Christmas Outdoor Lights Ideas on a Budget: 17 Looks That Make the Neighbors Slow Down
There is no decorating move with a better return on investment than outdoor Christmas lights. A $12 box of mini lights on your front door frame is visible to every person who drives down your street — compare that to the $200 you might spend on a living room nobody but you sees. And the budget version doesn’t look like the budget version. A clean, warm, intentional display reads as festive whether it cost $40 or $400.
The secret the pretty displays share is not more lights. It’s fewer, better-placed lights: one continuous line along the roofline, one color palette, and a little layering close to the door where guests actually stand. Everything below costs $30 or less per idea, and you can build a full front-of-house display — roofline, bushes, pathway, and porch — for under $100.
One safety note first: outdoor displays need outdoor-rated lights and cords, plugs protected from ground moisture, and a timer or smart plug so the display doesn’t run all night.
Quick-Start: Pick Your Budget Tier
$0 — Shop the garage and the junk drawer. Almost everyone already owns half a display: last year’s light strands (test every strand before hanging), extension cords, gutter clips, mason jars, brown paper bags, and any solar path lights already in the yard. Rearranging what you own into one clean line beats buying more clutter.
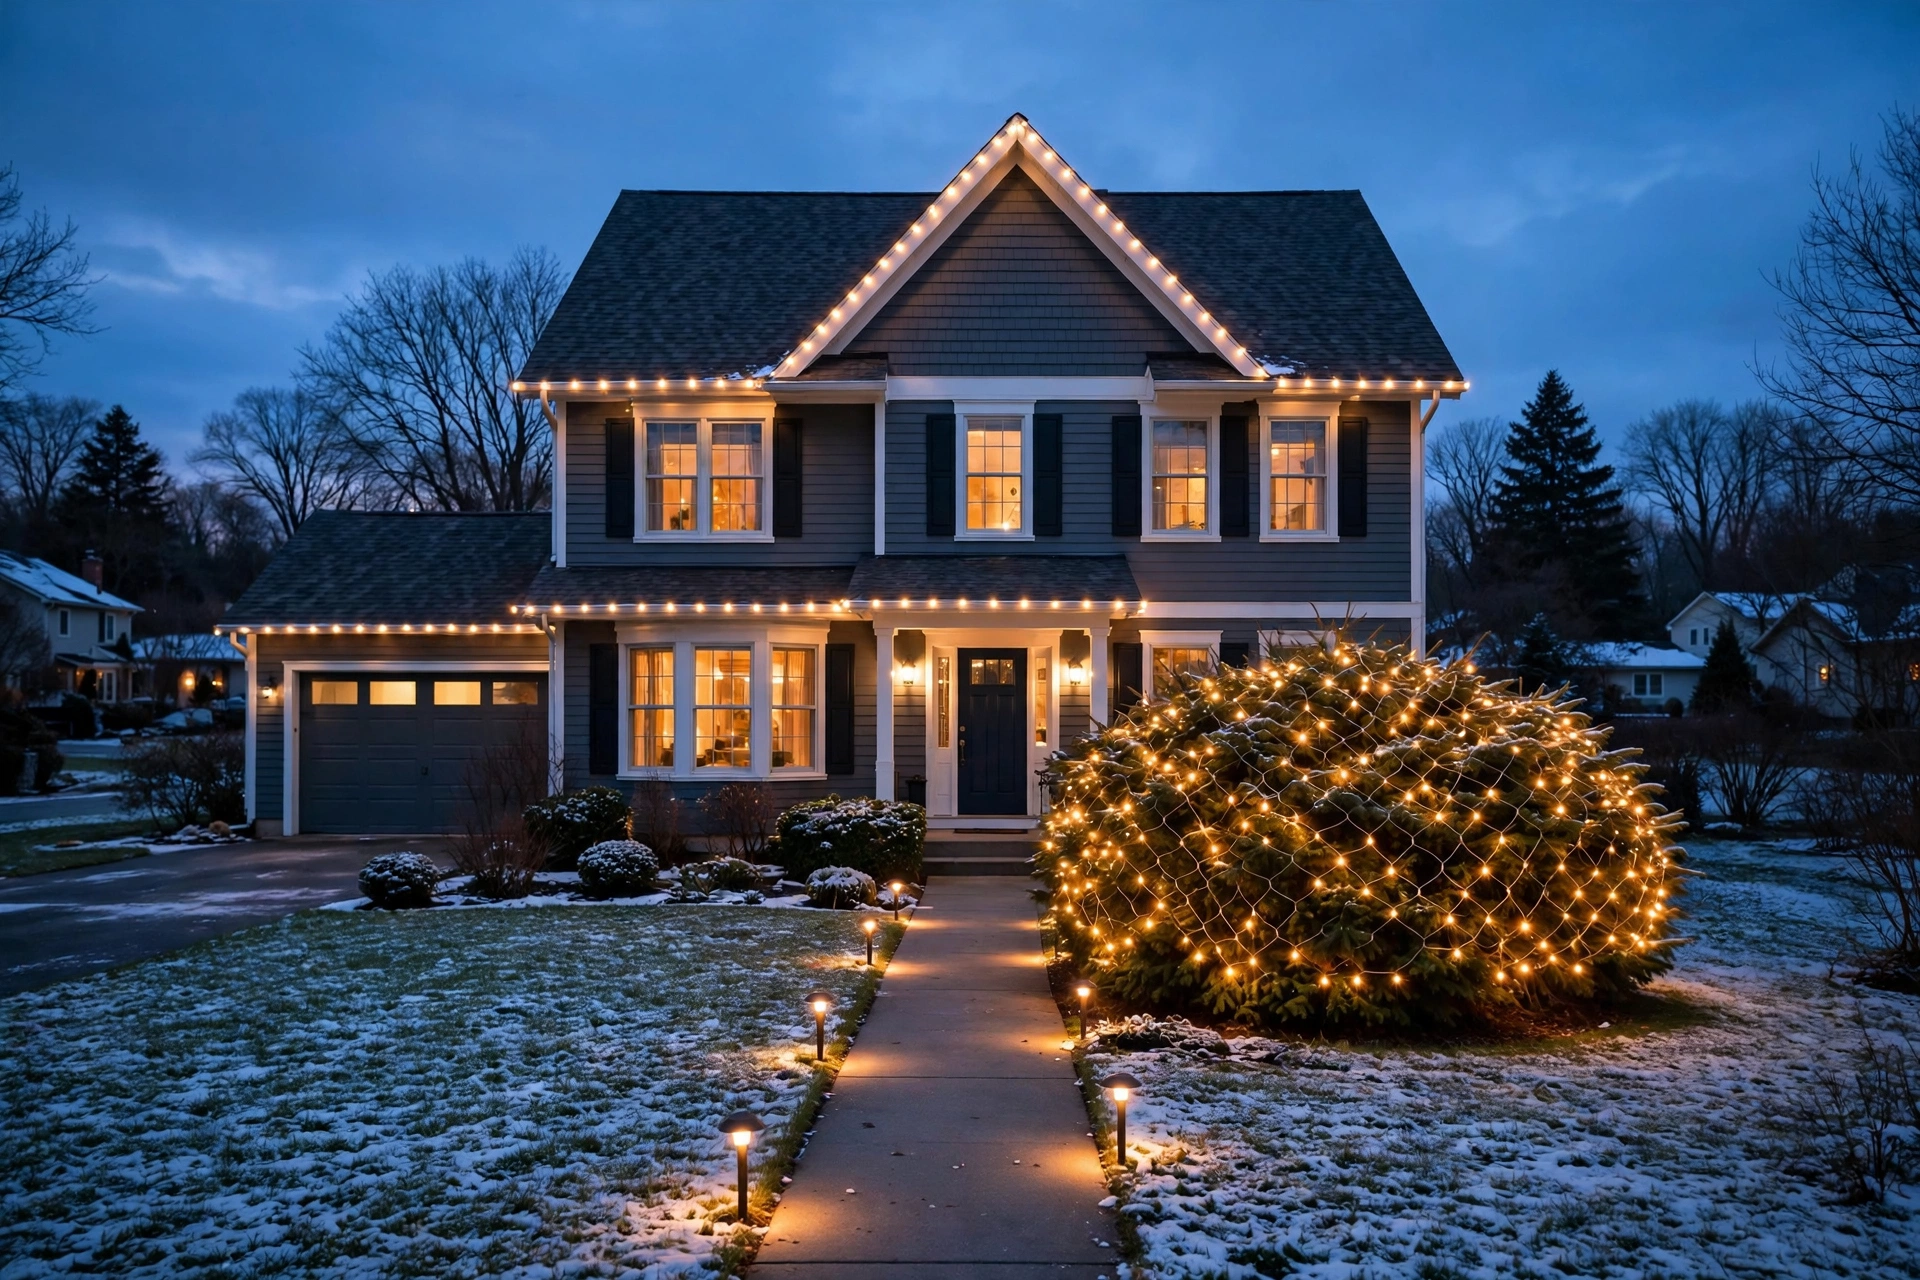
$25–$40 — The one-line wonder. One box of warm-white LED C9 or C7 string lights (100-count, ~$18–$25) plus a bag of all-in-one gutter clips (~$8–$12). This gets you the single most visible upgrade in outdoor decorating: a continuous line of lights traced along the front roofline.
$60–$80 — The layered house. Add a set of net lights for the biggest bush or shrub row (~$15–$20), solar pathway stakes for the walkway (~$15 for a 6–8 pack), and a battery or plug-in lighted wreath for the front door (~$12–$18). Roofline + greenery + pathway + door is the complete silhouette.
$90–$100 — The full block standout. Add a snowfall or pattern light projector for the house front (~$25–$35) or a second roofline strand for the garage/upper story. This is the tier that gets photographed from cars.
The Roofline: Where Every Great Display Starts
If you do nothing else, do this section. The roofline is the frame of your house — light it cleanly and everything else looks intentional.
1. Trace the front roofline with one continuous run of warm-white C9 LEDs — $18–$30
Buy warm-white C9 LED string lights (the big bulb shape) and run them along the front gutters and roof edge in one unbroken line, clipped to the shingles or gutters. C9 bulbs read as classic Christmas from the street; the continuous line gives the house an outline that says “decorated” even from half a block away.
Quick tip: LED C9 strands are end-to-end connectable, so measure your roofline in sections before buying — most strands cover 50–66 feet. Two strands connected cleanly beat four strands in a tangle.
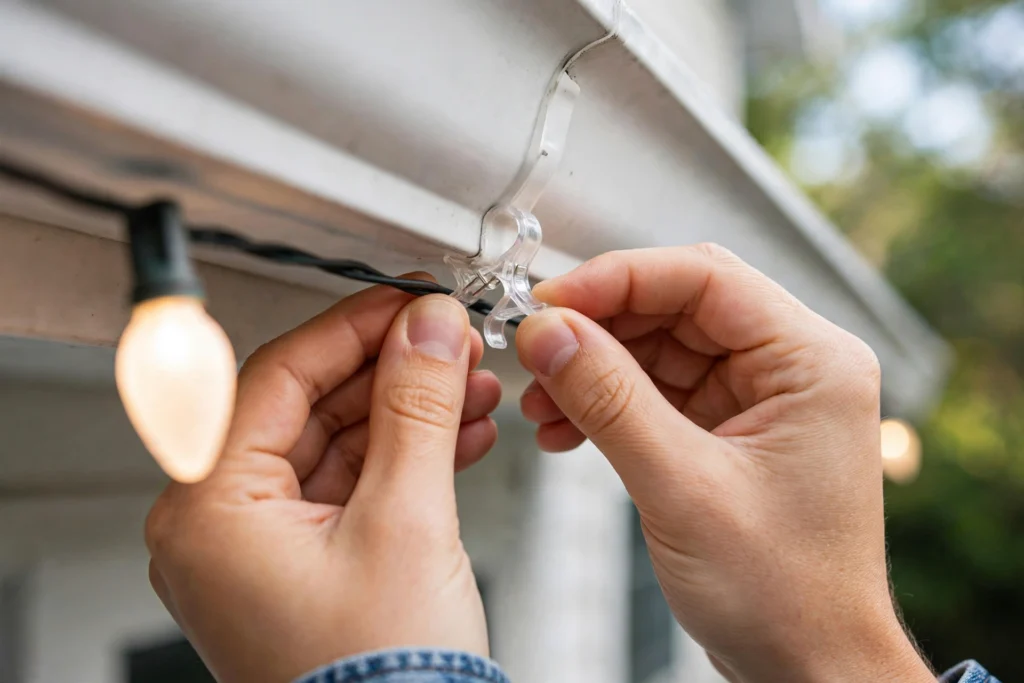
Do this: Clip, don’t staple or nail. Plastic all-in-one clips slide under shingles or onto gutters and come off in January with zero damage.
Skip this: Multicolor strands on the roofline if the rest of your display is warm white. One palette for the house outline; save color for the yard accents.
2. Outline the garage or a single gable for renters and small budgets — $10–$15
Don’t have a full two-story roofline budget (or a landlord who forbids roof work)? Lighting just the garage front, one gable peak, or the front porch roofline creates the same “outlined house” effect at a fraction of the cost and ladder time. The eye reads a partial outline as complete — nobody standing on the sidewalk knows where the rest of the lights are.
Quick tip: A gable peak wrapped in a V of lights plus a lighted wreath in the middle reads as the whole house’s decoration. Symmetry does the heavy lifting.
3. Hang icicle lights on the front porch overhang — $8–$14
Icicle strands hang straight down from the porch roof or eaves and give you depth and movement that flat roofline runs don’t. A single 150-count icicle strand covers about 5–10 feet of porch front, and on a windy evening the gentle sway reads as genuinely magical.
Do this: Hang them from the porch ceiling edge or gutter so they fall just above door height — too long and guests brush through them; too short and they look stunted.
Skip this: Icicles on a roofline where they tangle with the C9 run above. Pick one treatment per roof edge.
The Yard: Fill the Frame With Light
Once the house has its outline, the yard is where you add depth. The rule: light in groups, not in sprinkles.
4. Throw net lights over the biggest bush — $12–$20
Net lights are the cheat code of yard decorating. One net unrolls over a whole shrub in about thirty seconds and produces a perfectly even blanket of light that would take ten minutes of wrapping with regular strands. Draped over the biggest bush by your front door, it anchors the entire display.
Quick tip: Measure the bush first — nets come in 4×6-foot and 6×9-foot sizes. One net per major shrub; three shrubs with one net each beats one shrub wrapped in three nets.
5. Wrap one front-yard tree trunk and its lowest branches — $10–$18
Skip the giant inflatable and wrap the trunk of a front-yard tree with mini lights, spiraling up about six to eight feet and out onto the lowest branches. A bare winter tree wrapped in warm white is one of the prettiest outdoor looks there is — it reads as intentional and upscale, not cluttered.
Do this: Wrap the trunk first with lights spaced a hand’s width apart, then do one branch pass. Two strands is usually plenty for a medium tree.
Skip this: Trying to wrap the whole canopy. Nobody can see the top of the tree from the ground, and that’s where most of the ladder risk lives.
6. Aim a snowfall or pattern projector at the house front — $25–$40
No ladder, no clips, no untangling: stake a light projector in the lawn and aim it at the house or a big tree, and you get falling snowflakes, drifting stars, or dancing patterns across the whole front of your house in about two minutes. It’s the single biggest visual impact per dollar in outdoor decorating, and renters love it because nothing attaches to the house.
Quick tip: Keep the projector’s effect pattern tight on the house rather than spilling onto the whole lawn — a defined “stage” looks designed; light sprayed everywhere looks accidental. Run it in a warm or soft white if your palette is warm.
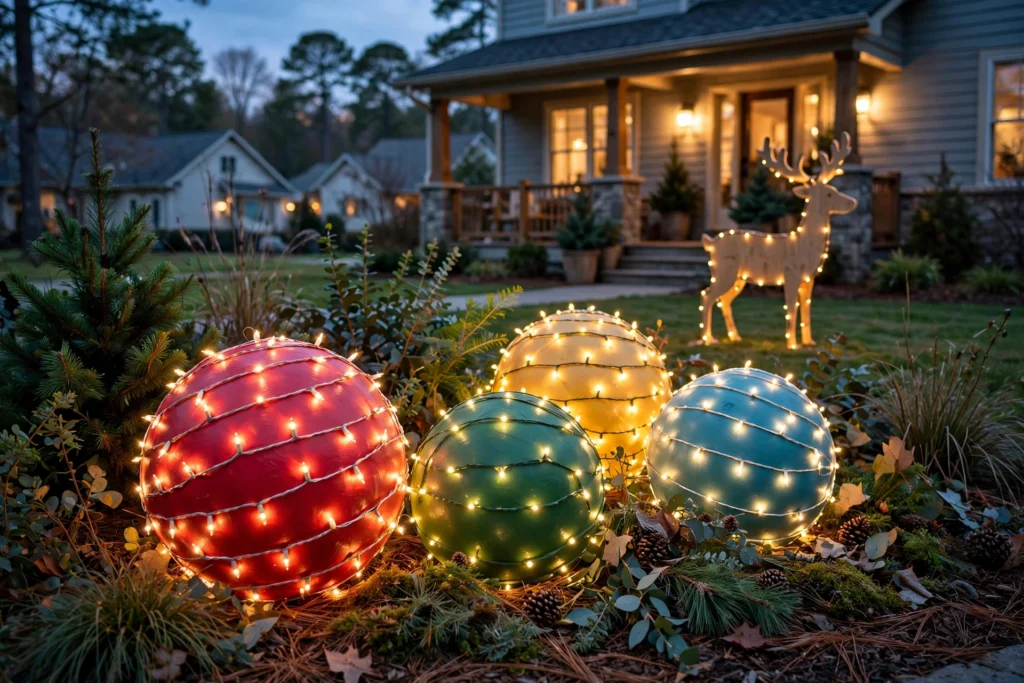
7. Make giant light-up ornaments from playground balls — $12–$20
Buy a few cheap playground balls (~$3–$5 each), wrap each in a strand of mini lights secured with tape or zip ties, and cluster them in a front flower bed or along the porch steps like oversized ornaments. Three or four clustered together is the sweet spot.
Quick tip: Use warm-white lights on two balls and red or green on one — same two-color palette rule as the house.
Pathways and Driveway: Guide Them In
The walkway is where your guests stand close, so this is where small, warm details beat big and flashy.
8. Line the walkway with solar pathway stakes — $12–$18 for 6–8
Solar stake lights need no wiring, no outlet, and no timer — they charge by day and glow by night. A row of six to eight stakes spaced evenly along each side of the front walk creates a runway effect that pulls the eye straight to your front door.
Do this: Place stakes where they’ll get at least a few hours of daylight — away from deep porch shadows. Wipe the solar panels clean in October so they charge at full strength.
Skip this: Mixing wildly different stake styles. One matching set reads as designed; a yard-sale collection of shapes reads as leftovers.
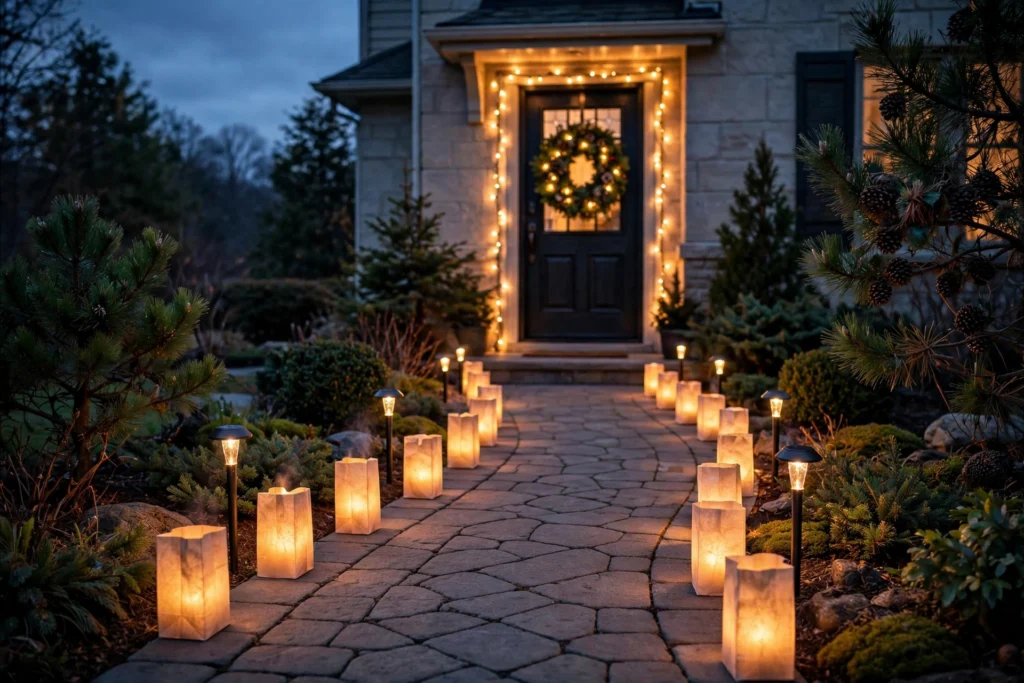
9. Set out paper-bag luminaries for weekends and parties — $5–$10
The oldest budget lighting trick there is: brown paper bags, folded at the top, with a few inches of sand or cat litter in the bottom and a battery tealight (or LED votive) inside, set every two to three feet along the walkway or porch edge. For a party night or Christmas Eve, nothing is prettier — the bags glow like lanterns.
Quick tip: Battery tealights are the move here — real candles plus paper bags plus wind is a bad combination. Dollar stores sell tealights in bulk; one bag of sand does a whole walkway.
10. Fill mason jars with fairy lights for porch steps — $8–$12
Put a short strand of battery fairy lights inside each mason jar, screw the lid on loosely (or leave it off), and line them along the porch steps, the railing, or beside the front door. They read as handmade and expensive at the same time, and the glass protects the batteries from light rain.
The Front Door: The Close-Up Moment
Guests stand here. Drivers slow down here. Make it warm.
11. Frame the front door with lights and hang a lit wreath — $12–$25
Run one strand of mini lights around the front door frame (down one side, across the top, down the other), hang a wreath in the center — plug-in or battery-lit if your budget allows — and the door becomes the glowing focal point the whole display is built around. This one corner does more for guests’ first impression than anything else on the list.
Quick tip: Use a battery-lit wreath if there’s no outlet near the door. Swap the batteries once in early December and they’ll last the season on a 6-hour timer.
12. Put electric candles in every front window — $10–$20 for a set
Battery or plug-in window candles are a colonial-tradition look that reads as cozy and classy from the street, and they’re visible from inside the house too — you get to enjoy your own display. A matching set in every street-facing window creates the rhythm that makes a whole block look festive.
Do this: Center each candle in the window and set them all at the same height — alignment is what makes this look intentional instead of random.
Skip this: Candles only in the living room window. One lonely candle reads as a forgotten decoration; the set reads as a decision.
13. Drape lighted garland along the porch railing — $10–$18
An unlit garland looks flat from the street; the same garland with one strand of mini lights woven through it glows. Drape it along the porch railing with a little swag between each post, and add a bow or two at the ends.
Quick tip: Pre-lit garlands from the dollar or craft store are often cheaper than buying garland and lights separately — and they store as one piece.
The Setup: Make It Last and Keep It Safe
Decorating is the fun part. Setup planning is what keeps it fun next year too.
14. Buy one outdoor timer or smart plug and automate everything — $10–$15
Plug your whole display (or at least the big strands) into one outdoor-rated timer or smart plug set to run 5–11 PM. You save electricity, you never forget to turn lights on or off, and the house glows reliably every evening whether you’re home or not.
Do this: Keep all plugs and connections elevated — on a brick, a hook, or a stake — so they never sit in puddles or snow. Outdoor-rated covers on every outdoor outlet are worth the few dollars.
15. Use outdoor-rated everything — and never overload a circuit
This is the one non-negotiable section. Outdoor displays mean weather: every strand, cord, and timer must be rated for outdoor use. Keep connections off the ground, don’t run cords under rugs or through doorways where they get pinched, and know that LEDs draw dramatically less power than old incandescents — you can safely connect far more LED strands end-to-end, but still check the package’s maximum-connect limit and respect it.
Do this: Plug outdoor displays into GFCI-protected outlets (the ones with the reset button) — most exterior outlets are.
Skip this: Staples, nails, or screws through light strands. One nick in the insulation is all it takes. Clips only.
16. Stick to two colors for a pro-looking palette — free
The displays that look expensive almost always use two colors: warm white plus one accent (red, green, gold, or blue). Pick yours and repeat it in at least three places — roofline, tree or bushes, door wreath. Restraint is what separates “designed” from “decorated.”
17. Store it like you’ll use it again — free now, saves $50 later
The cheapest lights are the ones you already own. When the season ends, wrap each strand around a piece of cardboard or a cord reel as you take it down, label the bag (“roofline — 2 strands”), and store everything dry. Lights stored tangled in a ball come out as a spring project; lights stored wrapped come out as a December evening.
Quick tip: Replace dead bulbs and dead strands in January when they’re on clearance — 50–75% off — and store the new ones for next year. Future you saves real money.
Frequently Asked Questions
How many lights do I need for a typical house?
For a single-story home, plan on 100–200 mini lights (or one 66-foot C9 strand) for the front roofline, one net light per major bush, and 6–8 solar stakes for the walkway. A two-story front needs roughly double the roofline footage.
How do I hang roof lights without damaging my roof?
Use plastic all-in-one or gutter clips that slide under shingles or snap onto gutters — no nails, staples, or screws. Hang in daylight, work from a stable ladder with someone steadying it, and never walk on the roof. For high peaks you can’t reach safely, the light projector (idea 6) gives you the glow with zero ladder time.
Do outdoor Christmas lights raise the electric bill much?
A full LED display running six hours a night typically costs a few dollars a month — LEDs use up to 80–90% less energy than old incandescent strands, which is also why you can safely connect many more of them together.
When should I put up outdoor Christmas lights?
Mid-November is the sweet spot for most of the US: early enough to beat the first hard freeze that makes ladder work miserable, and close enough to December that the display feels festive rather than premature.
What’s the best budget outdoor Christmas light for beginners?
One box of warm-white LED mini lights (100-count, $12–$18) and a bag of gutter clips. Wrap them on your porch columns or trace the porch roofline, add a timer, and you have a complete, classy display for under $25. Everything else on this list is a layer you can add in future years.