22 Curtain Styles for Living Room Windows That Look Custom
Fabric is the easy part. Most people stand in the store, pick a color they like, and walk out feeling finished. Then the panels go up and something looks wrong. They hang flat. They bunch at the top. They stack over half the glass.
The part nobody explains is the header. That is the top few inches of the panel, and it decides how the folds fall, how the curtain moves, and whether the whole window reads tailored or homemade. Two panels cut from the exact same linen can look completely different depending on how the top is finished.
So this list is organized by construction, not color. Each of these curtain styles for living room windows comes with the look it creates, the kind of window it suits, and the numbers you need to order it correctly. Fullness ratios. Rod sizes. Hem clearance. If the construction is already settled and it is colour and fabric you are stuck on, our guide to living room curtain ideas covers that side of the decision.
Some are formal and worth measuring twice. Some take one afternoon and a pack of clips. Start with the window you actually have, then work backward to the header.
1. Ripple Fold Panels for a Clean, Even Wave
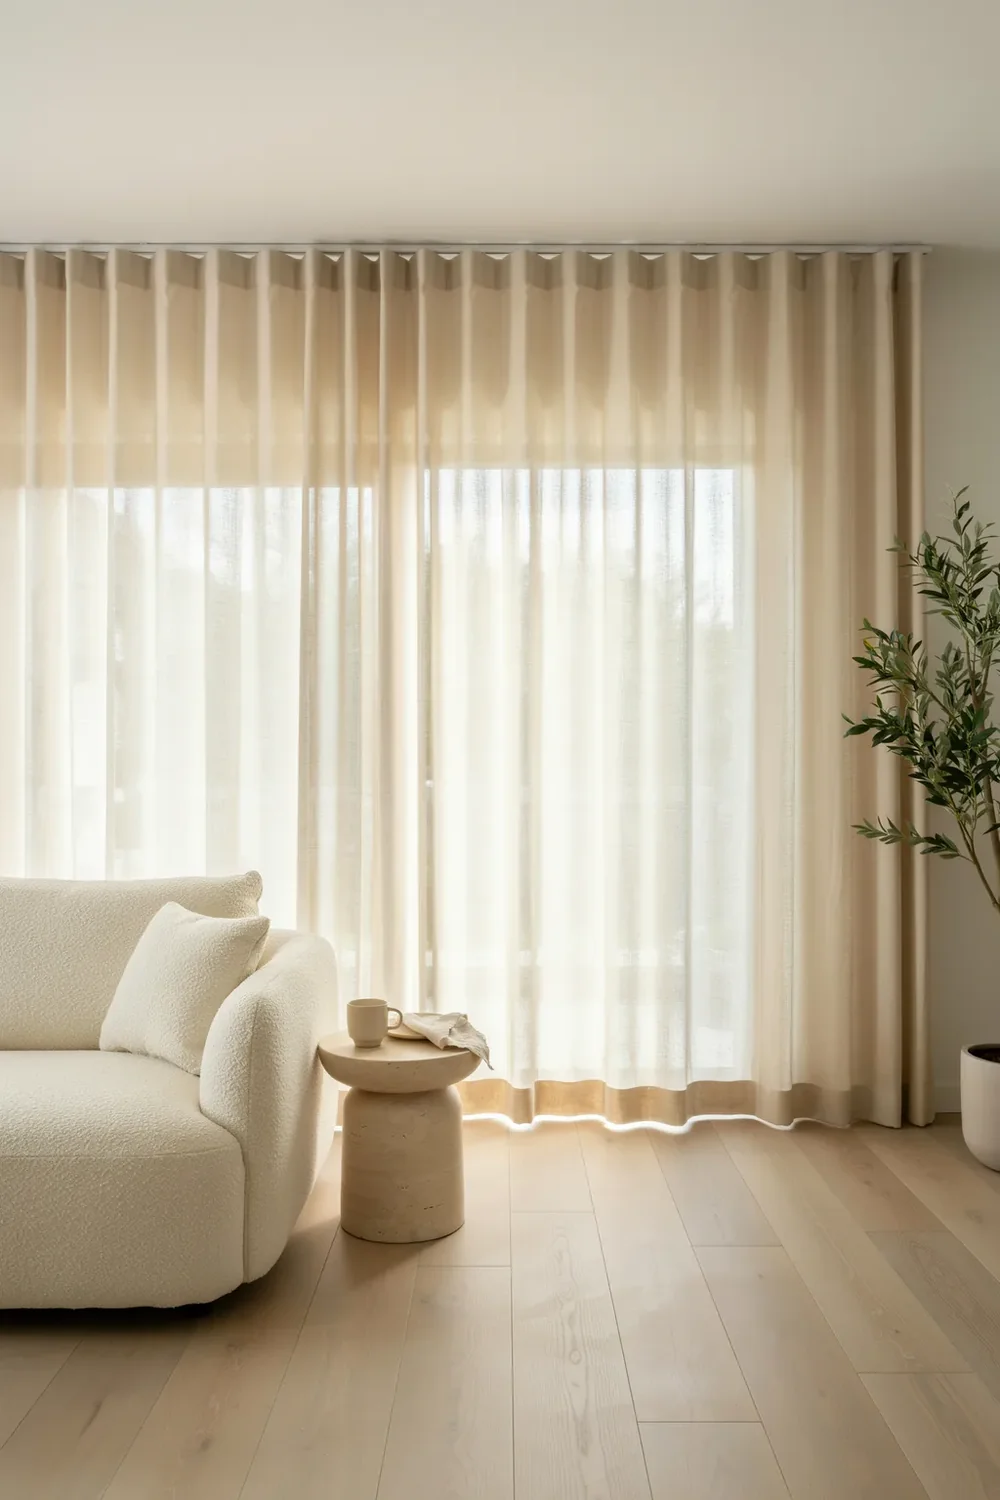
The folds are what you notice first. A ripple fold panel runs one continuous S-curve from end to end, with no pleat, no gather, and no flat spot where the fabric gives up halfway across.
That even wave comes from the track, not the fabric. Small carriers clip into a snap tape sewn along the back of the panel, and the spacing between those carriers sets the depth of every single wave.
What it needs to work:
- A track, not a decorative rod
- 2.0x fullness, so the waves stay round instead of shallow
- Wall or ceiling mounting with a clean return back to the wall
It stacks tighter than any pleated header, which means more glass stays uncovered when the panels are open. The tradeoff is that a track has no finial and no visible hardware, so all the presence has to come from the length of the drop.
2. Triple Pinch Pleat for a Tailored, Made-to-Measure Look
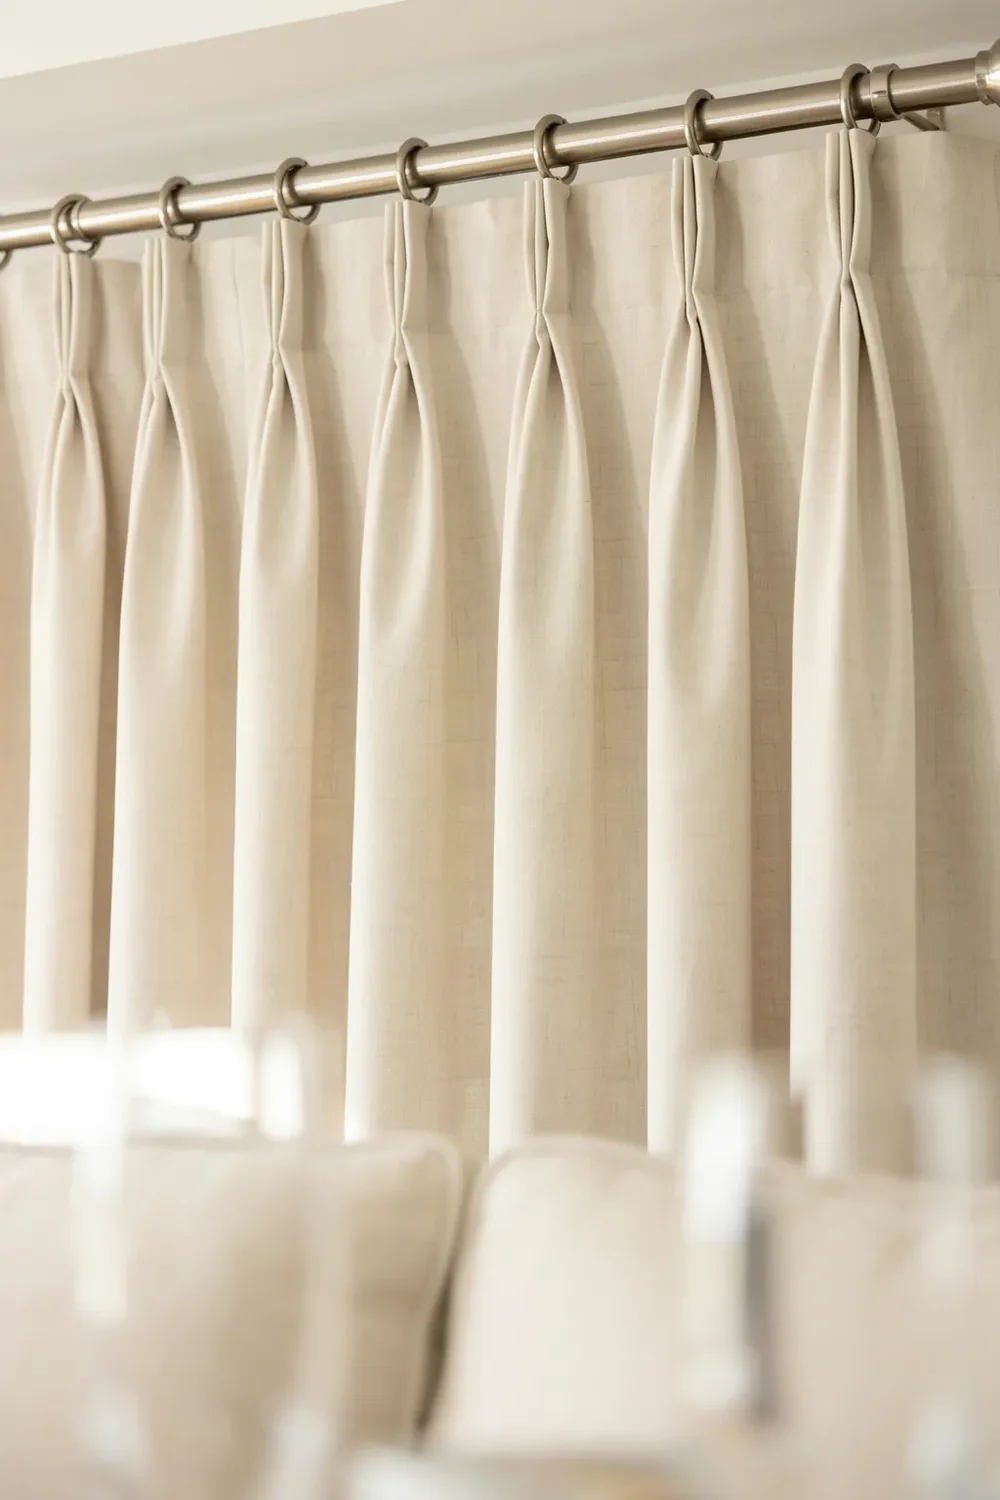
Set a pinch pleat beside a grommet panel and the difference shows before you touch either one. The pinch pleat holds its shape when the curtain is closed. The grommet panel relaxes into whatever the fabric feels like doing.
Three folds are hand-tacked together about four inches down from the top, then released so the fabric fans out below the tack. It is the oldest of the tailored curtain styles for living room windows, and the pleat itself is a much older piece of garment construction that drapery simply borrowed.
It is also the hungriest header on this list for fabric. At 2.5x fullness, a 60 inch window wants roughly 150 inches of finished panel width across the pair, which is usually two panels, sometimes three.
Worth knowing before you order: pinch pleats need rings or drapery pins, and both add height above the rod, so measure your drop from the ring bottom rather than the rod itself.
| Triple Pinch (3 folds) | Double Pinch (2 folds) |
|---|---|
| Deeper, fuller fold. Reads formal. | Slimmer fold. Reads relaxed. |
| Wants 2.5x fullness. | Works at 2.0x fullness. |
| Best in heavier linen, velvet, wool. | Best in lighter cotton and blends. |
| Higher fabric cost per window. | Noticeably cheaper to make. |
3. Euro Pleat When You Want Tailored but Softer
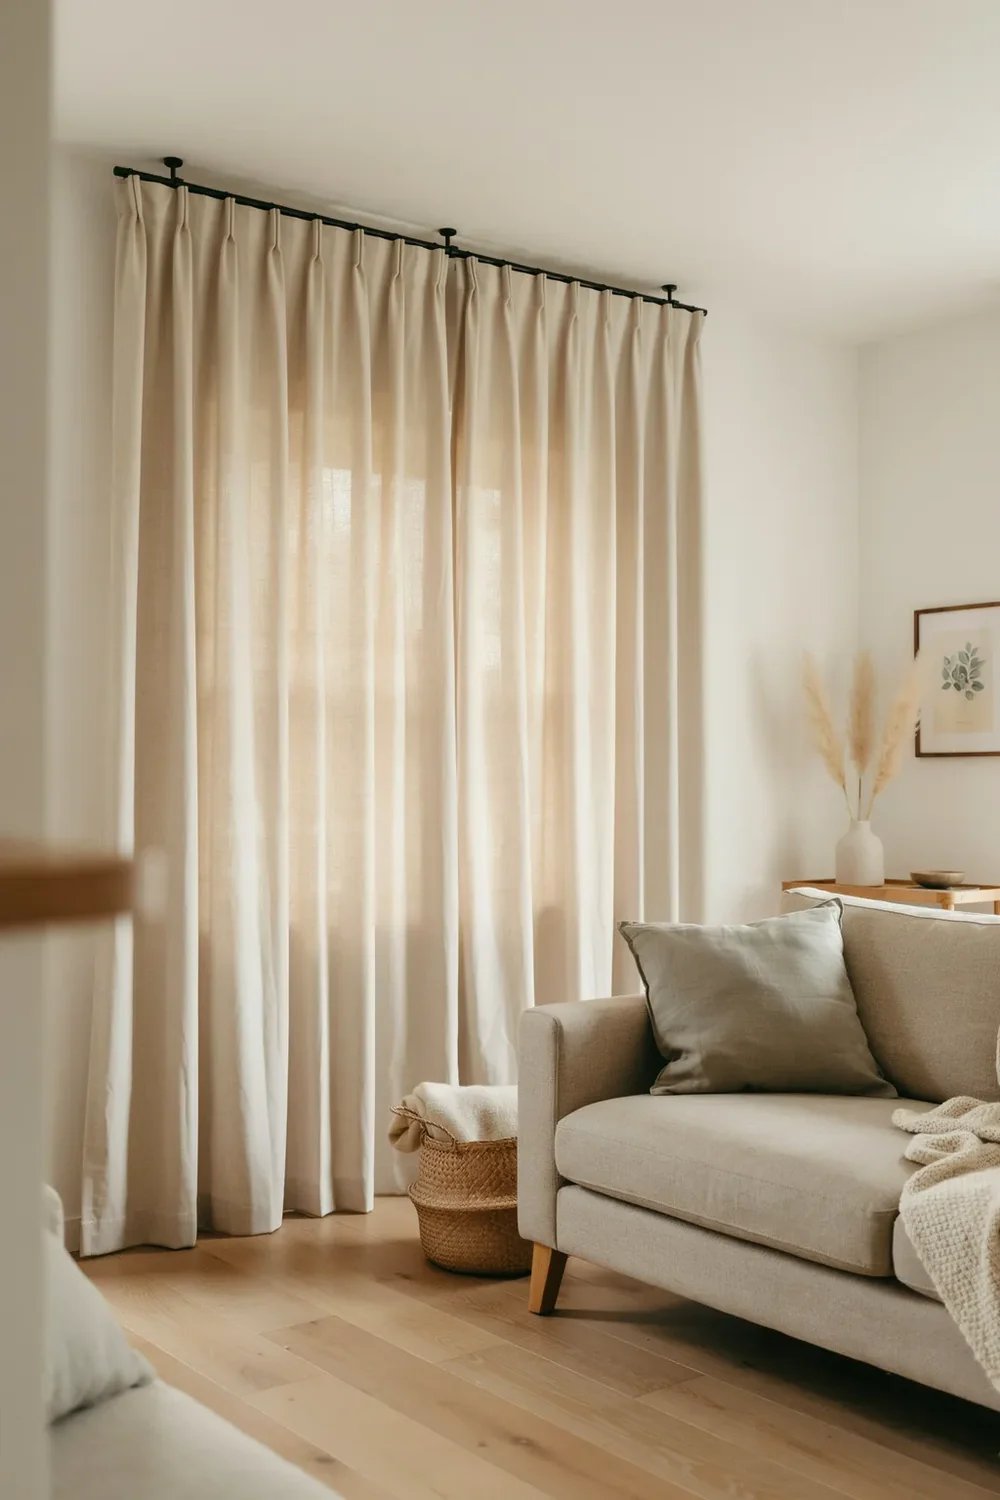
Tailored does not have to mean stiff. The Euro pleat, sometimes sold as a two-finger or top-pinch pleat, gathers the folds right at the very top edge instead of four inches down.
Moving that tack point up changes the whole read of the panel. The fabric falls open immediately below the header, so you get a long, quiet column rather than a structured fan.
It suits rooms where a triple pinch would feel like it was trying too hard. Think low-slung sofas, pale walls, and a room that already has enough going on.
One caution on hardware. Because the pleat sits flush with the top edge, whatever you hang it from is fully visible, so the rings and rod become part of the look rather than something to hide.
4. Goblet Pleat for Tall Rooms and Formal Windows
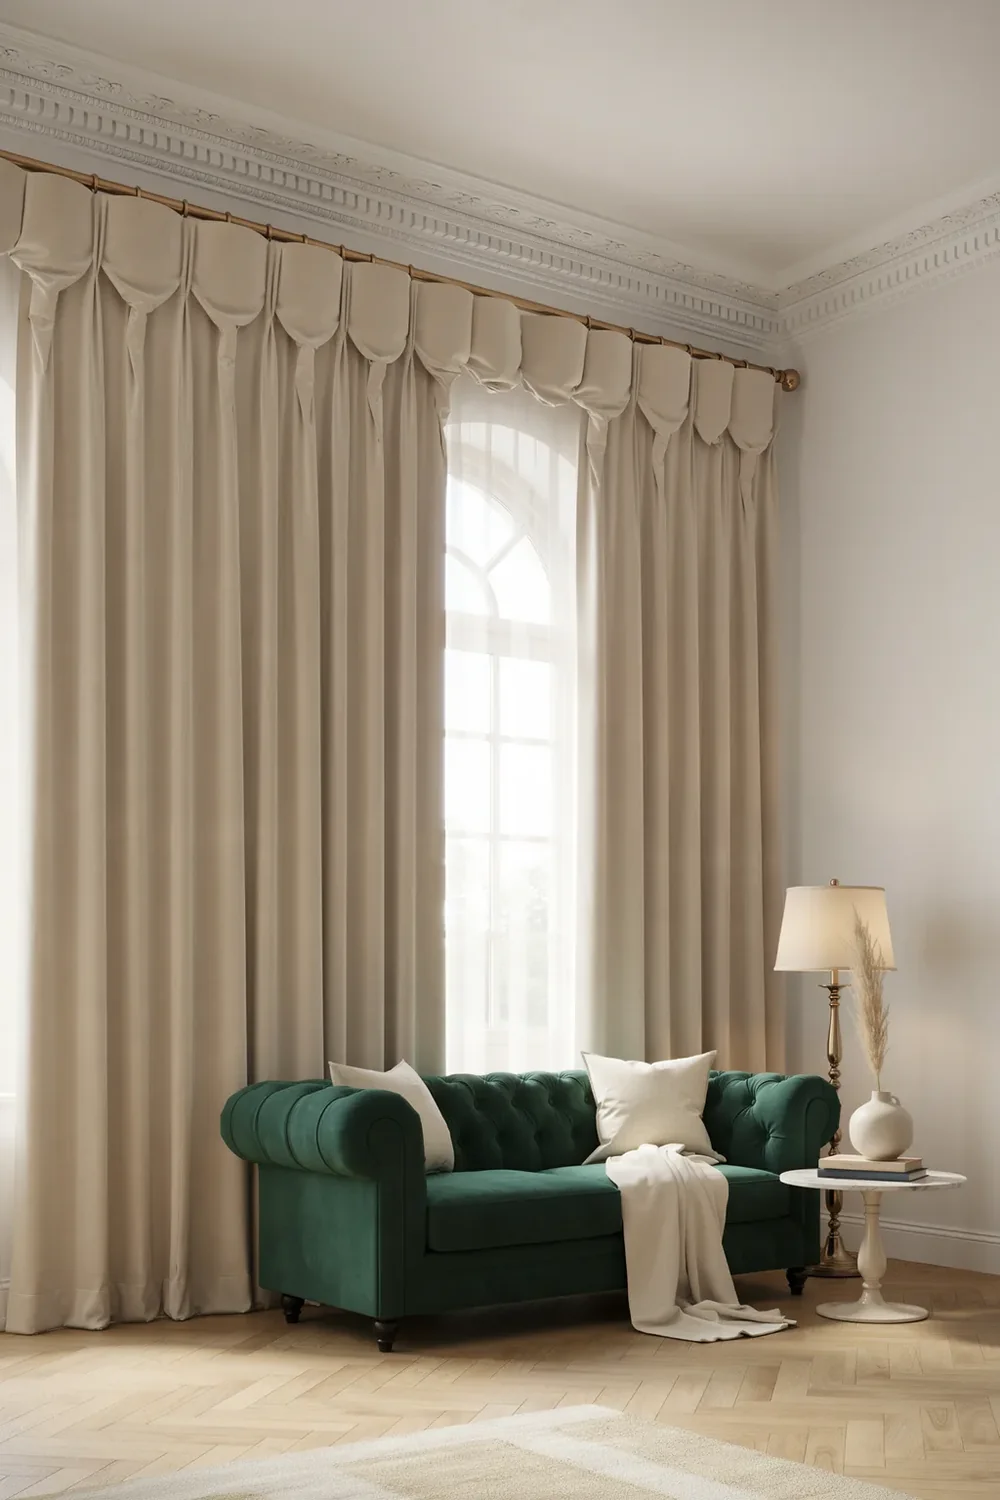
The mistake here is scale. Goblet pleats get chosen from a photo of a fourteen foot drawing room, then hung in a room with eight foot ceilings, where the rounded cups sit at eye level and read as fussy rather than grand.
Each pleat is shaped into a small cup at the top, stuffed with batting or a roll of interlining so it holds its round shape permanently.
That stuffing is the whole point, and it is also the limitation. The cups cannot be crushed, which means the panel never stacks flat and always eats wall space beside the window.
Reserve it for the tall window in the room, in a fabric with enough body to hold a curve. Thin cotton collapses inside the cup and the effect falls apart within a season.
💡 Quick Tip
Use the ceiling as your filter. Below roughly nine feet, the cups crowd the top of the window and the room feels shorter, not taller. Above that, they finally have the height to look intentional.
5. Inverted Box Pleat for a Flat, Crisp Front
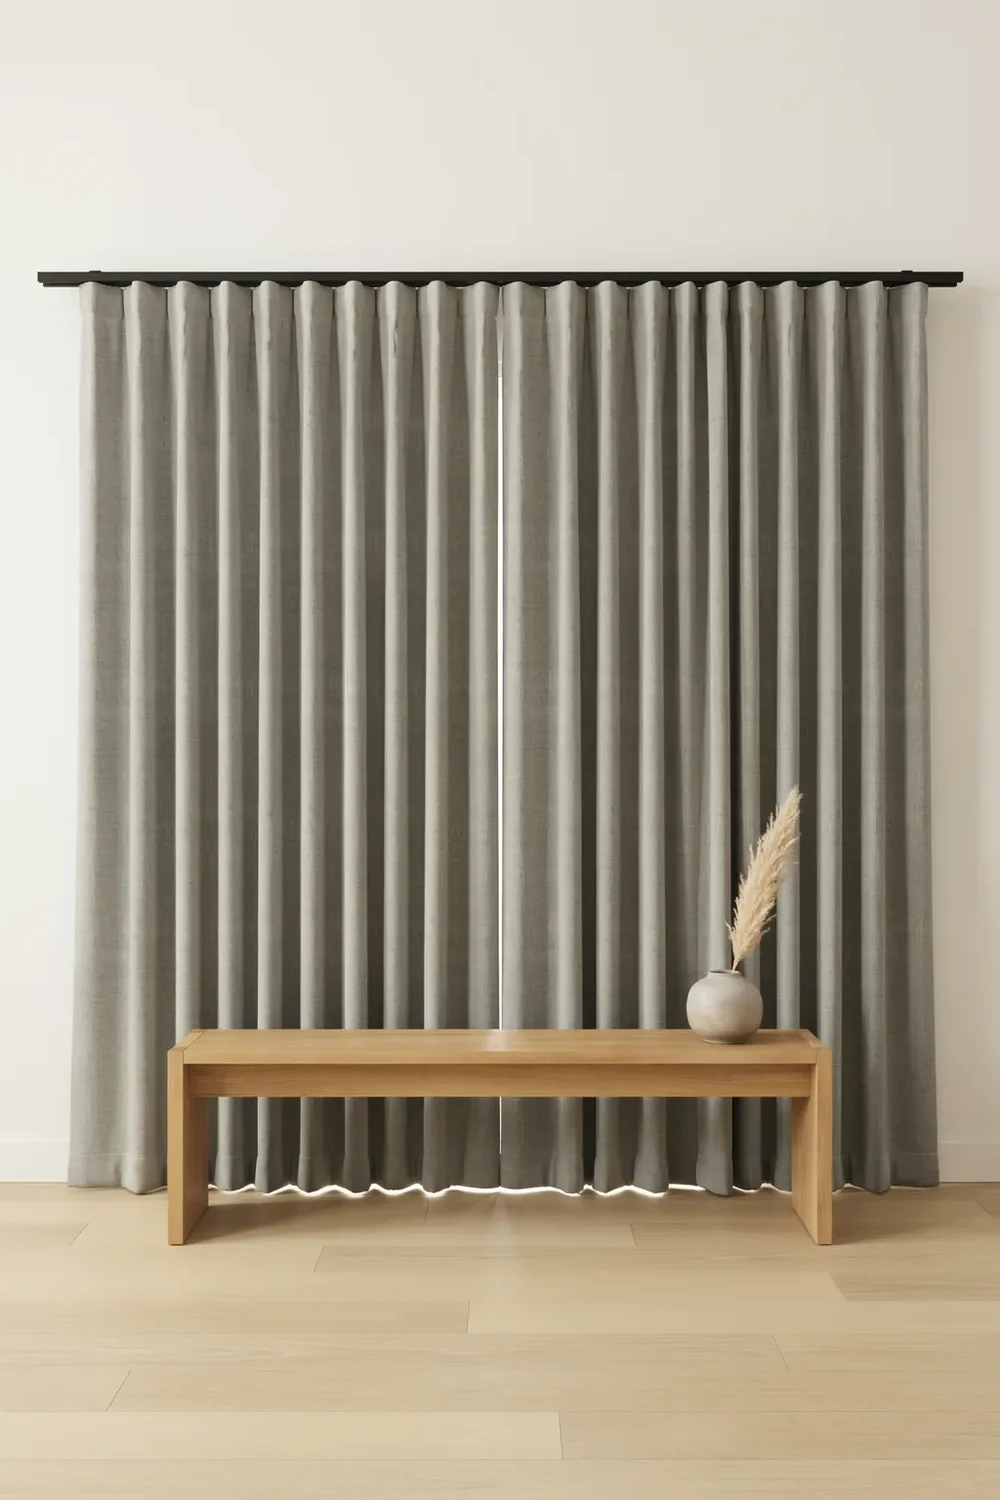
Some rooms fight with gathered fabric. Clean-lined sofas, flat-panel cabinets, plain plaster walls, and suddenly a ruffled header looks like it wandered in from a different house.
The inverted box pleat solves that by folding the excess fabric behind the panel instead of in front of it. What faces the room is an unbroken flat plane, with the fold hidden at the back of each pleat.
Where it earns its keep:
- Modern and Japandi rooms with very little pattern
- Windows sitting close to a wall corner, where a deep fold would crumple
- Any window where you want the fabric to read as a surface, not as drapery
Keep the fabric substantial. Flat headers show every wrinkle, and a limp cotton will crease across the front where nothing is holding it taut.
Choose a fabric with weight and a tight weave so the flat front stays smooth.
Steam the panel on the rod, working top to bottom, once it has hung for a day.
Thin unlined cotton, which creases across the flat front and never recovers.
Busy prints, since the pleat folds cut straight through the pattern.
6. Ring Clips on a Flat Panel for the Easiest Custom Look
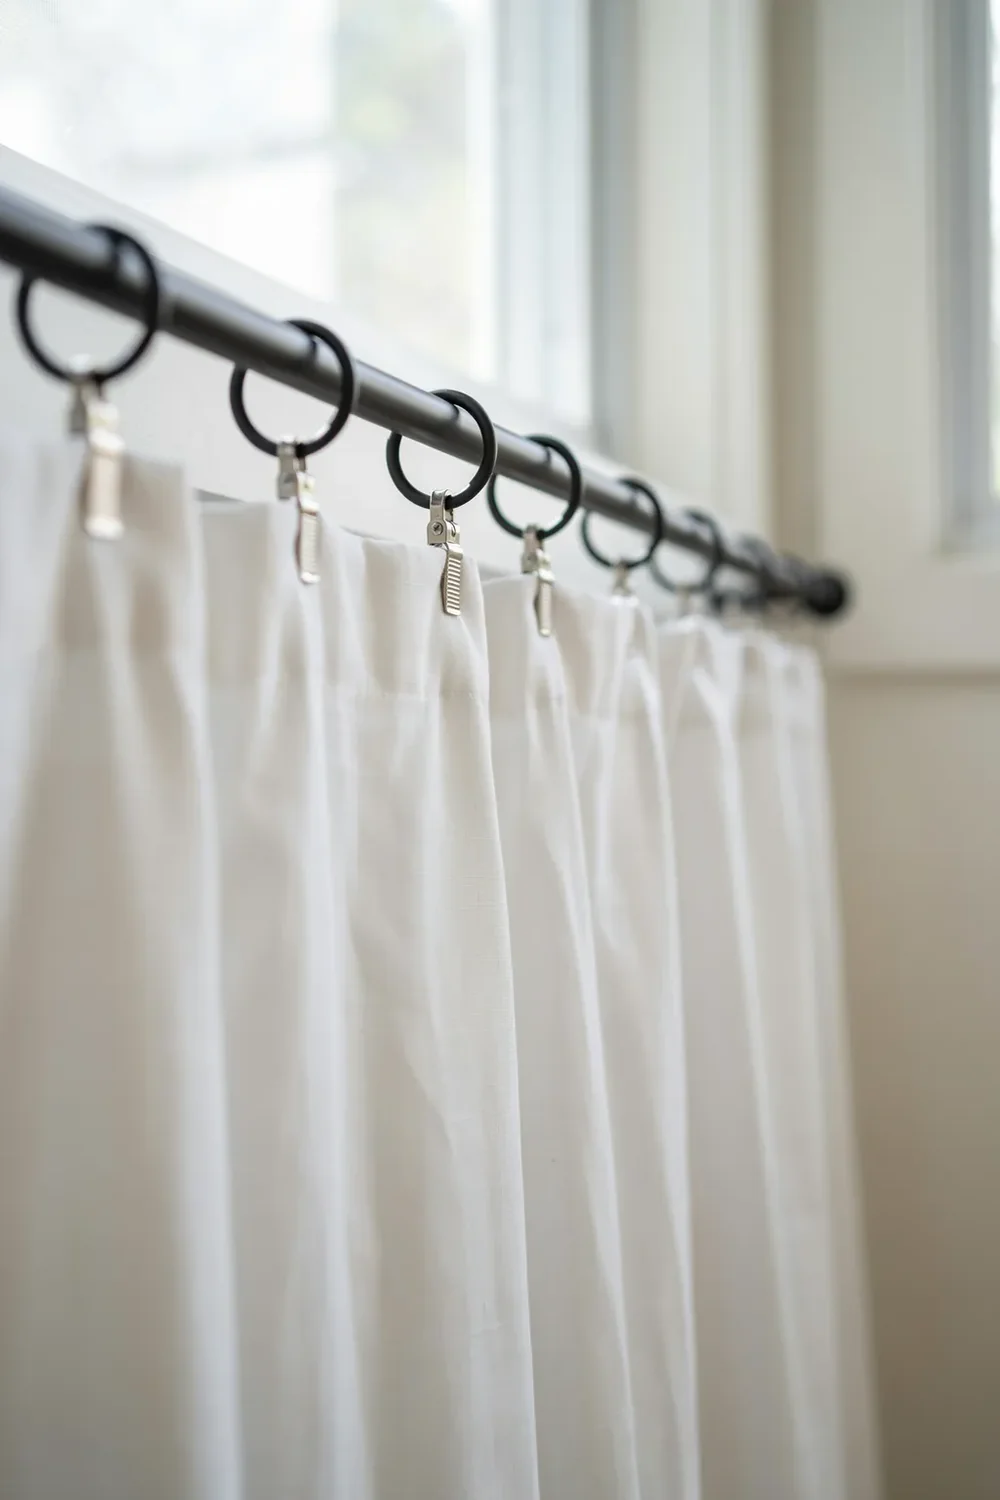
Start with a plain flat panel and a pack of drapery clip rings. No sewing, no pleat tape, no workroom order form. Of all the curtain styles for living room windows, this is the one you can finish in an afternoon with no special skills.
The whole result comes down to spacing. Clips set too far apart let the fabric sag into shallow, tired waves between them. Set evenly at roughly six inch intervals, that same cheap panel falls into consistent folds that pass for a made-to-measure header from anywhere in the room.
Hardware matters more than it looks like it should. Use 1.5 inch rings on a rod no thicker than 1 inch, since larger rings bind and clatter when you draw the curtain.
It is the least expensive change on this list, and the only one you can completely undo in ten minutes if you decide the fabric was wrong.
Clip both outer corners of the panel first, so the edges anchor square to the wall.
Find the exact centre of the panel and clip that, then halve each gap again.
Keep halving until the gaps sit near six inches. Halving beats measuring, because the spacing stays even even if the panel is not perfectly cut.
7. Grommet Panels That Glide and Stack Tight
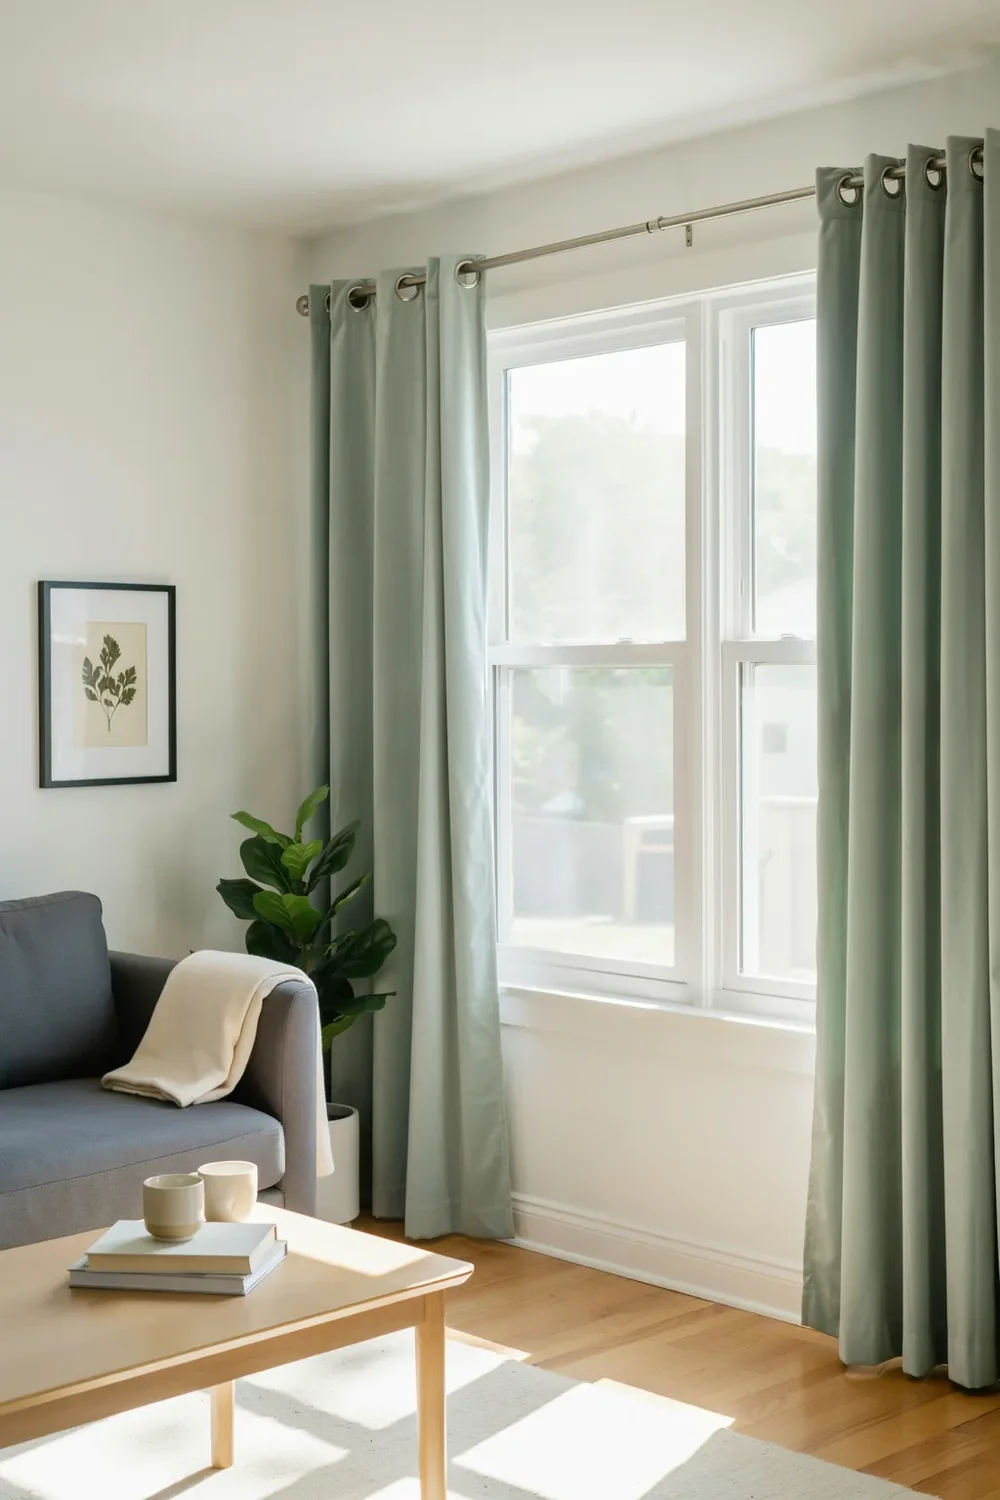
Grommet panels open with one pull. The metal rings ride straight on the rod with almost no friction, so a wide window closes in a single sweep instead of four separate tugs and a readjustment.
They also fold themselves. The fixed grommet spacing forces the fabric into a repeating wave whether or not the material would have cooperated on its own.
Two numbers decide whether yours behave:
- The inner grommet should clear your rod by about half an inch
- Always buy an even number of grommets per panel, so both side edges turn back toward the wall
Because the rings sit at the very top edge, the panel hangs roughly an inch below the rod. Add that inch back when you measure, or the hem lands short.
One edge of the panel turns toward the room. The leading edge flips outward and shows its hem, and the stack never sits flush against the wall.
Both edges turn back toward the wall. The panel closes with a clean face, and the open stack tucks tight beside the frame.
8. Back Tab Headers That Hide the Rod Completely
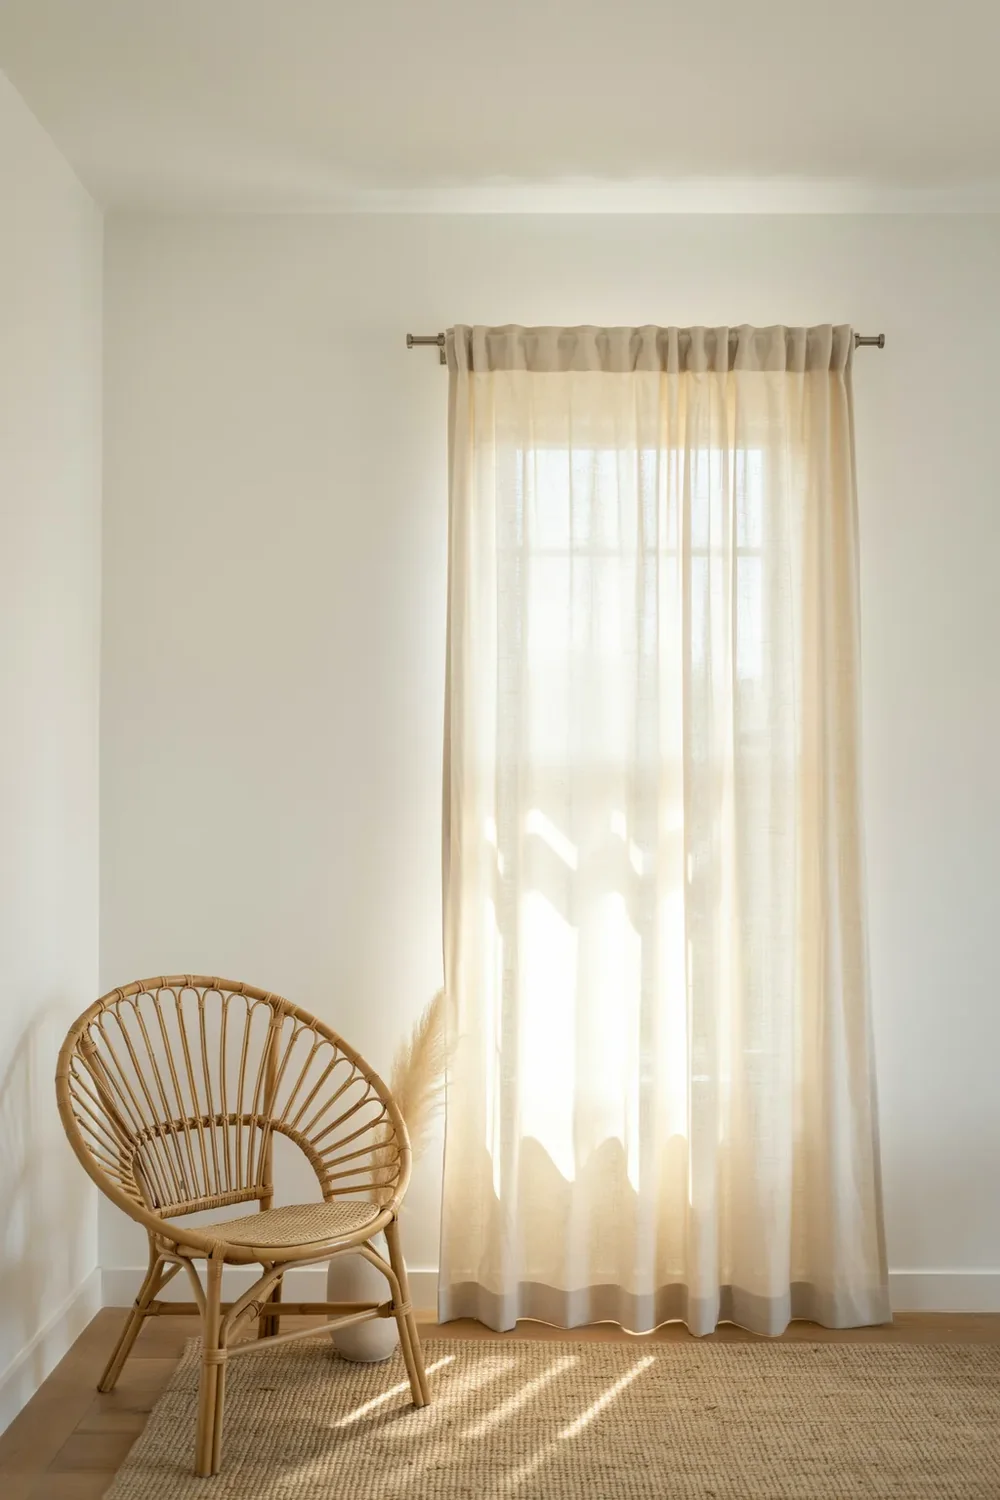
The rule with back tabs is short. The rod has to disappear.
Fabric loops are stitched to the back face of the panel, so the curtain passes in front of the hardware instead of hanging beneath it. Done properly you see one unbroken sheet of fabric from ceiling line to floor, with nothing interrupting it.
That illusion has a limit, and the limit is rod diameter. Past roughly 1.25 inches, the rod pushes visibly through the fabric and the flat front turns lumpy.
The header also sits level with the top of the rod rather than below it, which quietly buys back an inch or two of apparent height on a low wall.
Most back tab panels are made with a rod pocket sewn in as well, so one curtain gives you two different looks depending on how you thread it.
Check these before you buy
9. Rod Pocket Panels for Windows You Never Open
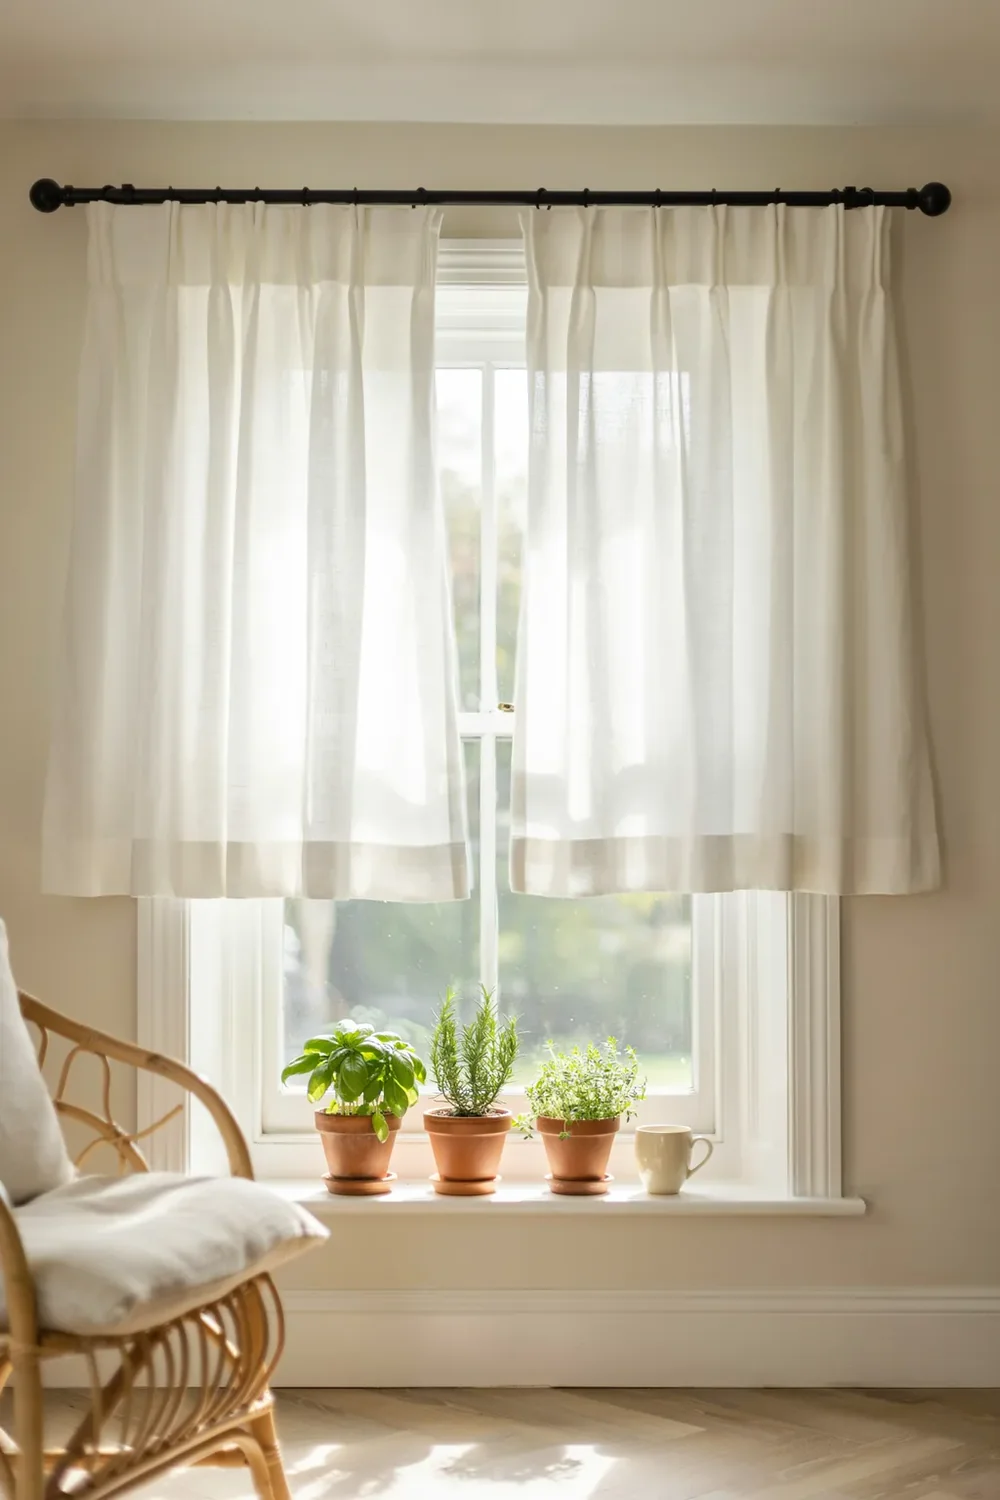
Rod pocket curtains turn up in more rentals than any other header, and the reason is honest enough. They cost little, they need no rings, and they cover a bare window the same afternoon you buy them.
The catch is friction. The fabric is threaded directly onto the rod, so opening them drags gathered cloth along metal. Do that twice a day and the pocket wears thin at the folds within a year.
Which is why they belong on windows that stay put. A sheer that never moves. A side panel that frames the glass and is only touched at cleaning time.
A 3 inch pocket on a 1 inch rod gathers a soft ruffle above the rod. Match the pocket close to the rod diameter instead and the ruffle disappears, which reads noticeably more modern.
Choose a rod pocket for how the window looks, never for how the window works. The moment a panel needs to open and close daily, this is the wrong header.
10. Tab Top Curtains for a Relaxed, Casual Header
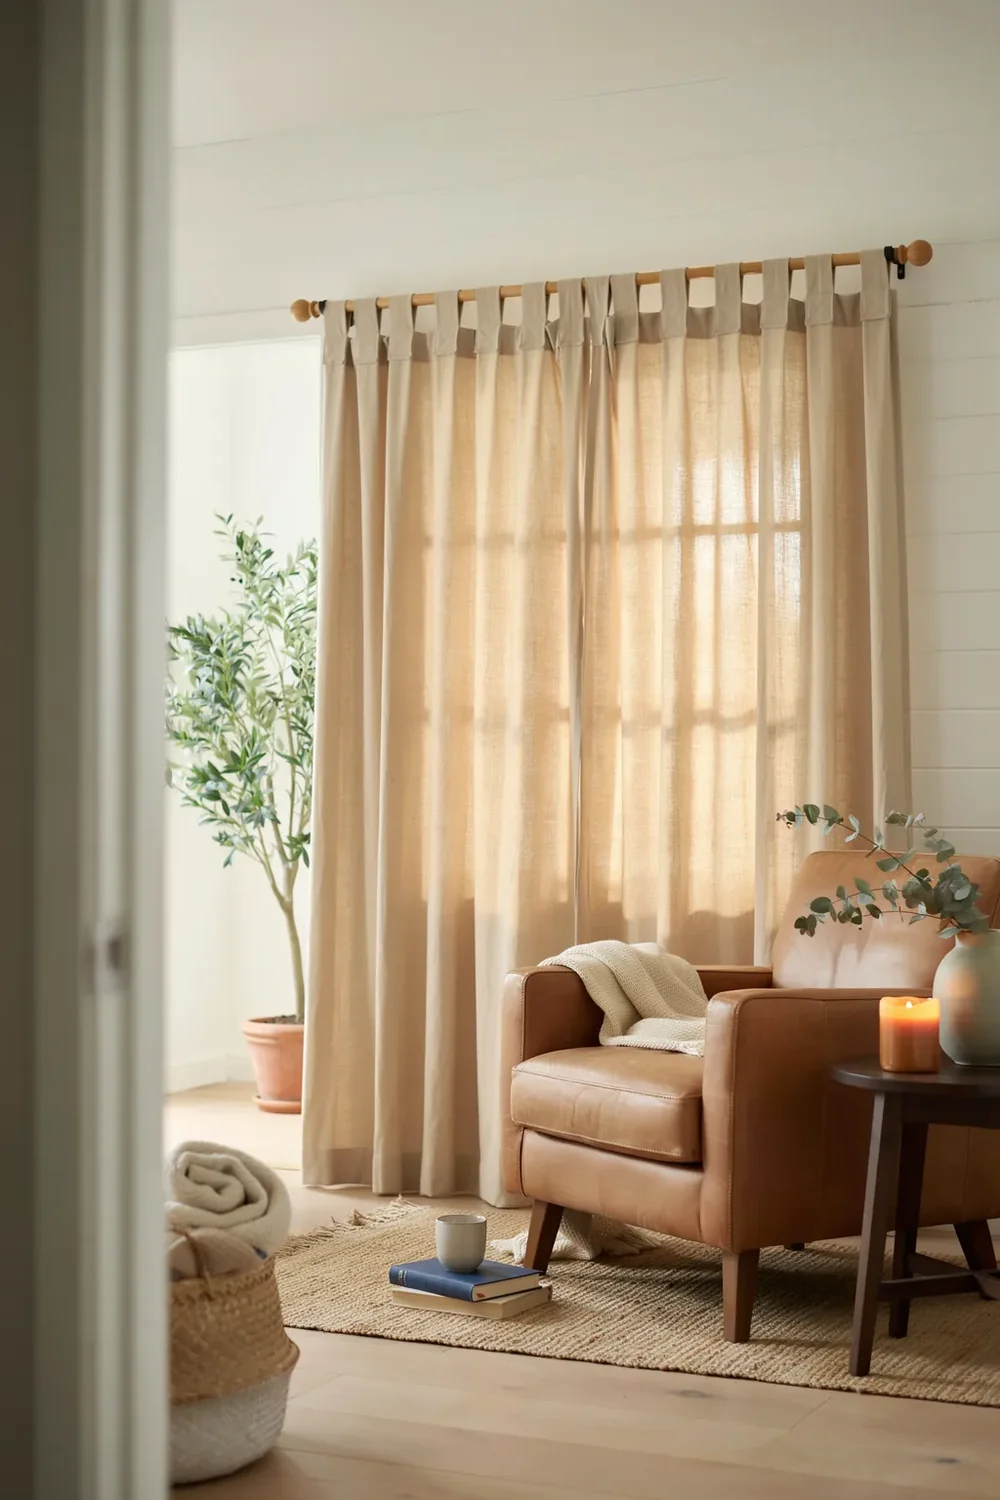
A few weeks after hanging tab tops, most people notice the same thing. The tabs have twisted, and every third one now faces the wrong way.
Flat fabric loops sit along the top edge and slide over the rod, leaving the rod on show in the gaps between them. That exposed hardware is the entire character of the style, casual and slightly handmade in a way the pleated headers never are.
Where tab tops earn their place:
- Cottage and farmhouse rooms with wood or matte black rods
- Light cotton and linen blends that hang without pulling at the stitching
- Windows you open rarely, because the tabs catch and stutter as they slide
Length is where people get caught. The panel hangs about two inches below the rod, so measure your drop from the bottom of the tabs.
⚠️ Watch Out
Tabs twist on the rod over time, and a twisted tab pulls the fabric beneath it out of line. Reach up and flatten each one every few months, or pick a rod with a slightly rough matte finish, which grips the fabric and lets the tabs twist far less than a polished metal rod does.
11. Tie Top Curtains for Light, Airy Windows
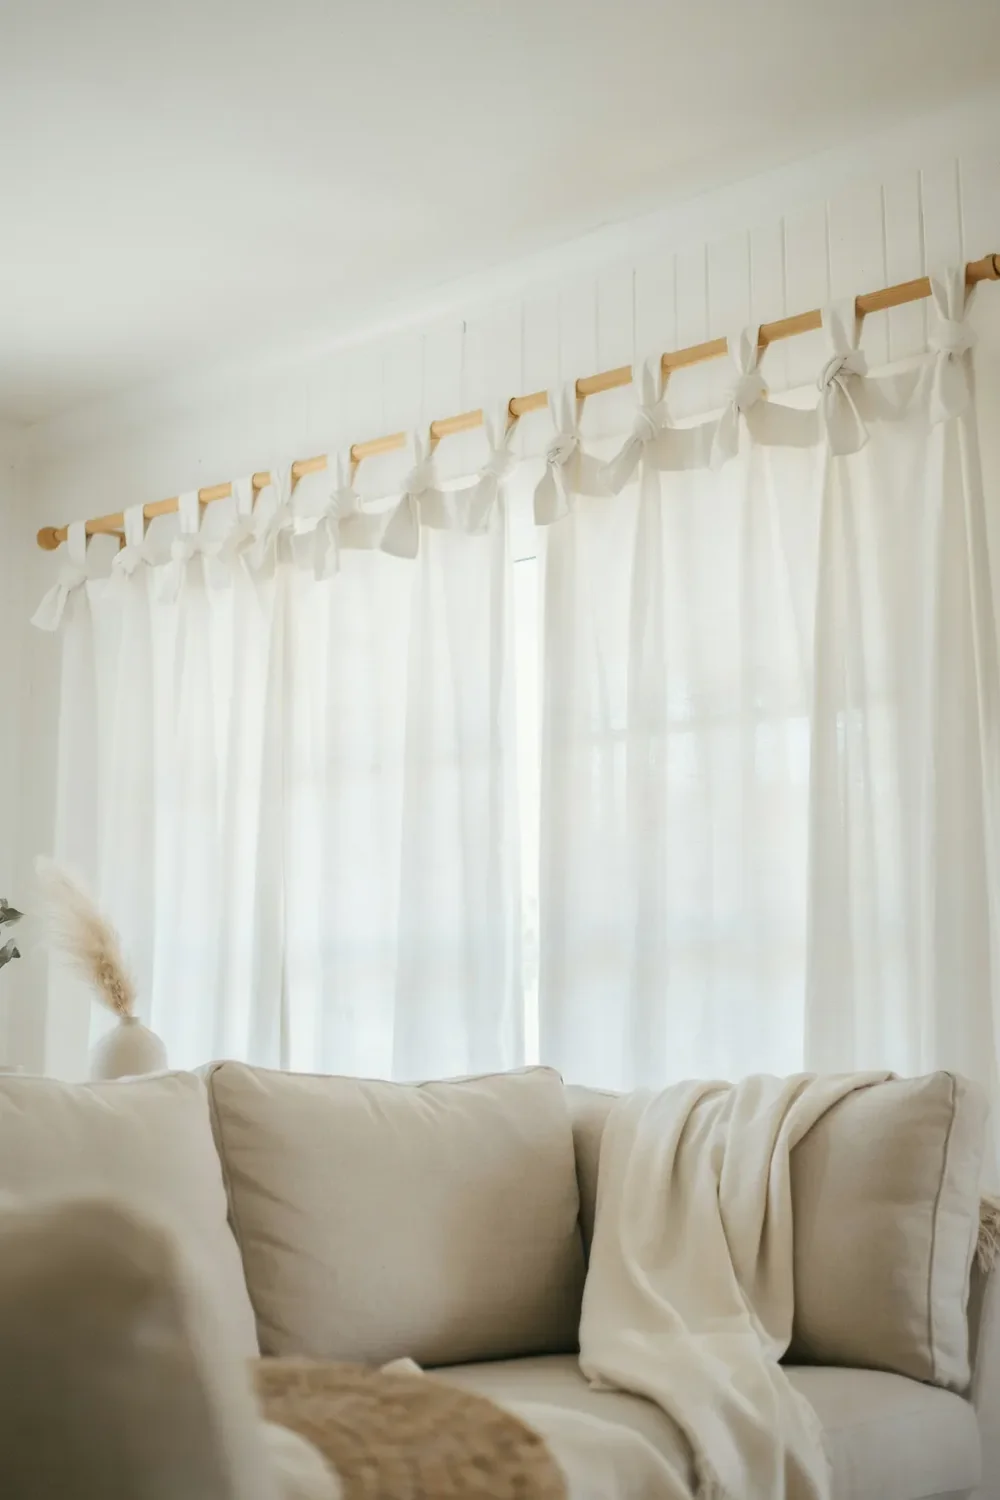
Two lengths of fabric, knotted over the rod, with a small gap of daylight showing between every pair. That is the entire construction.
Nothing about a tie top is structural, which is exactly why it works in rooms that already feel heavy. The knots break the top line into soft intervals instead of one solid band of fabric, so the window reads lighter even before you consider the material.
They are also the fussiest header to keep tidy. Knots loosen, and a loose knot drops that section of the panel lower than its neighbours.
Measure carefully here. Tying a bow consumes roughly three inches of panel length, so a curtain that measured perfectly on the floor will hang three inches short once it is knotted on the rod.
12. Cafe Curtains for Privacy Without Losing Daylight
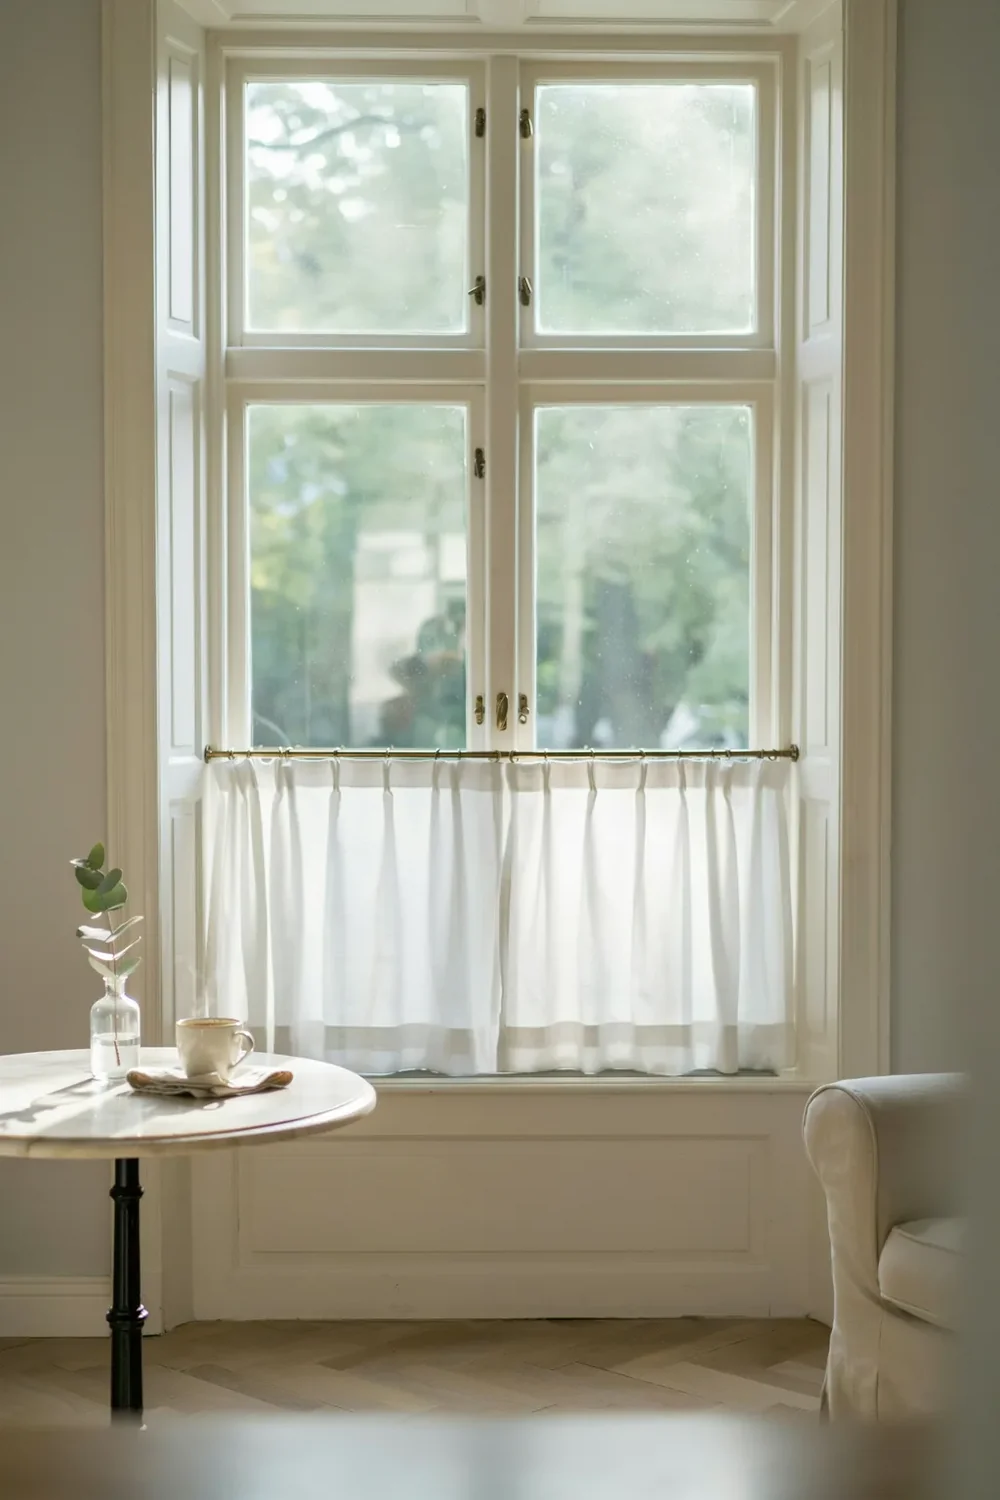
Ground floor living rooms have one specific problem. Passers-by can see straight in at eye level, but the daylight coming through the top half of that same window is the best light in the house, and full-length panels take both or neither.
Cafe curtains split the difference by covering only the lower portion of the glass. A slim rod crosses the window partway up, with short panels hanging below it. Among all the curtain styles for living room windows, this is the only one that solves privacy without spending any daylight to do it.
Mounting height is the whole decision. Set the rod at the midpoint of the glass for a balanced, traditional look. Push it up to roughly two-thirds height when the sightline from the street is the real concern.
Keep the fabric plain and the header simple. A pleated cafe curtain looks like a full-length panel that shrank in the wash.
| Cafe Curtain | Full-Length Panel |
|---|---|
| Keeps the top half of the glass permanently clear. | Covers or clears the whole window, nothing in between. |
| Privacy stays on without you touching it. | Privacy means drawing them, which kills the light. |
| Draws attention to the window frame and sill. | Hides the frame and stretches the wall visually. |
| Suits a smaller window with something worth showing below it. | Suits a tall window, or a short one you want to look tall. |
13. Roman Shades Where Panels Would Crowd the Room
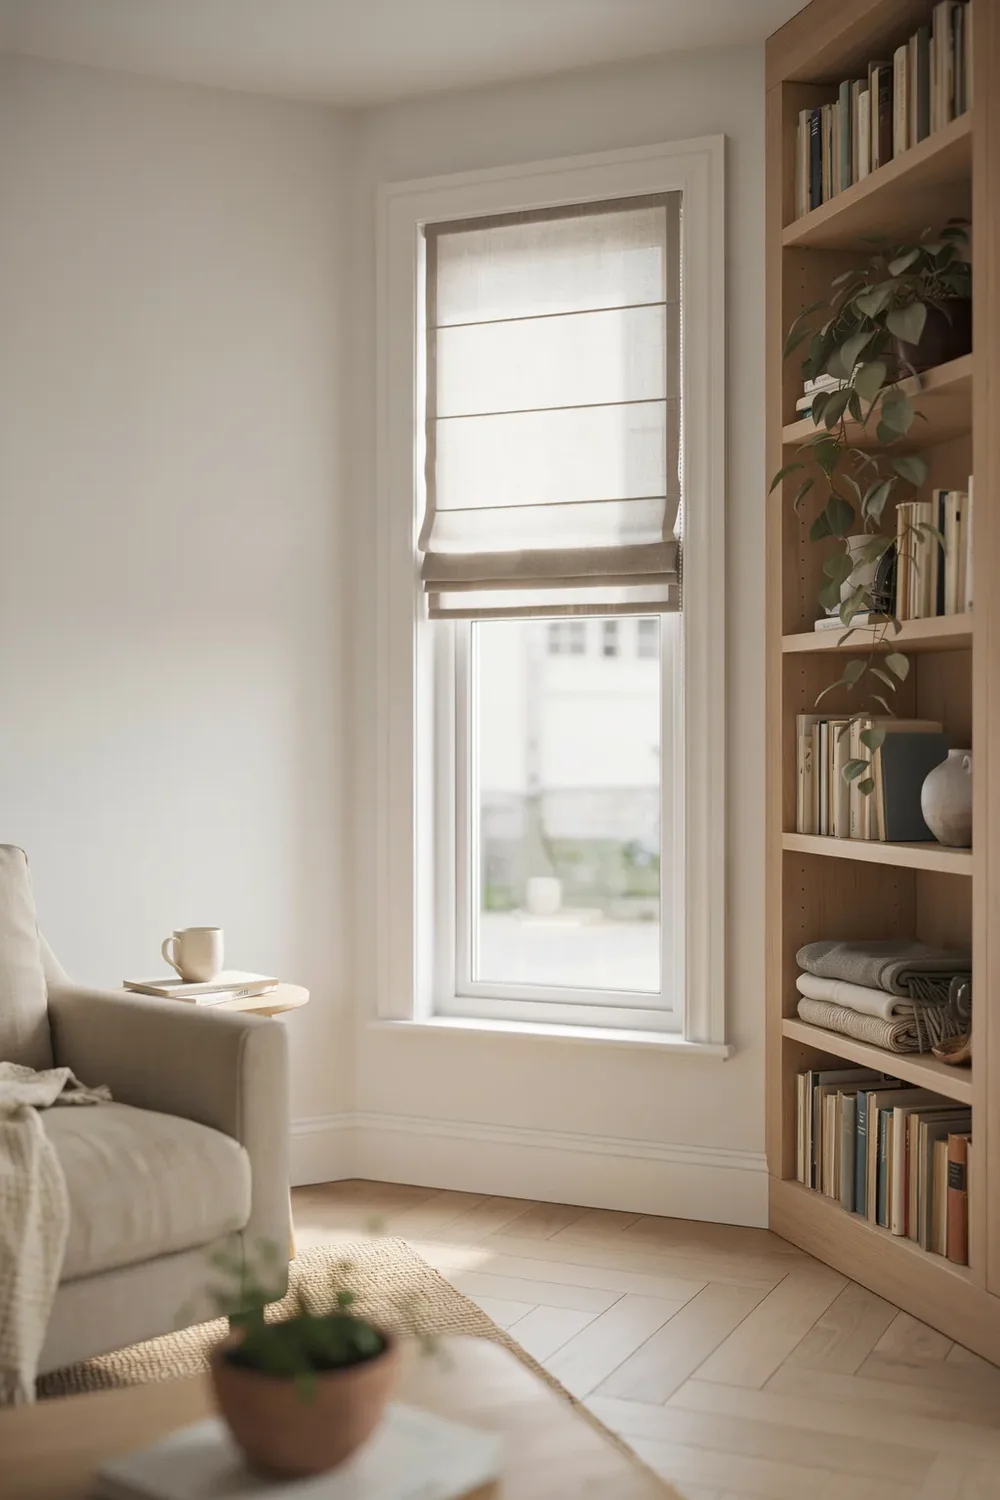
A Roman shade and a pair of panels answer the same question in opposite directions. Panels move sideways and need wall space beside the window to live on. A shade moves upward and needs nothing beyond the window itself.
That distinction decides small rooms. Where a window sits close to a corner, a bookcase, or the arm of a sofa, side panels have nowhere to stack and end up permanently half-covering the glass. It is the most compact of the curtain styles for living room windows for exactly that reason.
Raised fully, a lined Roman shade gathers into roughly an eight inch stack across the top of the window. Plan for that. Mount it high enough that the stack sits above the glass rather than clipping the top pane.
It also gives you a flat surface, which is the one place in a room where a larger pattern can sit without looking busy.
14. Panel Track Systems for Sliding Doors
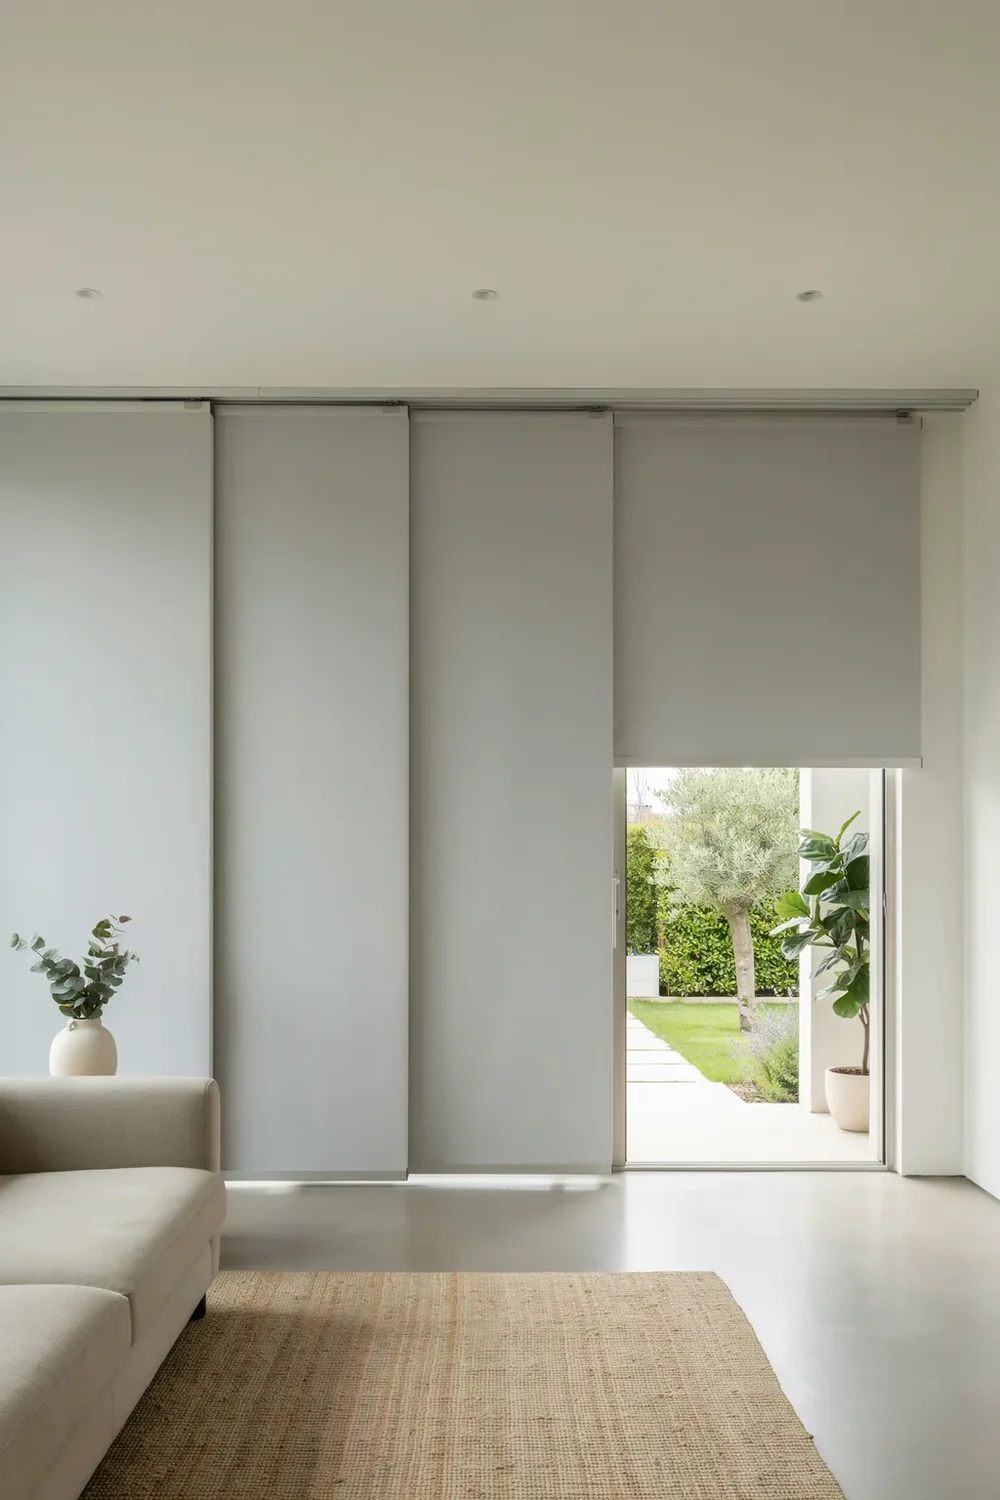
Measure the door opening first, then divide it. That single step is what separates a panel track that works from one that jams against the handle every time you go outside.
Wide flat panels hang from a multi-channel track and slide past one another like screens, stacking to one side in a slim bundle instead of bunching into folds.
The sizing rules are strict, which is exactly why this style suits doors better than it suits windows.
- ▸Three to five panels covers most standard sliding door widths.
- ▸Each panel needs about one inch of overlap with its neighbour, so no light gap opens mid-run.
- ▸The track needs one channel per panel, so count channels before you count panels.
- ▸Leave the panel nearest the handle on its own channel so it clears independently.
The look is architectural rather than soft. In a room full of textiles it can read cold, so it works best where there is already timber, stone, or a heavy rug to warm things up.
15. Ceiling Track for Uninterrupted Height
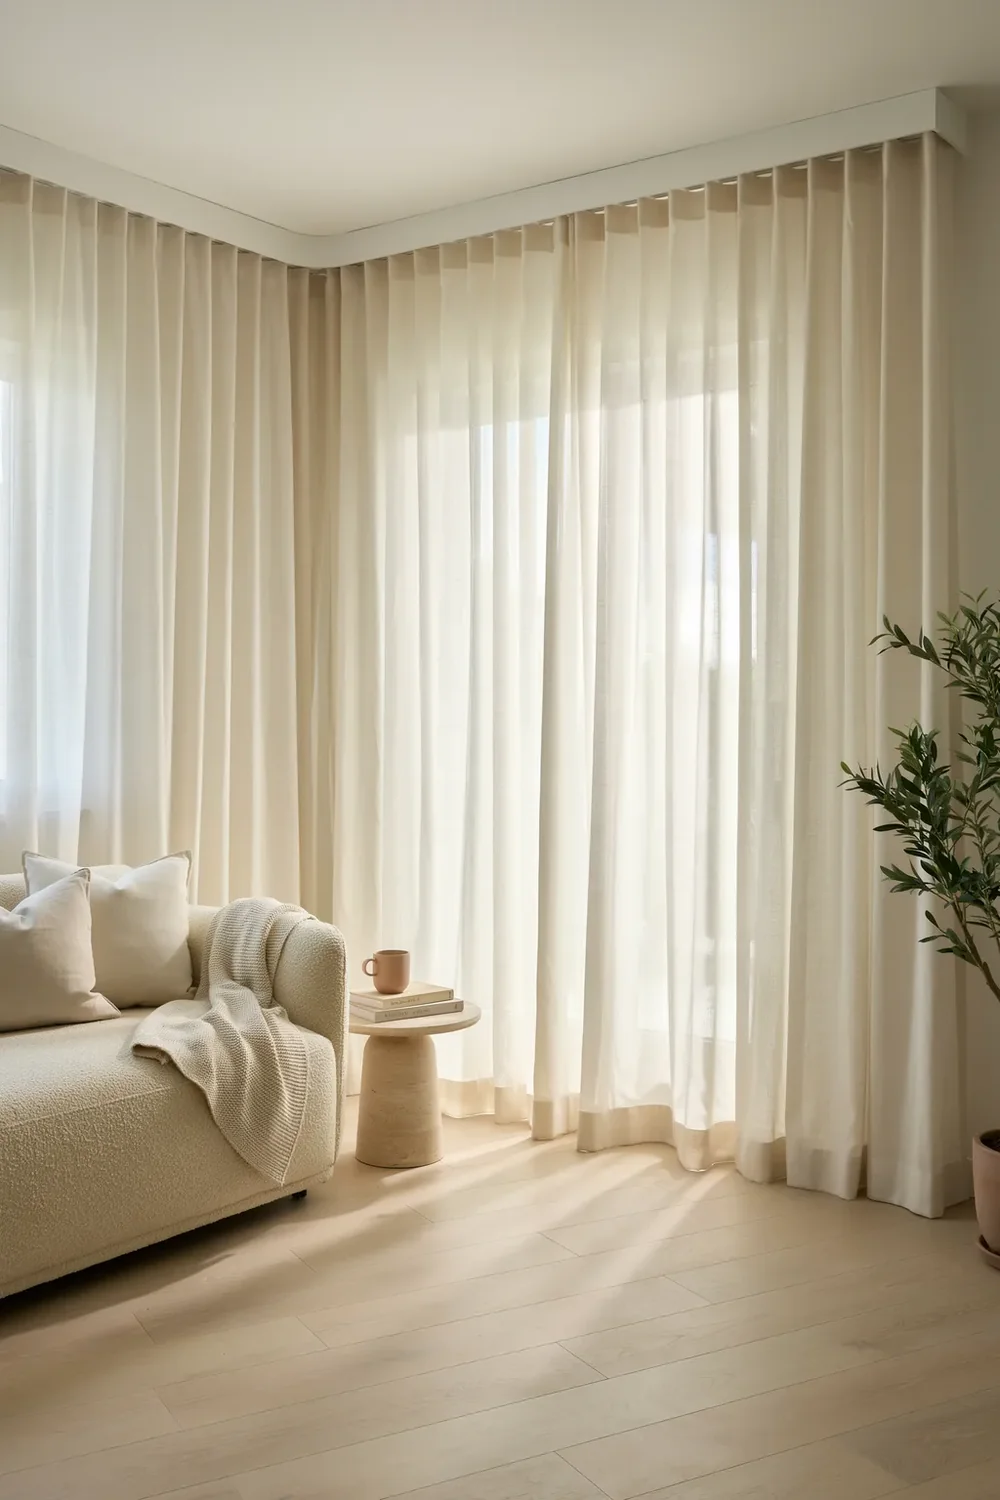
Higher is not automatically better, which is the part most people miss about ceiling mounting. Running a track along the ceiling only reads as height if the sides are closed. Leave them open and you get a tall sheet of fabric with daylight spilling down both edges, which draws the eye to the gap rather than the drop.
The fix is a return. The track bends back to meet the wall at each end, and the panel follows it, sealing the edge.
Two details make it land:
- Mount the track 2 to 3 inches out from the wall, so the panels clear the sill and any radiator below
- Hem the panels to finish about half an inch above the floor, close enough to look fitted without dragging every time they move
Ceiling tracks also let a curtain run past the window on both sides, so a small window can wear a full wall of fabric.
Light runs down both outer edges in two bright vertical strips. The eye stops at the gap, and the full height of the fabric never registers.
The track curves back to the wall and the fabric closes against it. The panel reads as one unbroken plane from ceiling to floor, and the room gains its height.
16. Bendable Rods That Follow a Bay Window
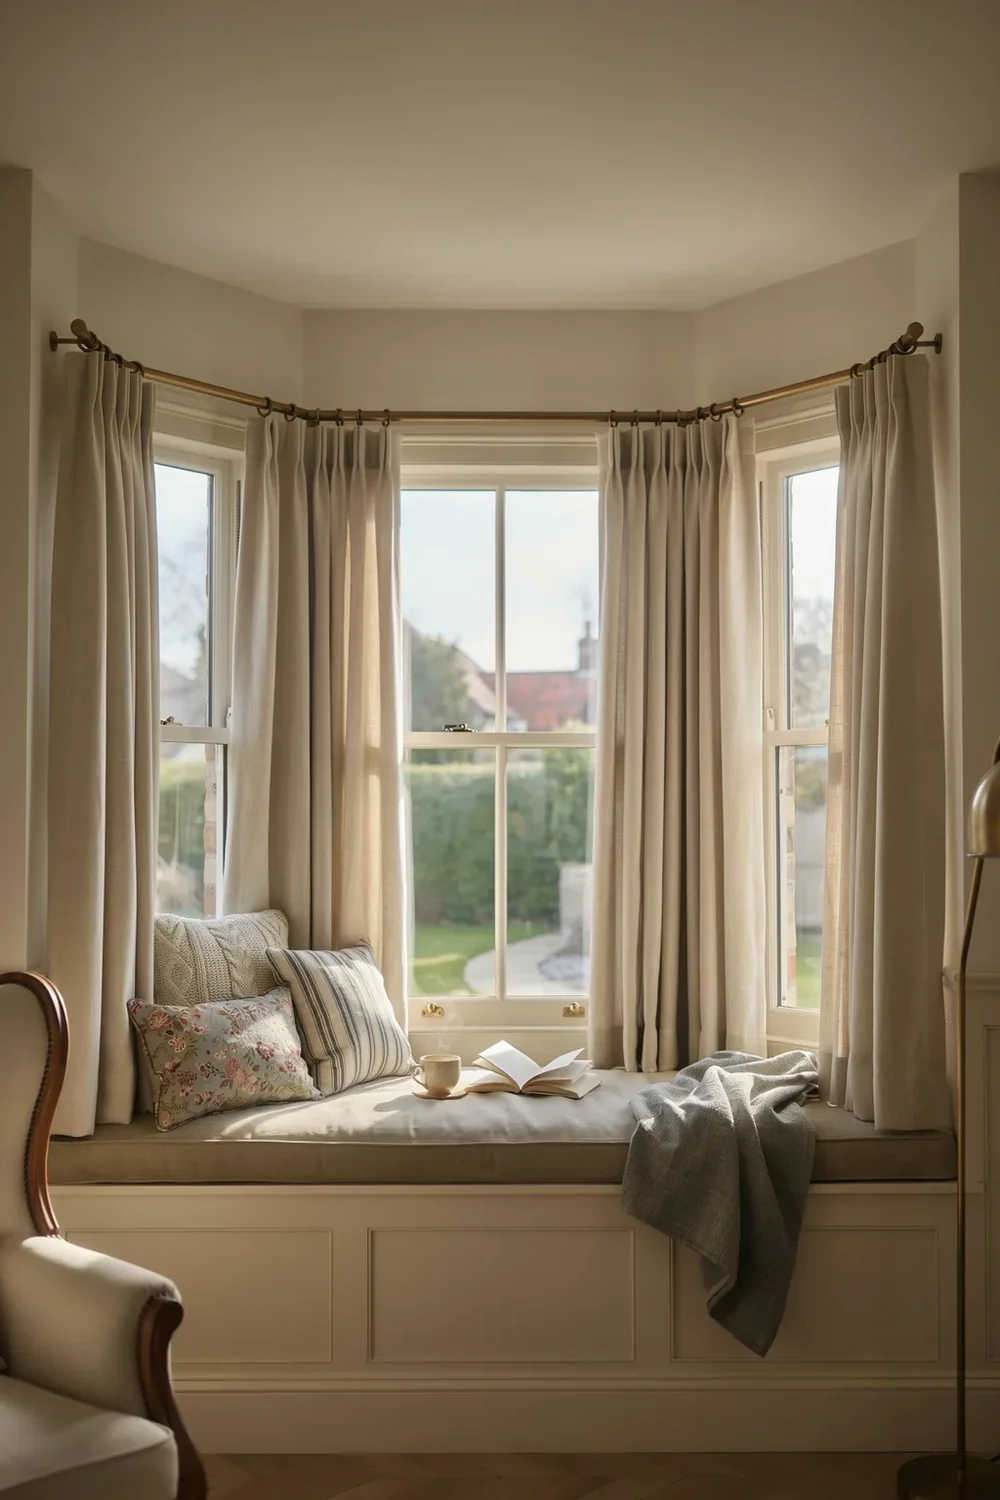
The corners are where bay window curtains fail. Three separate rods meet at two angles, each with its own finial and its own bracket, and light pours through the two vertical seams no matter how carefully the panels are pulled.
A bendable rod solves it by being one continuous piece. The rod is shaped on site to follow the angles of the bay, so a single panel can travel around the corner without a break.
Most bend to 90 degrees, which covers a square bay. Angled bays sitting at 135 degrees are the more common shape and need less bending, not more.
The rod still needs support at every bend, or it will sag at exactly the point you were trying to close.
Measure each face of the bay separately, then add the two corner angles. Do not measure wall to wall across the opening.
Fit a bracket at both ends and one at each bend. A bend without support is where the rod drops and the panel jams.
Hang one long panel per side rather than one per face, so the fabric crosses each corner instead of stopping at it.
17. Arched Window Curtains Without Cutting the Curve
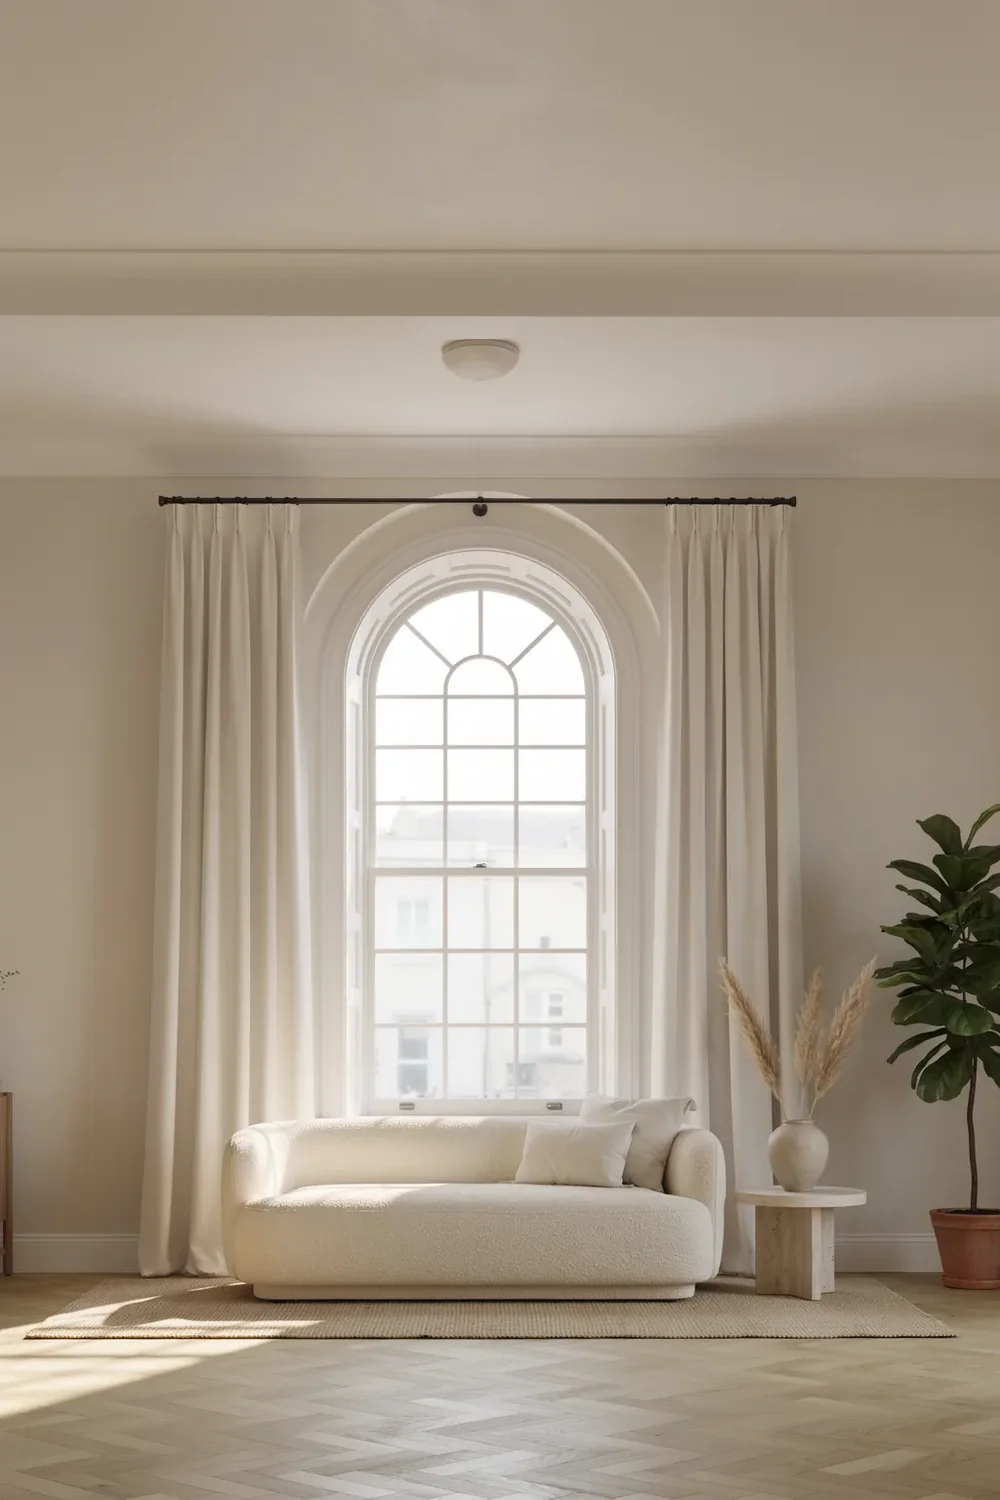
The rule is worth saying plainly. Never hang a rod across the middle of an arch.
An arched window is doing something no other window in the room does, and the moment a straight rod crosses it, the curve is chopped into a half circle sitting on a horizontal line. The architecture stops working and the window just looks obstructed.
Mount above the peak instead, so the whole arch stays visible below the hardware.
That means measuring differently. Take the drop from the ceiling or from a point a few inches above the highest part of the curve, not from the top of the window frame, which is now well below your rod.
Mount the rod above the peak of the arch, and extend it wide so the open panels clear the curve entirely.
Leave the arch bare and let the panels frame it, treating the curve as the feature.
A straight rod across the springline, which slices the arch into a shape that reads as a mistake.
Custom fan-shaped fabric fitted inside the arch. It dates fast and permanently blocks the best light in the room.
18. Stationary Side Panels for Windows You Want to Show Off
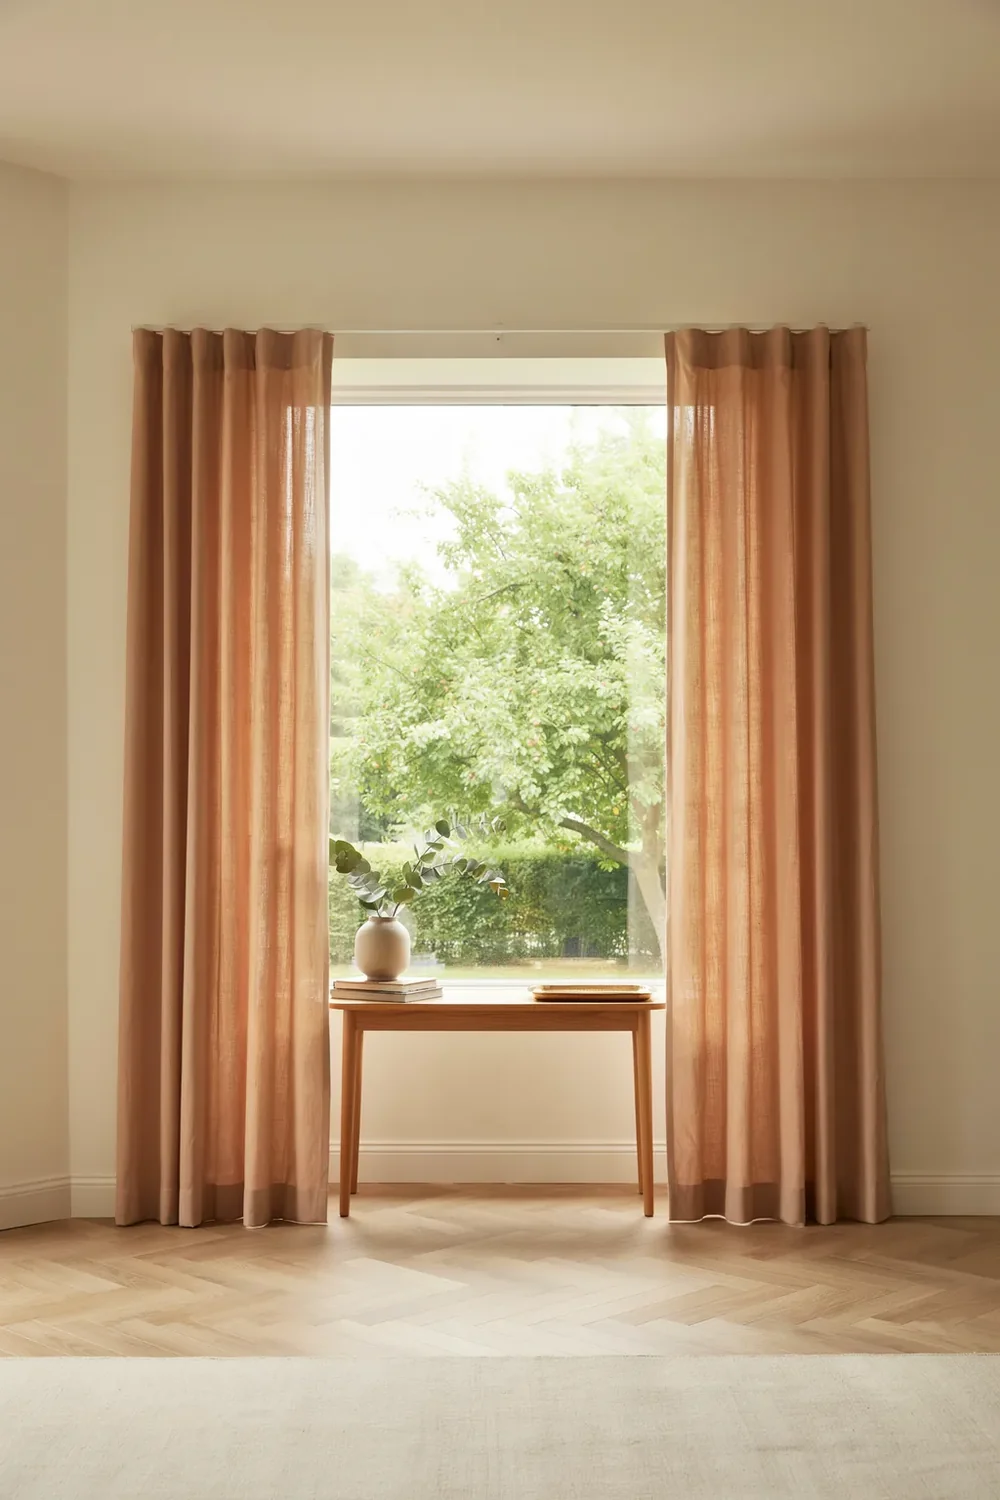
The window stays fully open all day, every day. That is the point of a stationary panel, and it is a genuinely different job from a curtain that draws.
Two narrow panels sit at the outer edges of the window and never move. They soften the hard vertical line of the frame, add colour and texture at the edges of the glass, and leave the view and the daylight completely untouched. It is one of the cheapest curtain styles for living room windows precisely because it uses so much less fabric.
Because they never close, the fullness maths changes entirely. Each panel needs roughly a third of the window width, so the pair covers about two-thirds of the frame while the middle third stays clear.
Pair them with a blind or shade if the room ever needs to be dark. Stationary panels are styling, not light control, and treating them as both is how rooms end up with neither.
📌 Good To Know
Because you are buying roughly two-thirds of the fabric a working pair would need, spend the difference on a heavier material. The panels never have to fold or stack, so weight costs you nothing here and looks considerably more expensive.
19. One Asymmetric Panel for an Off-Center Window
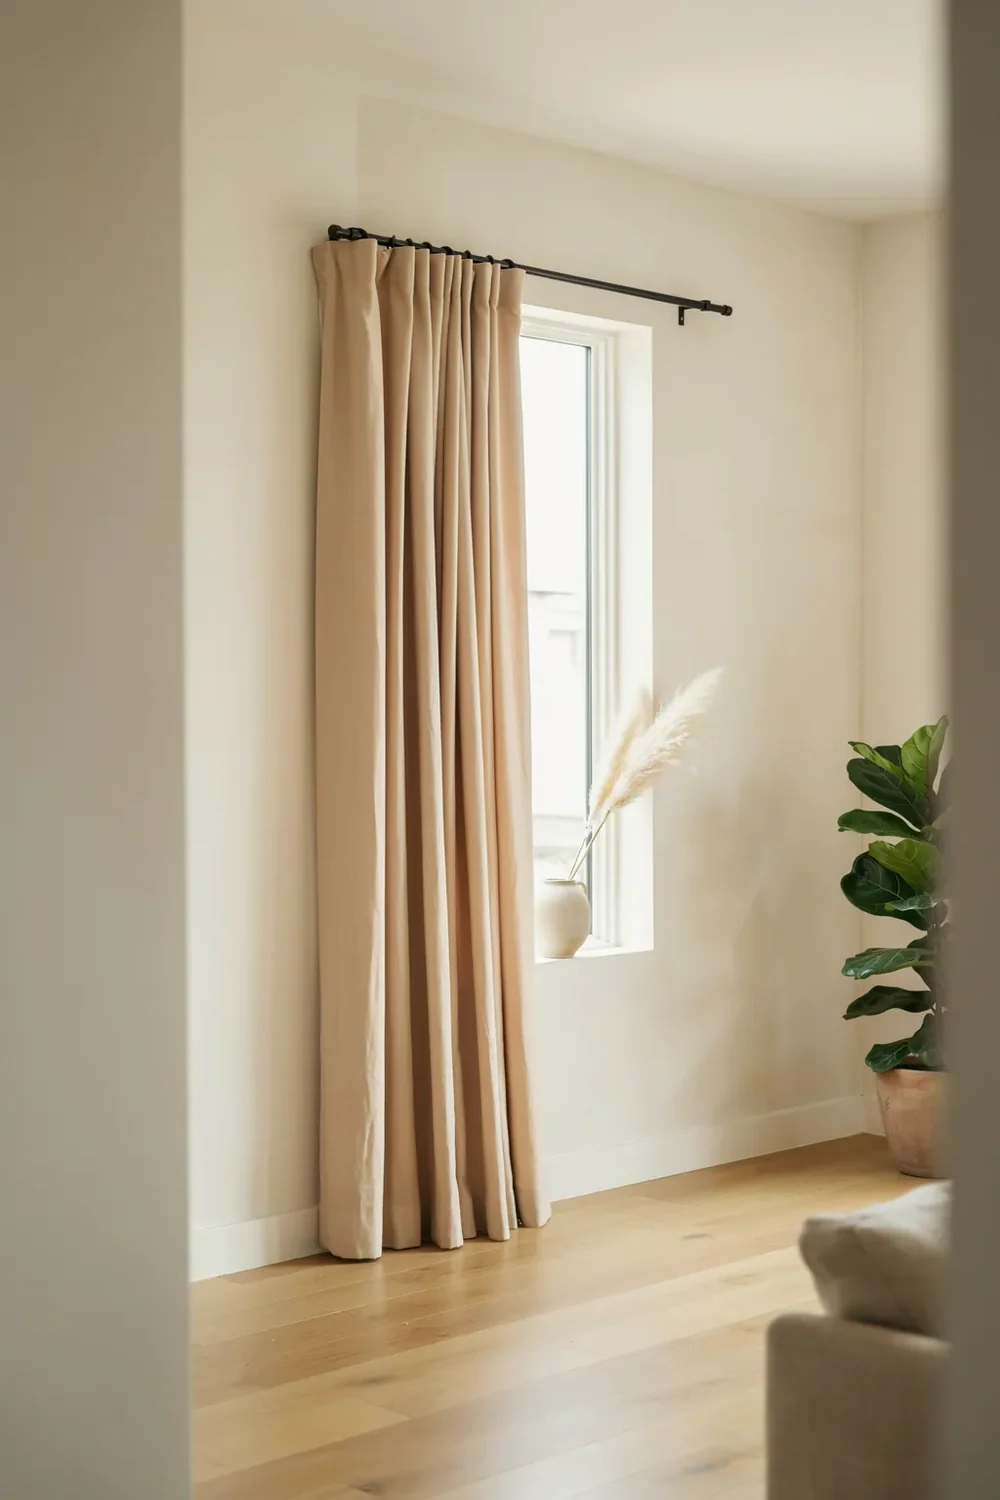
Some living rooms have a window pushed hard against one side of the wall, with a radiator, a door swing, or the back of a sofa taking up the space on the other side. Hang a matched pair and one panel spends its life squashed into eight inches of wall.
A single panel accepts the room instead of arguing with it. All the fabric gathers on the side that has room, and the window edge on the tight side stays clean and bare.
Give that one panel the full width. At roughly twice the window width it still closes properly and still falls into real folds, rather than looking like half a set went missing.
The asymmetry needs a partner elsewhere in the room. A tall plant or a floor lamp on the opposite side keeps the wall from tilting visually.
A single panel only looks deliberate when it is generous. Order it at twice the window width, or it reads as the survivor of a pair rather than a decision you made.
20. A Soft Valance Over Panels for a Finished Top Edge
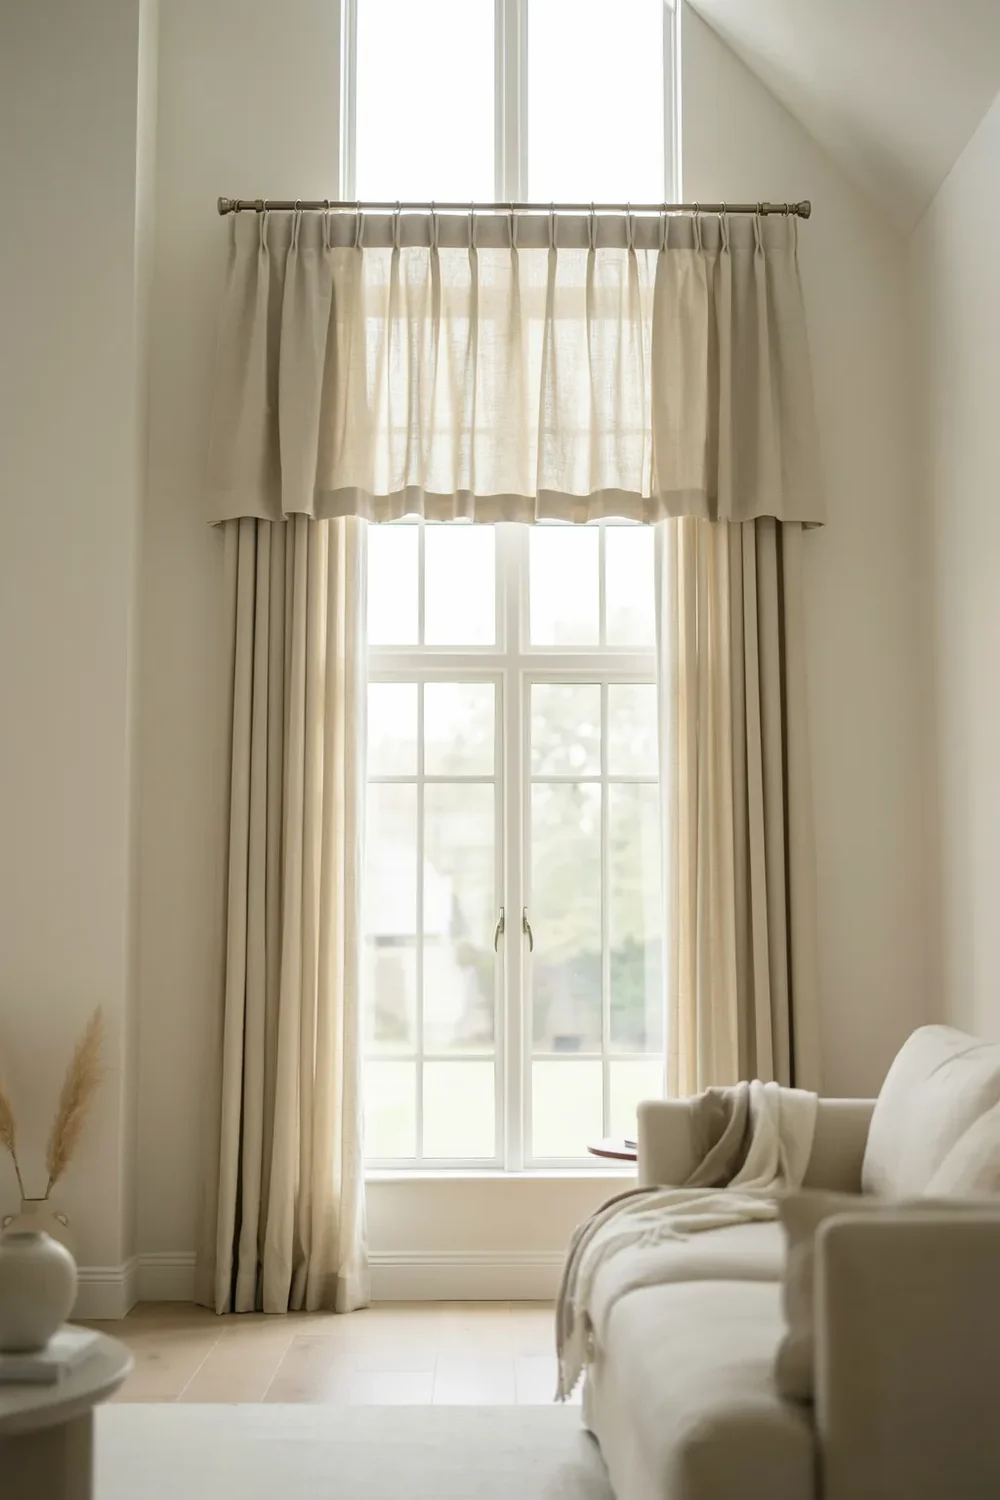
Valances fell out of fashion so completely that most people picture the stiff, swagged, pattern-heavy versions of thirty years ago and stop there.
The current version is nothing like that. A flat or lightly gathered band of the same fabric as the panels, hung on a second rod in front of the first, hiding the hardware and closing off the top of the window.
Proportion is what changed, and it is the only rule that matters. Keep the valance to about one-fifth of the total drop. On a 96 inch curtain that is roughly 19 inches, and going deeper is what made the old ones feel heavy.
Match the fabric to the panels rather than contrasting it. The point is a finished edge, not a second focal point competing with the first.
Before you commit to a valance
21. A Cornice Box for a Built-In, Architectural Header
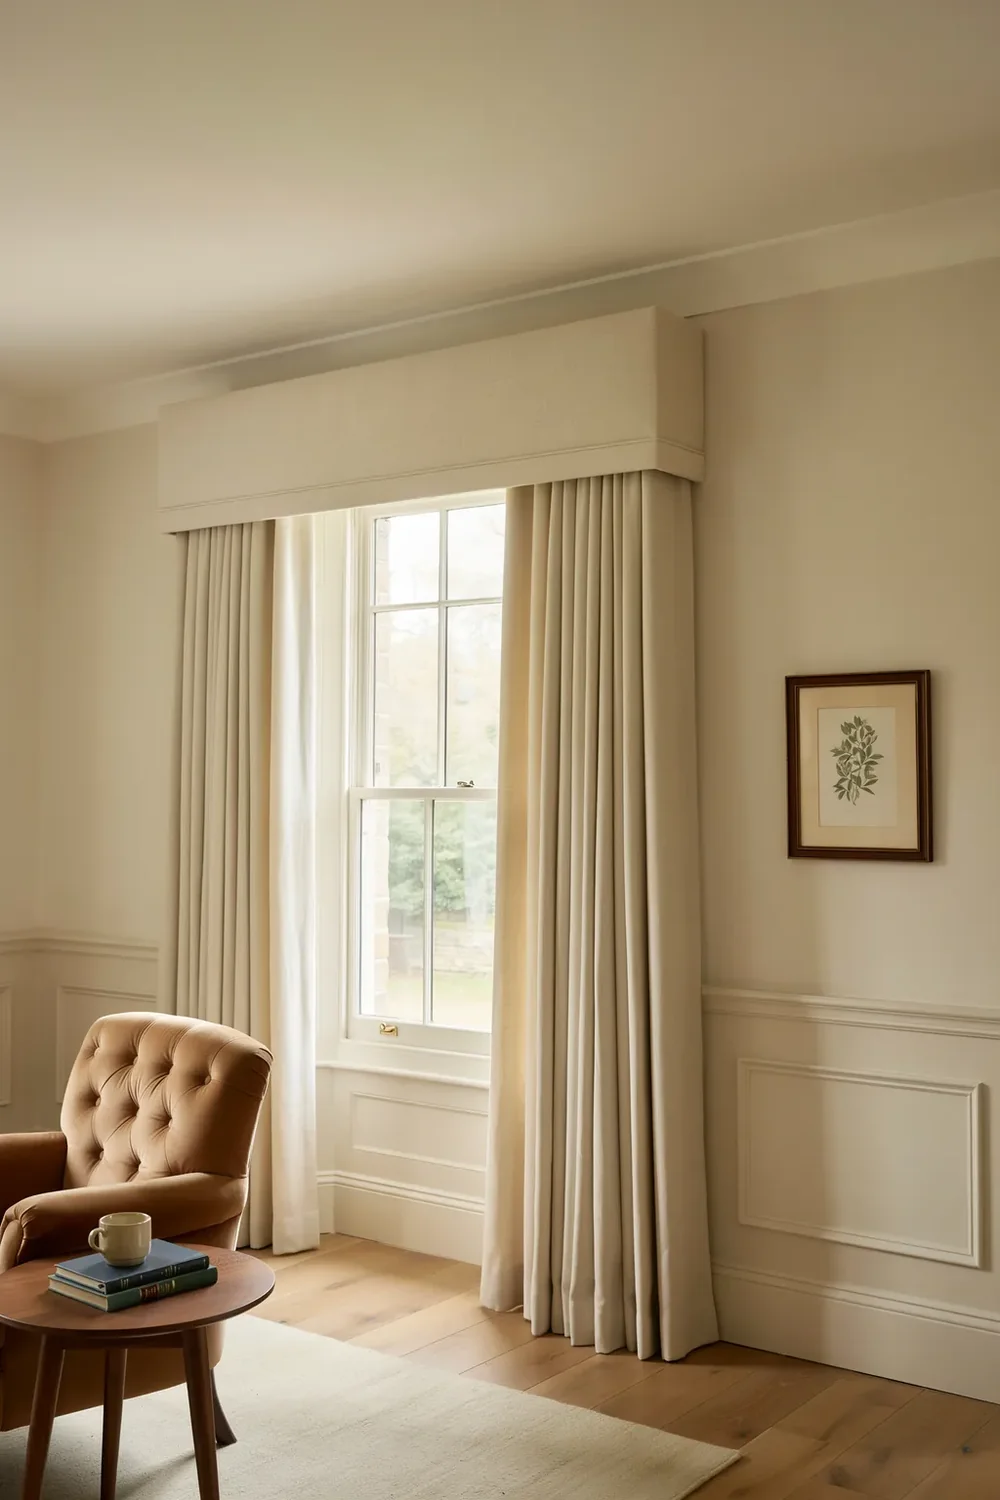
From the room it looks like a shallow box sitting flush above the window, eight to twelve inches deep, upholstered in fabric or painted to match the trim.
Underneath it is exactly that. A wooden frame fixed to the wall, wrapped in batting and fabric, with the curtain rod hidden inside it.
What separates a cornice from a valance is rigidity. A valance hangs and moves. A cornice is built, and because it does not move, it reads as part of the architecture rather than as a soft furnishing added later.
The detail people skip is the returns. Each end has to wrap back to the wall by about three inches, closing the sides. Without returns you see straight into the box from an angle, hardware and all, and the built-in effect collapses.
Worth the effort on a window with no interesting trim of its own, since it gives the opening a substantial top edge that the builder never bothered to.
22. Motorized Tracks for Tall or Hard-to-Reach Windows
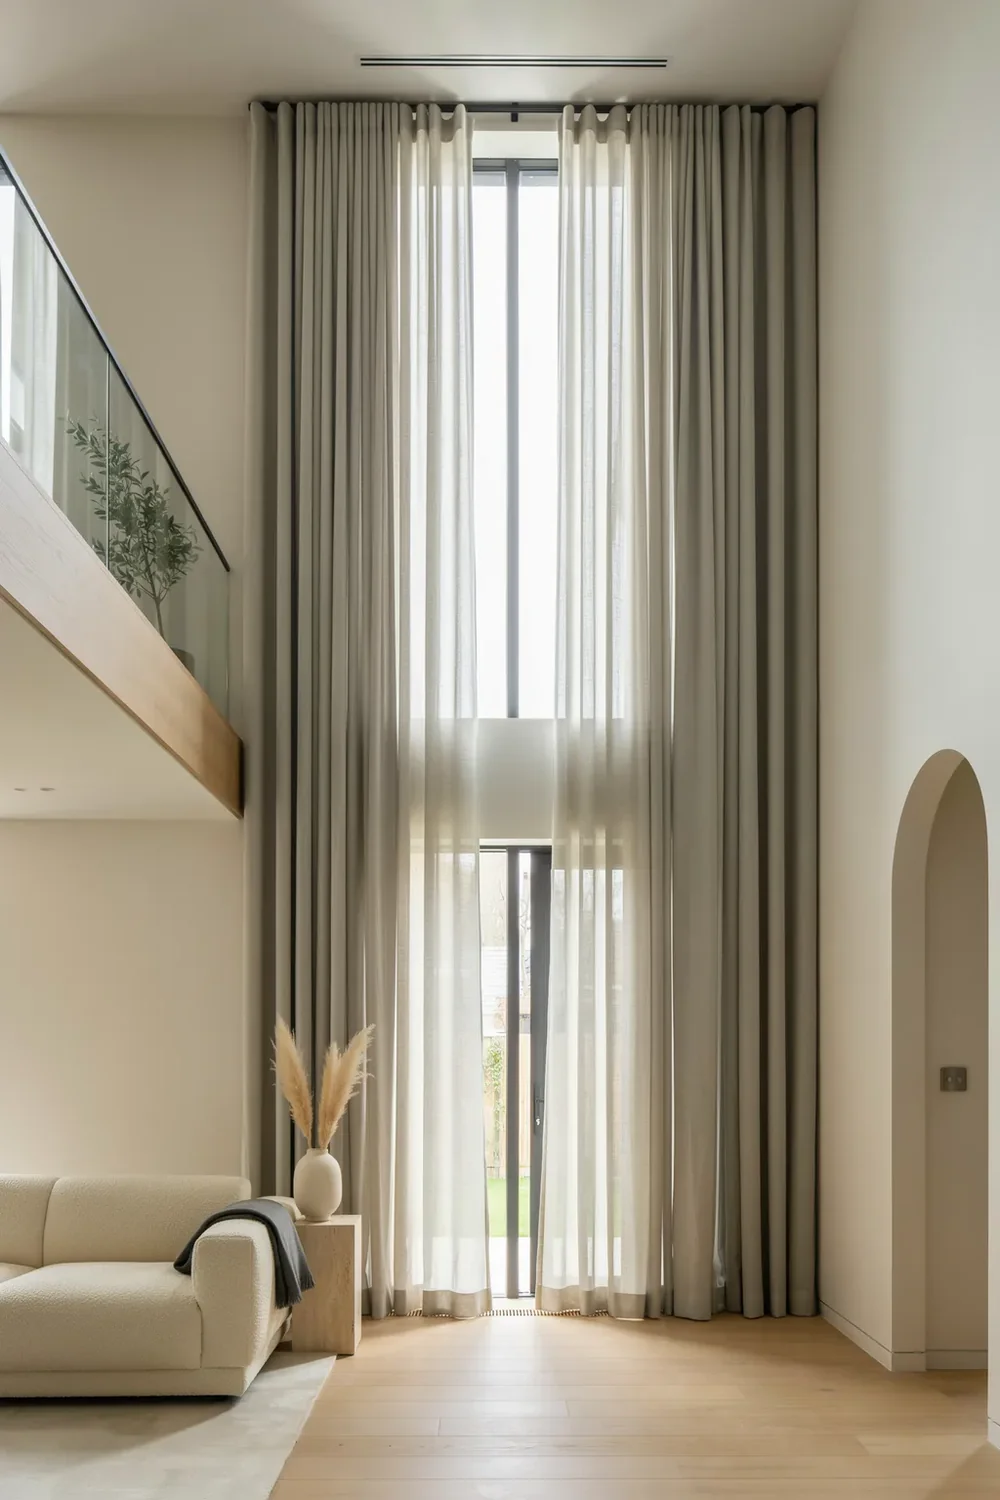
Tall windows come with a daily problem nobody mentions in the showroom. A panel hanging eleven feet up needs a wand, a pole, or a stretch across the back of the sofa every morning and every evening, and after a fortnight most people simply stop closing them.
A motorized track removes the reach. The carriers are driven along the track by a small motor at one end, operated by remote or wall switch, and the panels draw evenly whether or not anyone can touch them. It is the newest of the curtain styles for living room windows, and the only one that solves a problem of access rather than a problem of looks.
It suits three situations in particular:
- Windows above a stairwell, a built-in bench, or a run of furniture
- Very wide runs where drawing by hand pulls the panels out of line
- Rooms where heavy lined curtains are too weighty to move smoothly
The decision that matters is power. Battery motors install anywhere and need recharging once or twice a year. Hardwired motors need an electrician and a plan, and then never ask anything of you again.
| Battery Motor | Hardwired Motor |
|---|---|
| Fits any window with no wiring work. | Needs power run to the track before the wall is finished. |
| Recharge or swap the pack once or twice a year. | Nothing to recharge, ever. |
| Best for renters and finished rooms. | Best during a renovation or new build. |
| Struggles with the heaviest lined panels. | Handles heavy fabric and very wide runs. |
Curtains Are a Measuring Job Before They Are a Decorating One
The header is the decision that carries everything else. Once you know whether a window wants a pleat, a clip, a track, or nothing at all across the top, the fabric choice gets much easier, because by then you already know how much you need and how it has to hang.
Start with the window you actually have. Measure the drop, count the wall space beside the glass, and decide whether the panels need to move every day or simply sit there looking right.
Any of these curtain styles for living room windows will read as custom, as long as the measurements are honest. The most expensive fabric in the shop still looks wrong at the wrong length, and a plain cotton panel hung correctly looks like it cost three times what it did.
Save this one for the next window you tackle, and come back to it with a tape measure in hand.
The five numbers to have before you order