18 Family Photo Wall Ideas That Never Look Cluttered
Most people have hundreds of family photos sitting in a phone or a shoebox, and no real plan for getting them onto a wall. The fear is always the same: hang too many frames too close together and it looks like clutter, not a collection. Hang too few and the wall still feels bare.
These 18 family photo wall ideas solve that problem by giving you an actual layout to copy, not just a vague suggestion to “add some frames.” Some use matching frames in a strict grid. Others mix wood, metal, and color on purpose. A few skip frames entirely and use string, pallet wood, or a shelf instead.
Pick the one that matches the wall you actually have, a hallway, a staircase, the space over your couch, and the number of photos you actually want to display. None of these need a professional to hang.
1. A Mixed-Frame Gallery Wall Above the Sofa
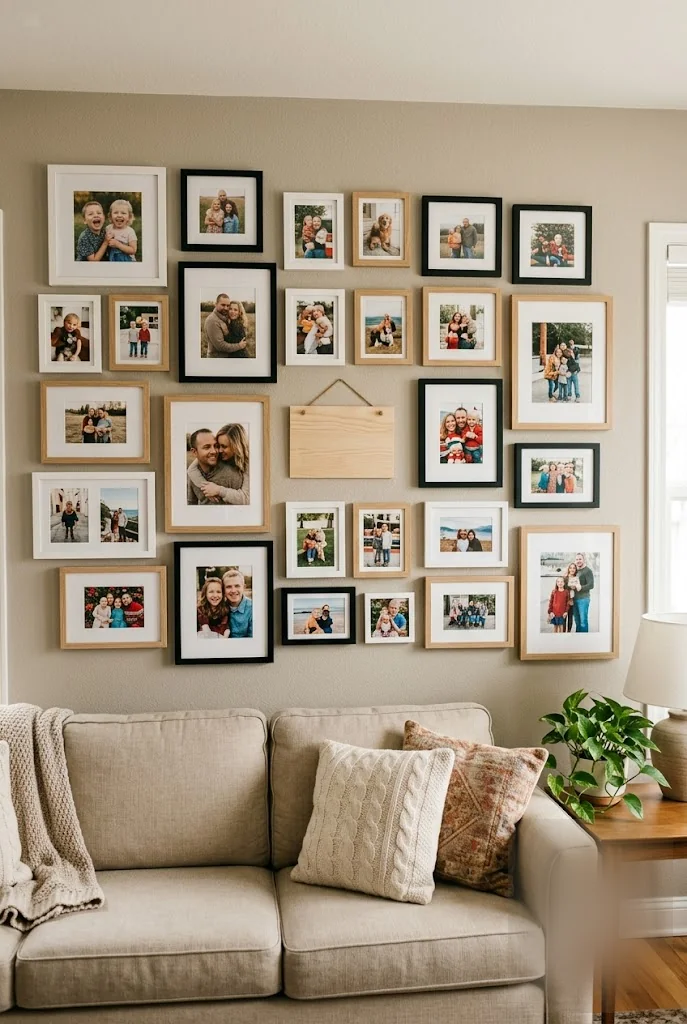
The frames aren’t matched on purpose. White, black, and natural wood sit next to each other, along with one plain wood sign with no photo at all, just texture to break up the grid. That mix is what keeps a big wall of photos from reading as one flat block of pictures.
Start with your biggest photo in the rough center of the space, then build outward with smaller frames. Leave two to three inches between frames throughout, tighter spacing starts to look accidental instead of intentional.
2. Hallway Frames Hung From Decorative Hooks
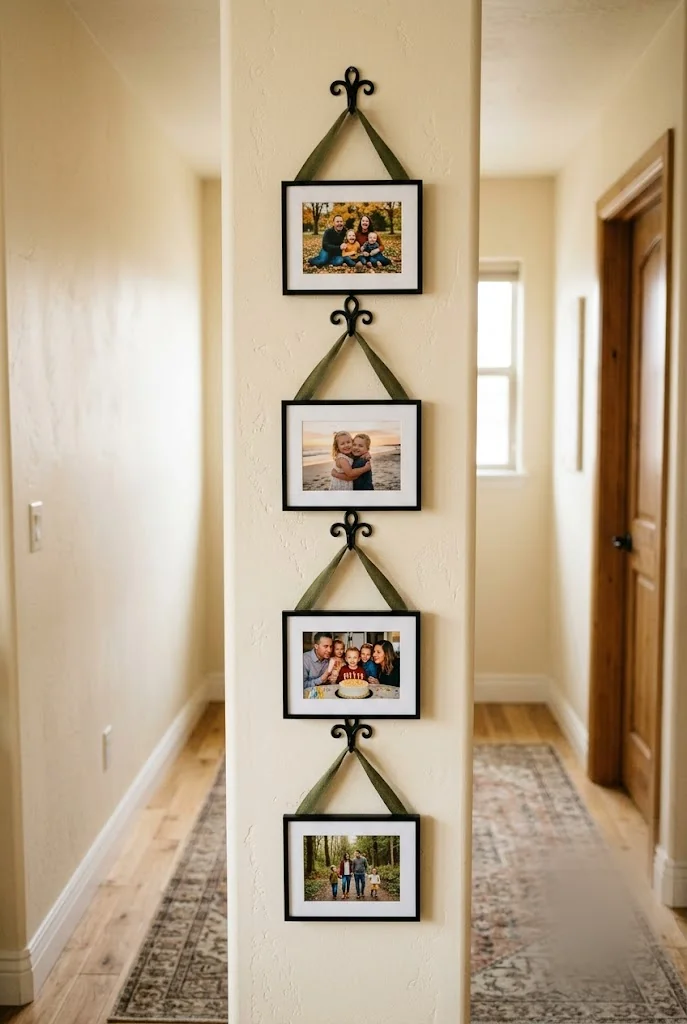
Skip the wall drill entirely. A row of decorative hooks holds thin frames by ribbon or leather straps, so each photo hangs a few inches off the wall instead of sitting flush against it. That small gap catches shadow and makes even simple frames look more considered.
This works best with four to six photos in a single row, more than that and the hooks start competing with each other visually. Keep the ribbon color consistent across every frame so the row reads as one cohesive display, not a random assortment.
💡 Quick Tip
Use the same ribbon color and hook finish on every frame in the row. Consistency there does more visual work than matching the frames themselves.
3. Frameless Photos Mounted on Reclaimed Wood
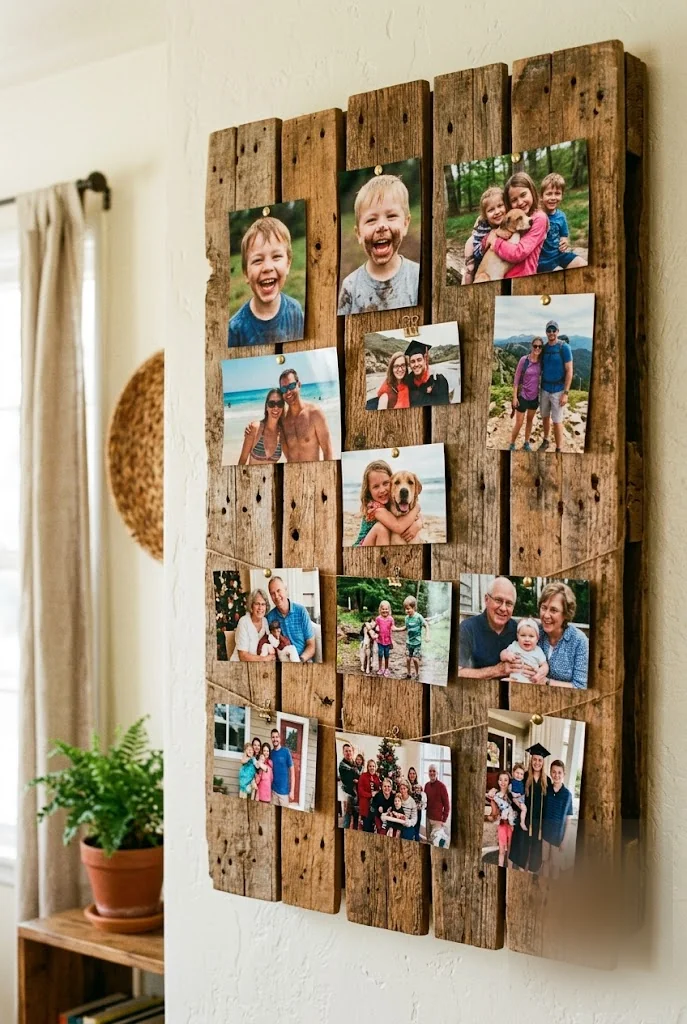
A wall of individually framed photos can start to feel like a lot of separate purchases instead of one cohesive piece. Mounting photos directly onto a section of reclaimed pallet wood solves that by turning the whole thing into a single object, one board, one hanging point, dozens of photos.
Small binder clips or upholstery tacks hold each photo in place without damaging it, so you can swap photos out later without repainting or redrilling anything. The wood grain itself does the decorating, so the photos can stay a simple, uniform size.
A dozen separate frames, a dozen hanging points to level.
One mounted board, one hanging point, the same visual impact.
4. A Black-and-White Grid With No Frames at All
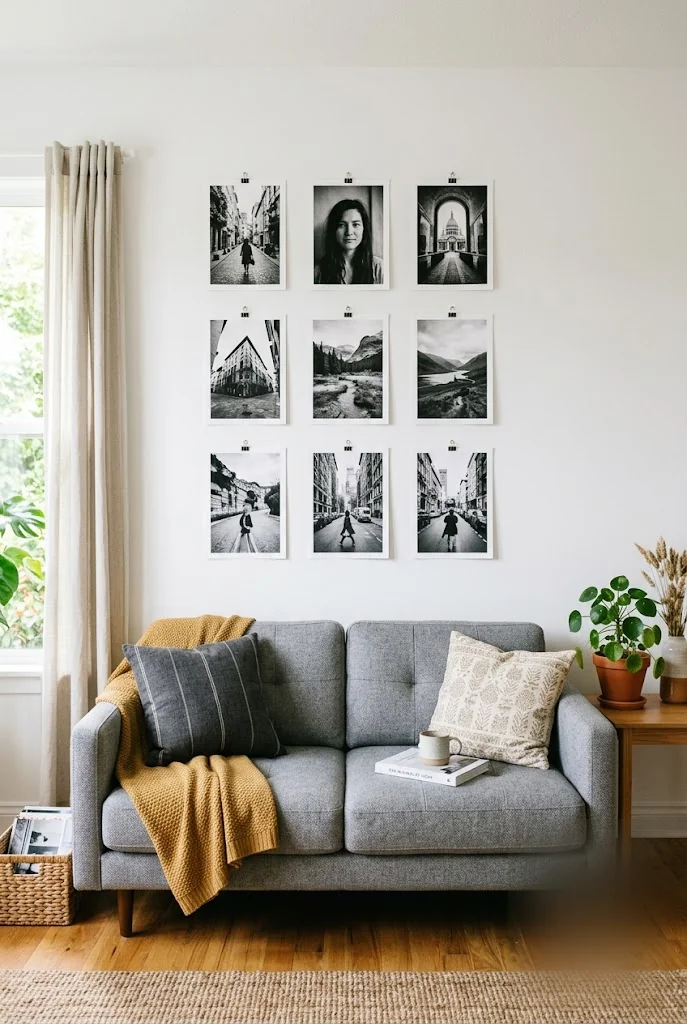
Print your photos in black and white, mount them on thick cardstock or foam board, and clip each one to the wall with a small binder clip on a nail. No frames means no glass glare and no mismatched finishes to coordinate, just the photos themselves in a clean, even grid.
Keep every photo the same size and orientation for this one. The whole appeal is the uniformity, and one differently sized photo will pull the eye away from the grid instead of blending into it.
What this layout needs
5. A Foyer Wall Just for Wedding Photos
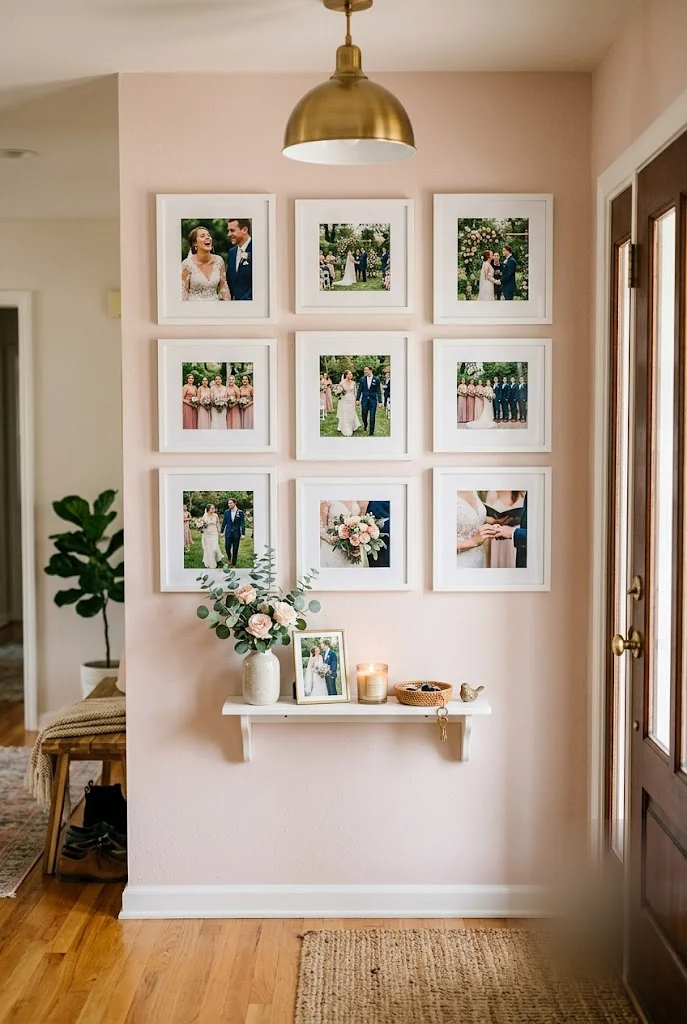
Wedding photos rarely make it past the first year of marriage before they’re packed into a box, which is a shame considering how much thought usually goes into picking them. A dedicated foyer wall in matching white frames keeps a curated set on permanent display, right where guests actually see it.
Nine photos in a three-by-three grid is enough to tell the story of the day without needing the whole album. A small shelf underneath holds fresh flowers or a candle, so the display changes slightly through the year even though the photos stay the same.
6. A Few Large Frames, Spaced Way Apart
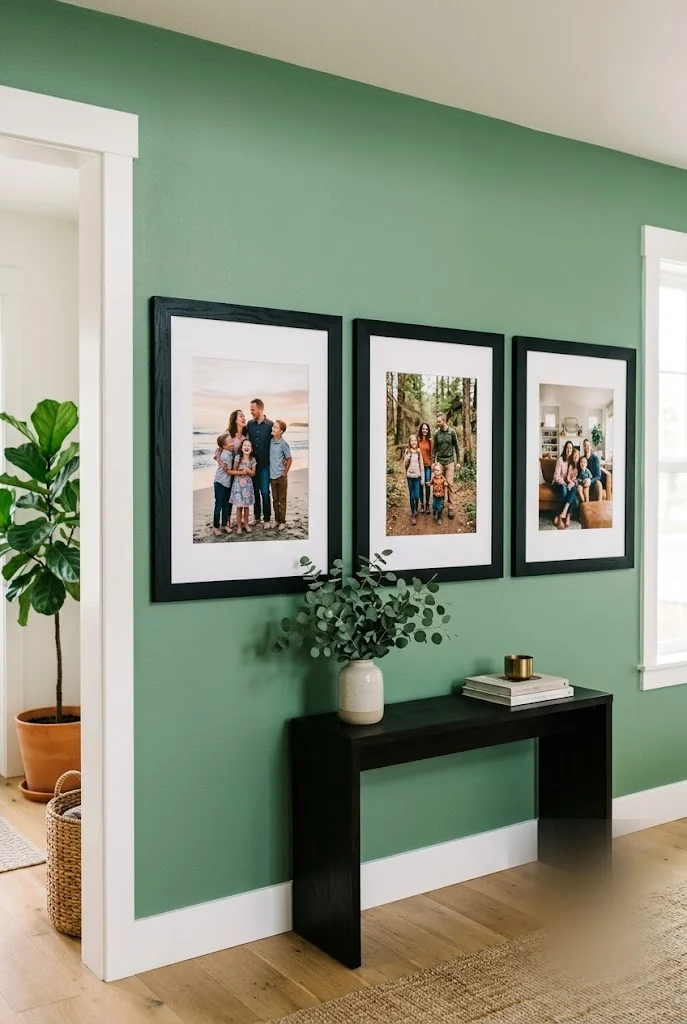
Fewer, bigger photos actually make a bolder statement than a dense cluster of small ones. Three large frames, each holding one meaningful photo, spaced generously apart on a solid wall color, reads as confident rather than sparse once the wall color and frame finish are doing real work.
A saturated wall color, like a deep sage or a moody blue, matters more here than it does in a busy gallery wall, since there’s nothing else competing for attention. Black frames hold up best against a bold wall color; anything lighter tends to disappear into it, one of the boldest family photo wall ideas on this list for an otherwise plain wall.
Choose 3 photos that matter most, not just the newest ones.
Size the frames large, 16×20 inches or bigger.
Paint the wall a saturated color before hanging anything.
7. Building a Gallery Above the Fireplace
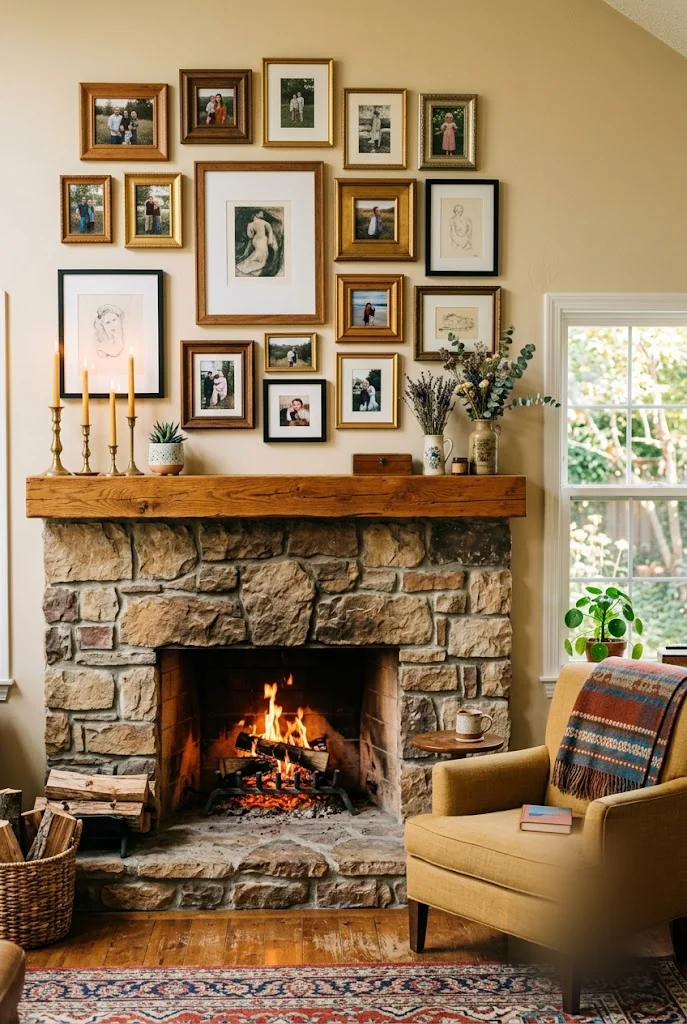
The instinct is to center the gallery directly over the mantel edge, but that often crowds the display right up against the mantel clutter below it. Leave a solid 6 to 8 inches of breathing room between the top of the mantel and the bottom of the lowest frame.
A stone or brick fireplace already carries a lot of texture, so keep the frames themselves simple, matching wood tones work better here than a busy mix of finishes. Styling the mantel itself with just candles and one small plant keeps attention on the photos above it.
Leave 6 to 8 inches between the mantel and the lowest frame.
Keep frame finishes simple against a textured fireplace.
Crowding frames right up against the mantel edge.
Over-styling the mantel itself so it competes with the photos.
8. Following the Stairs With a Diagonal Layout
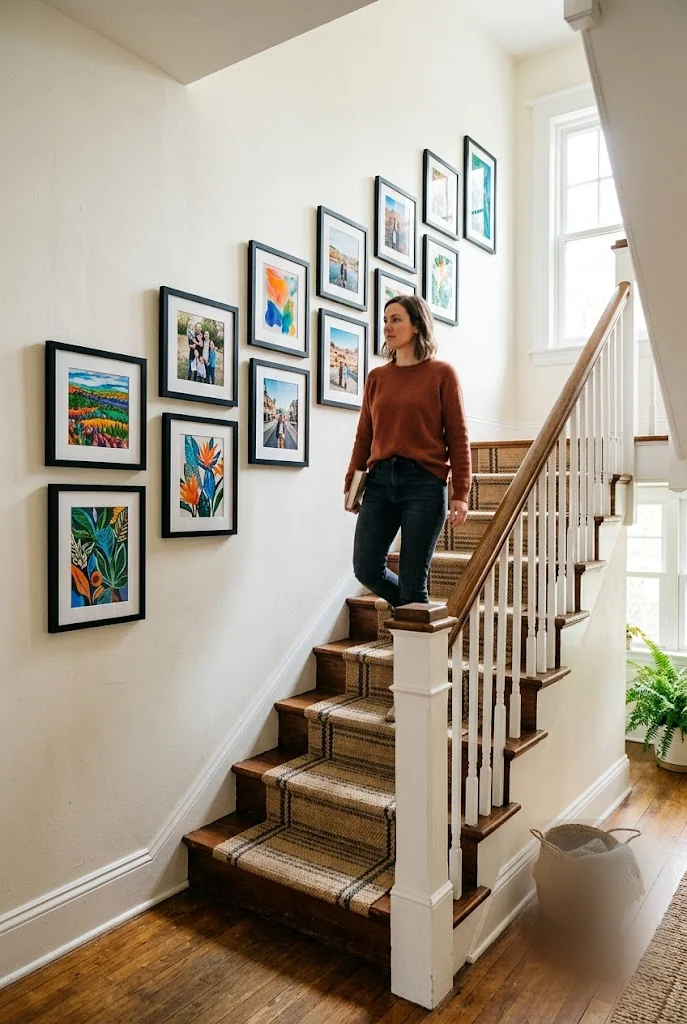
Measure from the nose of each stair tread up to where you want the bottom of each frame, and keep that measurement identical for every photo up the incline. That consistency is what makes a staircase wall look intentional instead of like frames placed wherever there was room.
Two approaches work here: a strict diagonal line following the stair angle exactly, or a looser cluster that roughly follows the slope without lining up perfectly. The strict version reads more modern, the looser version feels more collected.
| Strict diagonal | Loose cluster |
|---|---|
| Same measurement from every stair tread | Roughly follows the slope, less precise |
| Reads modern and precise | Reads collected and relaxed |
9. Picture Ledges Instead of Nailed Frames
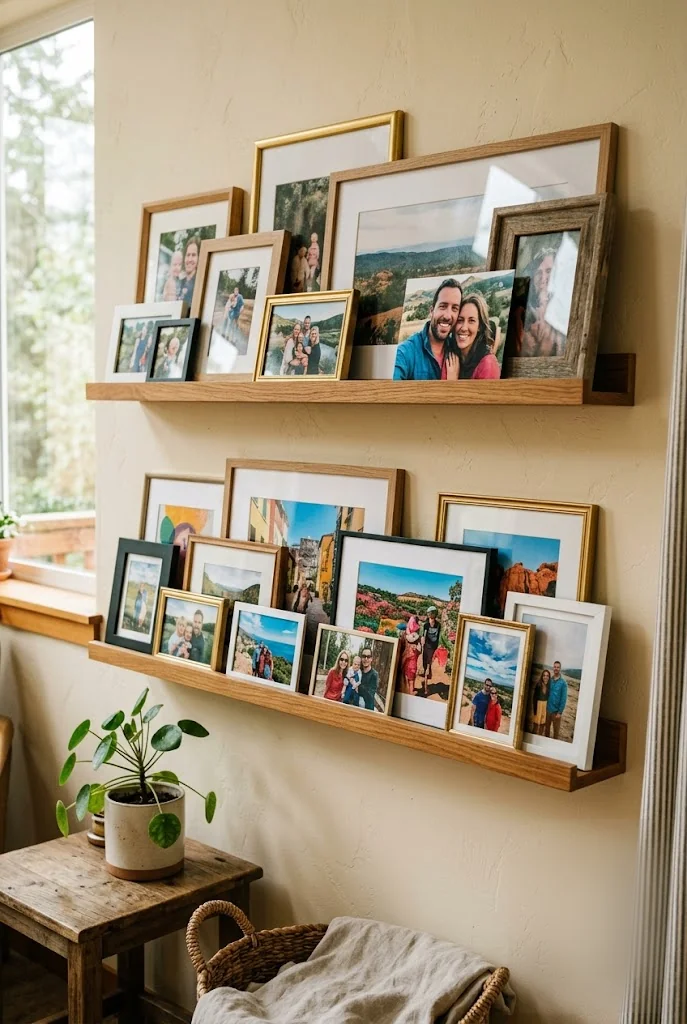
It looks like a nailed gallery wall, but nothing is actually nailed in place beyond the ledge itself. A floating wood ledge holds leaning frames that overlap each other slightly, and rearranging the whole display takes minutes instead of a wall full of patched nail holes.
Two ledges stacked with a gap between them give you room for a taller arrangement without needing a single large wall. Lean the largest frame at the back of each stack and layer smaller ones in front, slightly off-center, so the whole thing reads as effortless rather than lined up. This is one of the easiest family photo wall ideas to change your mind about later.
A ledge lets you rearrange the whole display in minutes, no new nail holes, no repainting.
10. A Grid of Square Tiles Above a Console Table
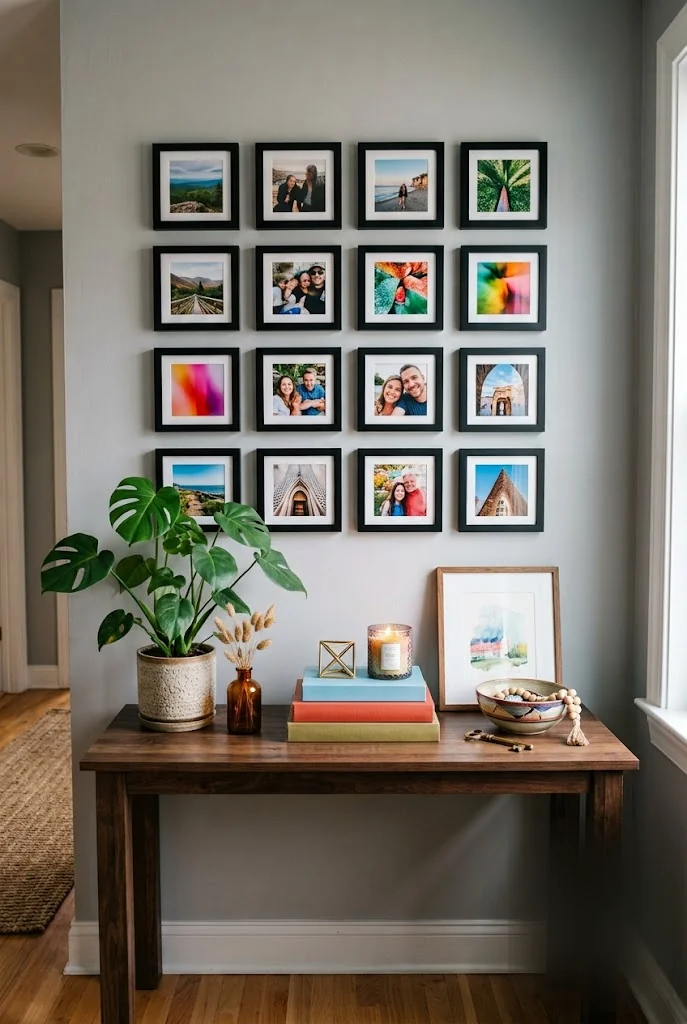
Sixteen small square photos, all the same size, all in matching black frames, turn a plain wall above a console table into something that looks custom-ordered rather than assembled piece by piece. Square photo tiles are built for exactly this kind of tight, even grid.
Keep the console table below simple, one plant, one or two objects, so it doesn’t compete with the dense grid above it. This layout works especially well for displaying a large number of photos without any single one feeling like the centerpiece.
💡 Quick Tip
Tape a paper template to the wall to mark every hole before hanging a grid this size. One misaligned row is obvious when everything else lines up precisely.
11. A Bold Mix-and-Match Frame Collage
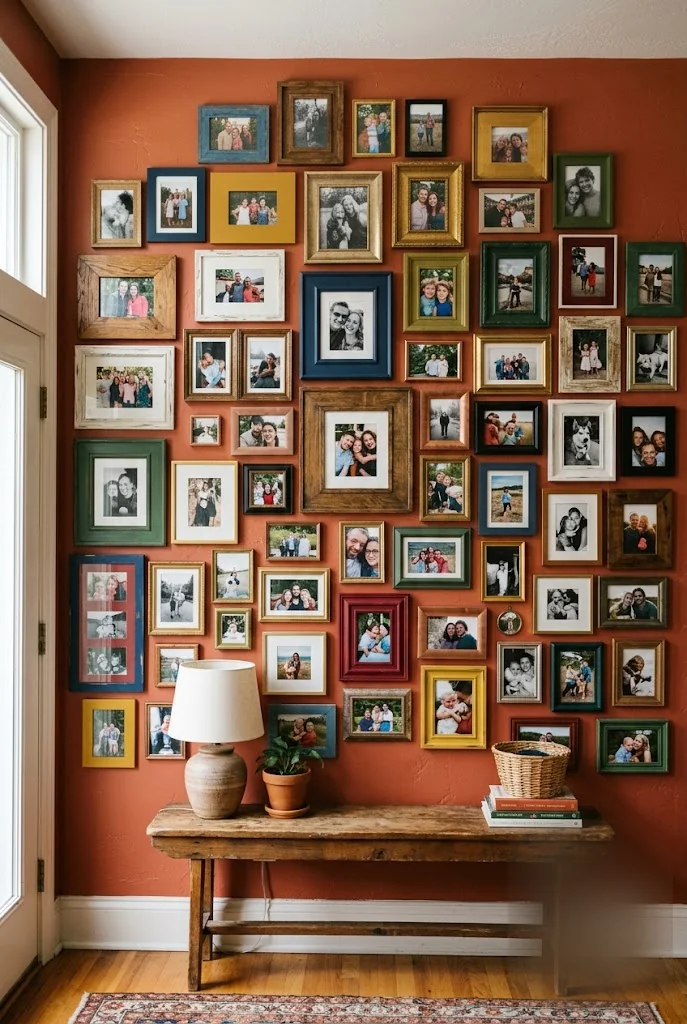
A curated gallery wall usually sticks to two or three frame finishes to stay cohesive. This one breaks that rule on purpose, dozens of frames in different colors, woods, and metals, packed close together on a saturated wall color that ties the whole thing together.
The wall color is what makes this work despite the chaos. Pick one bold, warm color, like terracotta or rust, and let every mismatched frame sit against that same backdrop. Without that unifying color, the same collage would just look like a pile of leftover frames.
12. A Timeline Row Down a Long Hallway
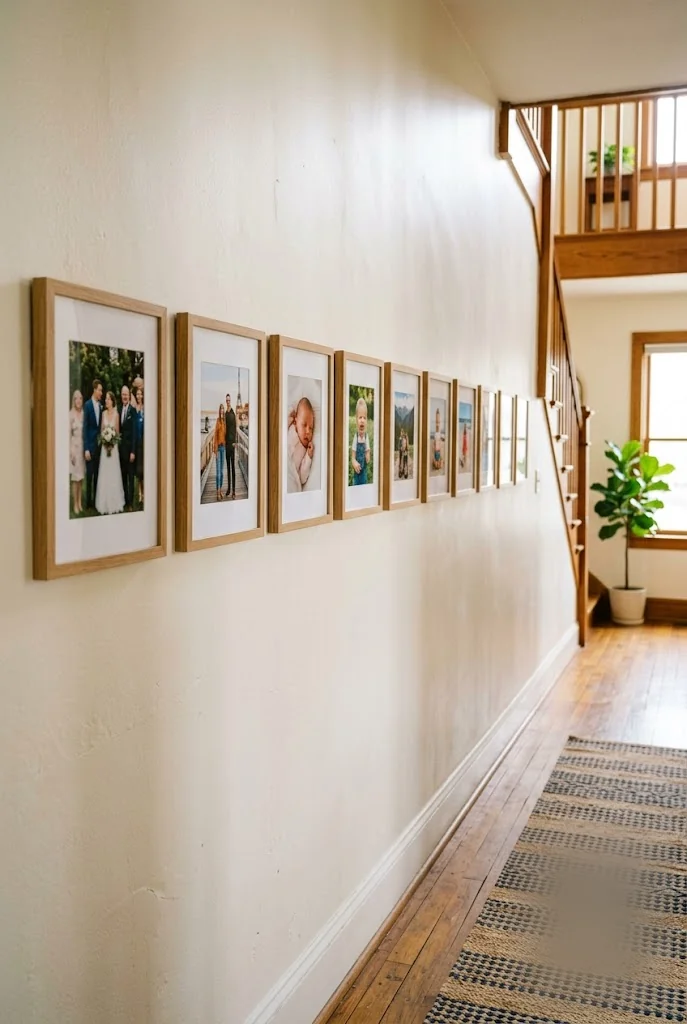
Walk down the hallway and the photos move roughly in order, oldest at one end, most recent at the other, all in identical wood frames at the same height. That single horizontal line is easier to pull off in a long, narrow space than a clustered gallery would be, since there’s only one dimension to plan.
Wedding photo, first house, first child, more recent family shots, the story reads itself as you walk past. Keeping every frame the same size and finish is what makes the timeline idea actually land instead of just looking like a random row. It’s one of the more low-effort family photo wall ideas to execute well.
What keeps a timeline row working
13. An Evenly Spaced Modern Grid
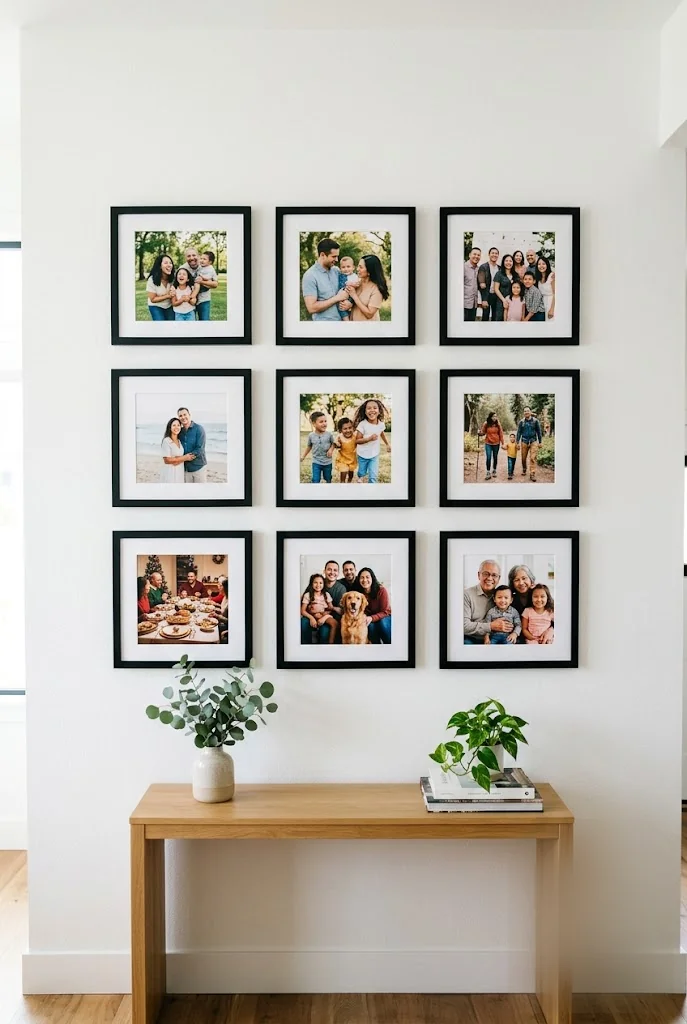
Pick nine photos, print them all at the same size, and hang them three rows by three columns with equal gaps on every side. Black frames against a plain white wall is the most forgiving version of this layout, since the high contrast hides tiny measuring imperfections better than a busy wall would.
A laser level makes this layout dramatically easier than eyeballing it. Mark the center point first, then work outward row by row so any small error stays contained to one row instead of throwing off the whole grid.
A scattered mix of sizes reads busy no matter the arrangement.
Nine matched frames in a perfect grid read calm and deliberate.
14. A Stair-Step Hanging Pattern
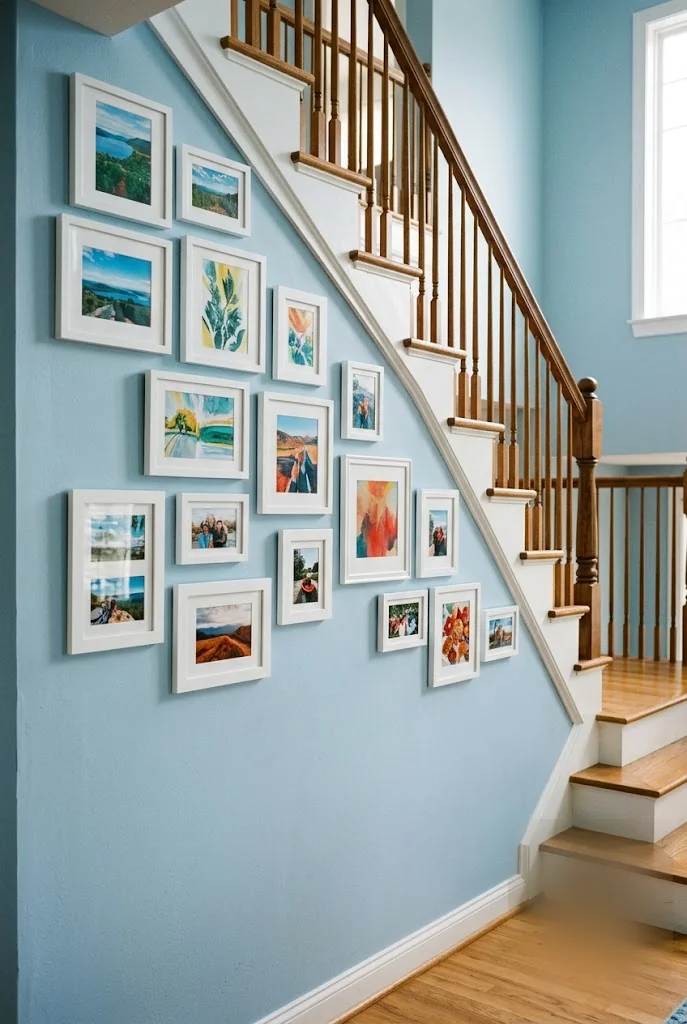
Move up, move over, repeat. Each frame in a stair-step pattern sits a set distance higher and a set distance to the side of the last one, creating a diagonal rhythm without needing an actual staircase nearby to justify it. It works on any tall, narrow wall.
Matching white frames keep the pattern itself as the visual interest instead of competing with mismatched finishes. This layout reads best with five to seven frames, fewer than that and the diagonal line isn’t long enough to register as a pattern.
Set a fixed vertical and horizontal offset between frames.
Repeat that exact offset for every frame in the row.
Use 5 to 7 matching frames so the diagonal reads clearly.
15. Frames Arranged in a Loose Circle
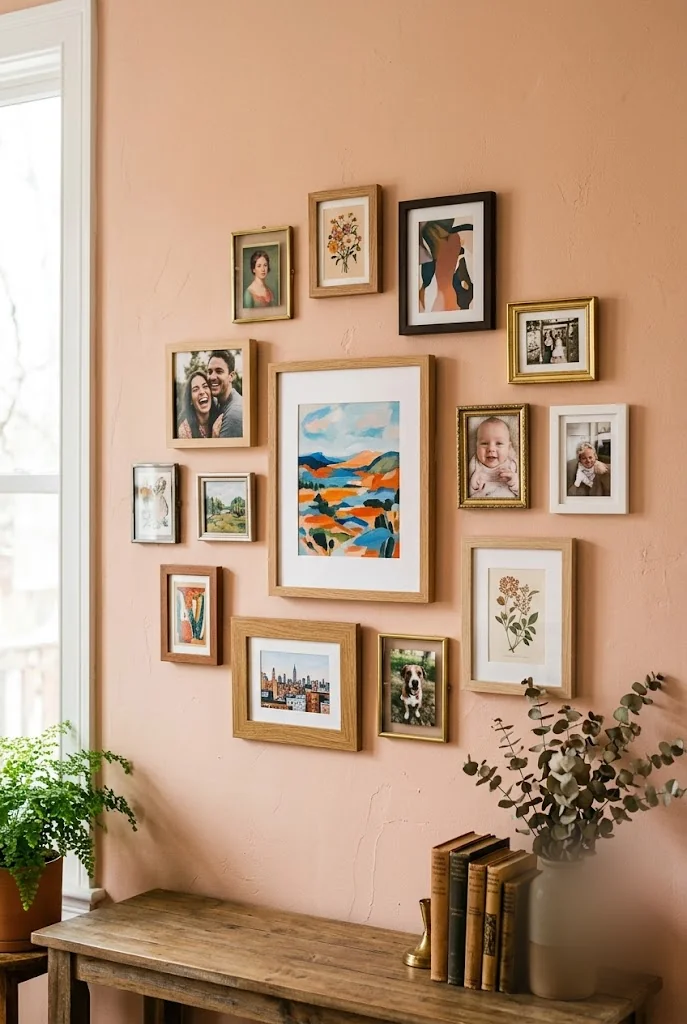
One larger frame anchors the middle, and everything else, smaller photos, a piece of art, a small mirror, radiates loosely outward from it without following a strict grid. The result feels more like a curated corner of a gallery than a measured display.
This layout forgives imperfection in a way a grid never could, a frame a half inch off doesn’t break the composition the way it would in a strict row. That makes it a good choice for a first gallery wall if precise measuring and leveling isn’t something you enjoy.
16. A Clothesline of Clipped Photos
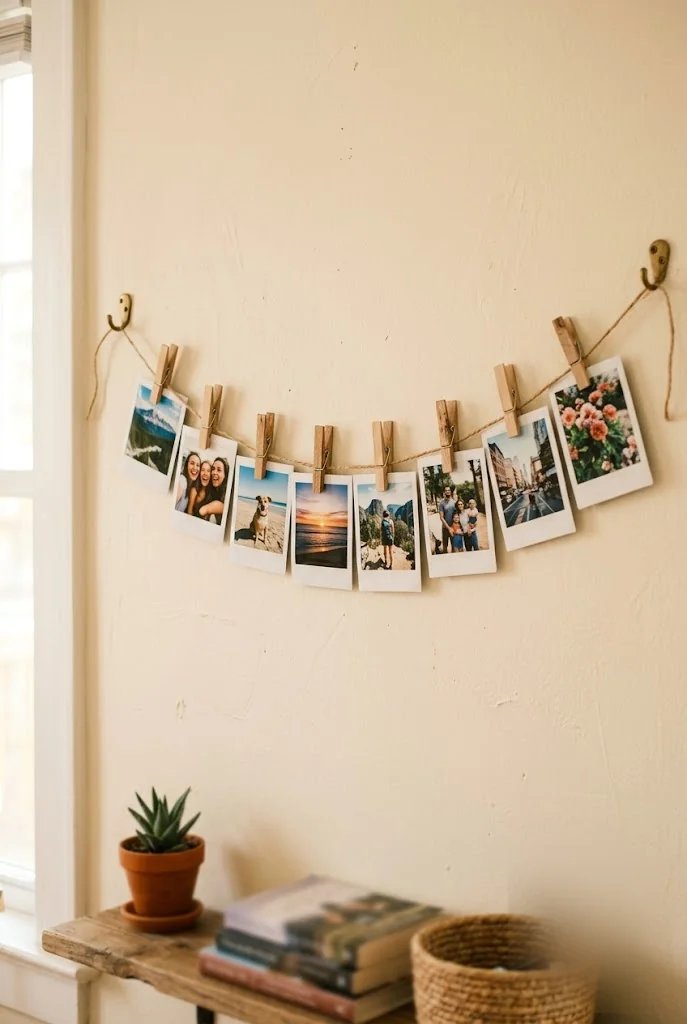
The instinct is to buy a real photo-hanging kit, but a length of twine and a bag of wooden clothespins does the same job for a few dollars. String it loosely between two small decorative hooks, and let it sag slightly in the middle instead of pulling it drum tight.
Instant film or polaroid-style prints work best here since they’re already sized to hang without a frame. Swapping a photo out takes seconds, which makes this the easiest option on this whole list to keep current as new photos come in.
| Clothesline display | Framed row |
|---|---|
| Swap a photo in seconds | Reopening a frame each time |
| Costs a few dollars in supplies | Costs more per frame |
17. Shadow Boxes That Hold More Than Photos
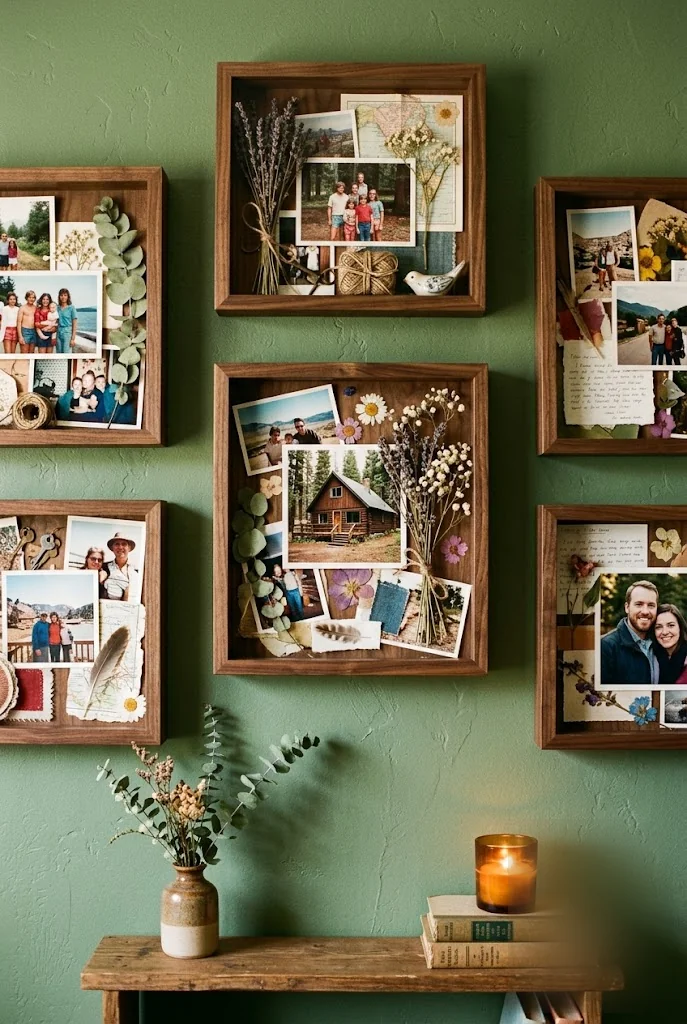
A shadow box goes deeper than a normal frame, literally, which means it can hold a photo alongside a pressed flower, a map, or a folded note instead of just the picture on its own. That extra depth turns a single frame into a small, layered scene from one specific trip or memory.
Anchor each box around one photo rather than trying to fit several in, the mementos need room to sit without overlapping the picture itself. A sage green or other muted wall color lets the warm wood tones of the boxes stand out instead of competing with a bold backdrop.
Anchor each box around one central photo.
Give the mementos room to breathe around it.
Cramming several photos into one small box.
Pairing dark wood boxes with an equally dark wall.
18. Vintage Frames for an Heirloom Look
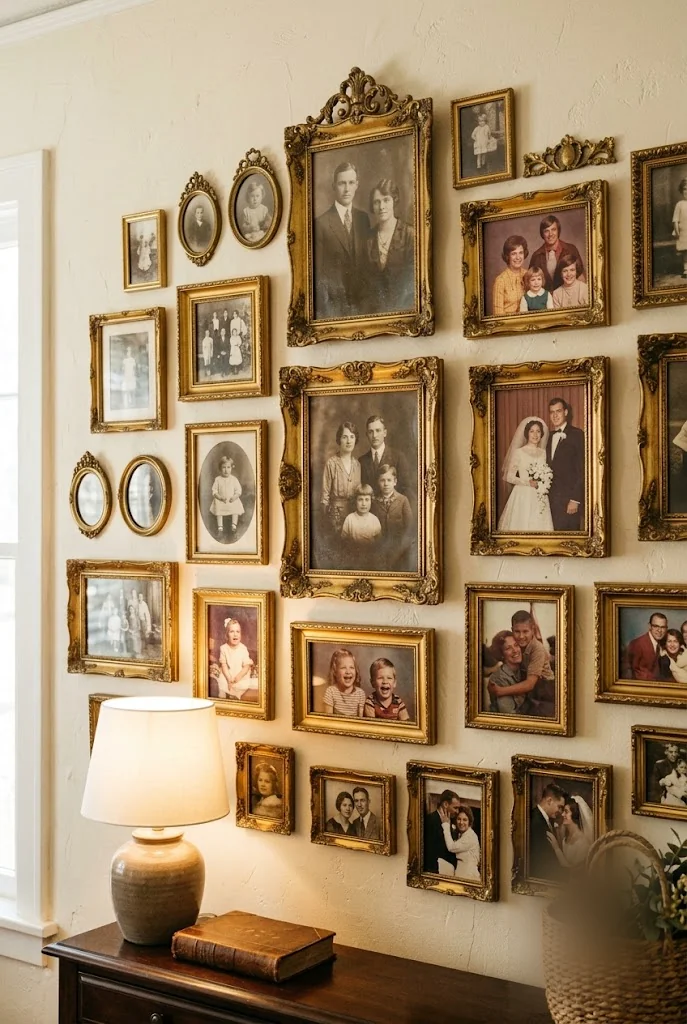
Ornate gold frames read dated when they’re all identical, but a mismatched collection of them, gathered slowly from estate sales and thrift stores, reads like something inherited rather than bought last weekend. Mixing genuinely old photos in with recent ones inside the same style of frame blurs the line between generations on one wall.
A warm cream or off-white wall keeps the gold from feeling heavy. This is a slow-build project more than a weekend one, the collection looking assembled over years is exactly what makes it convincing. Among all these family photo wall ideas, this one rewards patience the most.
💡 Quick Tip
Mix a few genuinely old family photos in with recent ones inside matching vintage frames. That blend sells the heirloom look, not the frames alone.
Making the Wall Actually Happen
None of these 18 family photo wall ideas require you to hang every photo you own at once. Start with the layout that matches the wall you actually have, a hallway, a staircase, the space over the couch, and the number of photos you’re ready to commit to right now.
The best photo walls usually grow over time anyway. A three-photo cluster today can turn into a full gallery wall next year without needing to start over, as long as the frames or spacing stay consistent from the start. Save this list and pick one wall to start with this weekend.