15 Ways to Decorate Your Room Without Buying Anything
Every room reaches a point where it just feels flat, and the fix everyone reaches for is a shopping cart. New pillows, a new rug, a print from an online shop. But most of what makes a room feel finished is not new at all. It is what you already own, used differently. A drawer of mismatched frames. A jar from the pantry. The curtain fabric folded in a closet because it never fit any window.
These fifteen ways to decorate your room work with what is already in your house, your closet, or your recycling bin, not what is in your cart. Some take twenty minutes. A few take an afternoon with paint. None of them ask you to spend money you were not planning to spend.
If your room has felt half done for months because the budget never lined up with the Pinterest board, this list is built for exactly that gap. Grab what you have, pick two or three ideas that fit your space, and start there.
1. Repaint a Stack of Thrifted Frames and Build a Color-Block Gallery Wall
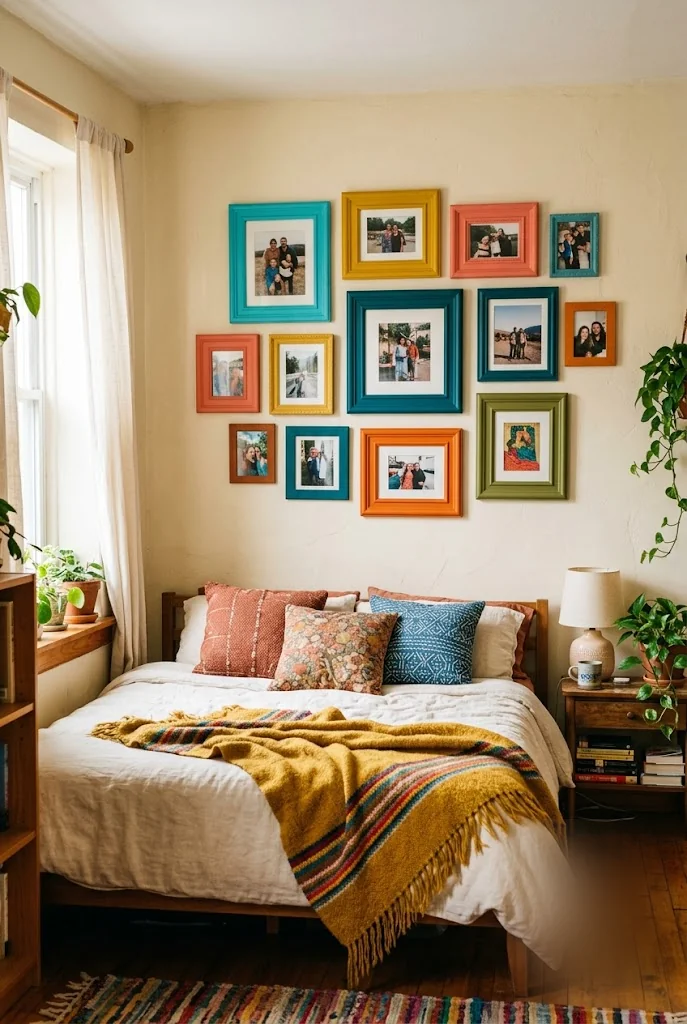
Eleven photo frames in eleven different finishes rarely look intentional, they look accidental. Buy a few small cans of sample paint, in colors that already exist somewhere else in the room, and give every frame a single flat coat. Group them loosely by size before you hang anything, then space nails eight to ten inches apart so the whole wall breathes instead of crowding.
Skip the frame if it has a crack in the glass. Swap in an old family photo for the drugstore stock print that came inside it. A wall like this holds up because it is planned, not because every frame matches. Leave one frame empty and layer it in as you print more photos.
A box of mismatched thrifted frames in five different finishes, none of them painted, none of them hung.
The same frames in one flat coat each, spaced evenly above the bed, holding real photos instead of stock inserts.
2. Hang a Flea-Market Curtain Panel as Window Art Instead of Buying New
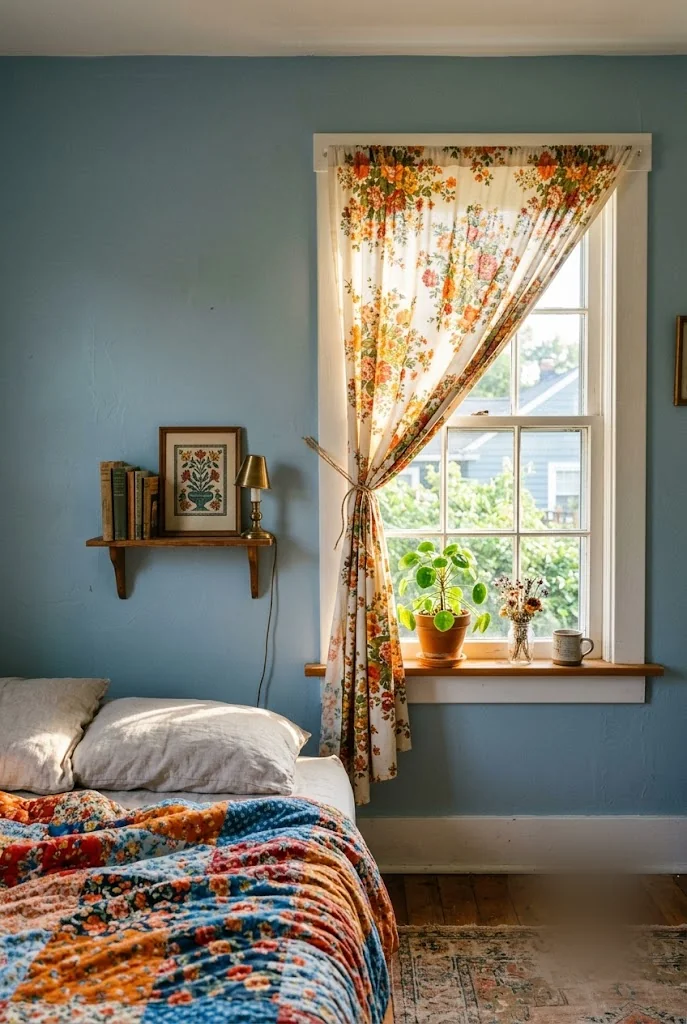
Pull an old curtain panel, a tablecloth, or even a flat bedsheet with a print you like, and mount it above the window instead of stuffing it in a donation bag. A simple wood dowel through a folded hem works as well as a real curtain rod, and twine looped around a cup hook holds it back during the day.
Pick fabric with a busy, warm print, since a single panel reads more like art when the pattern carries the whole piece. Pair it with a small shelf underneath for books or a framed cross-stitch, so the corner feels finished instead of like a leftover curtain waiting for a window.
💡 Quick Tip
No curtain rod, no problem. Slide a plain wood dowel through the folded top hem and rest it on two small hooks. It costs almost nothing and holds heavier fabric better than a spring rod.
3. Turn an Old Baking Sheet Into a Gold-Painted Magnet Board
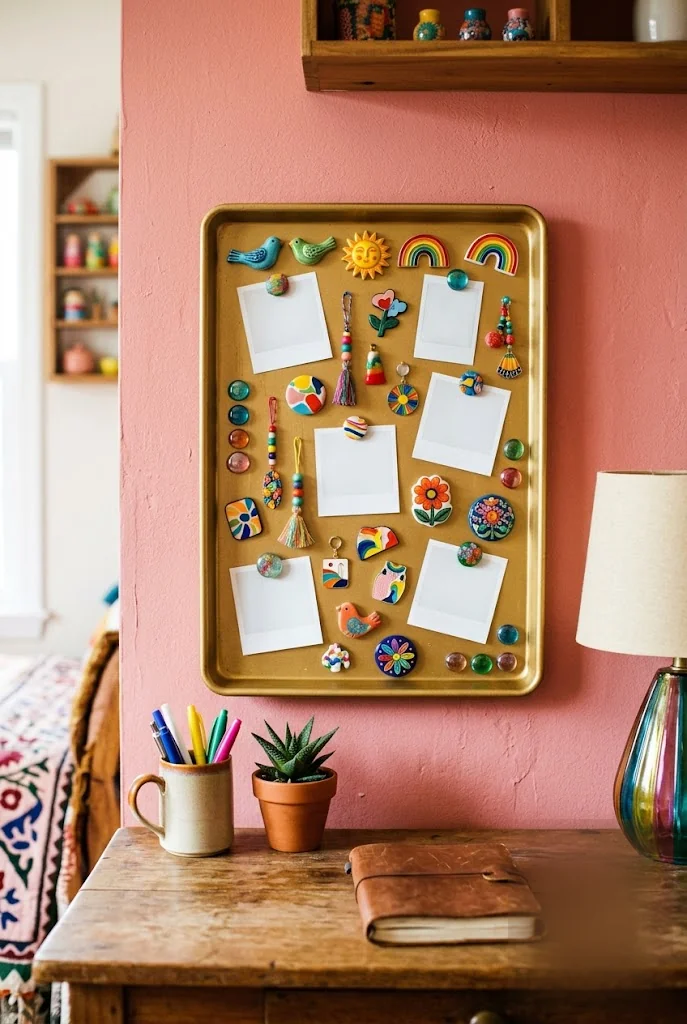
Any metal baking sheet works as a magnet board, as long as a magnet actually sticks to it first, since some pans are aluminum and will not hold anything. Wipe it down, give it two light coats of gold spray paint, and let it dry flat overnight so the paint does not pool at the edges.
Screw two D-rings to the back or use strong picture-hanging strips if you would rather not drill into it. Once it is up, load it with blank photo prints, colorful magnets, and small trinkets from a drawer instead of leaving it bare.
Test a magnet on the pan first. If it does not stick, the pan is aluminum and will not work.
Clean the pan and apply two light coats of gold spray paint, letting it dry flat between coats.
Mount it with D-rings or hanging strips, then load it with magnets, blank photos, and small trinkets.
It is one of the more unusual ways to decorate your room without spending anything beyond a can of spray paint you likely already own.
4. Layer Fairy Lights and Beach Shells Inside a Mason Jar for a Bedside Glow
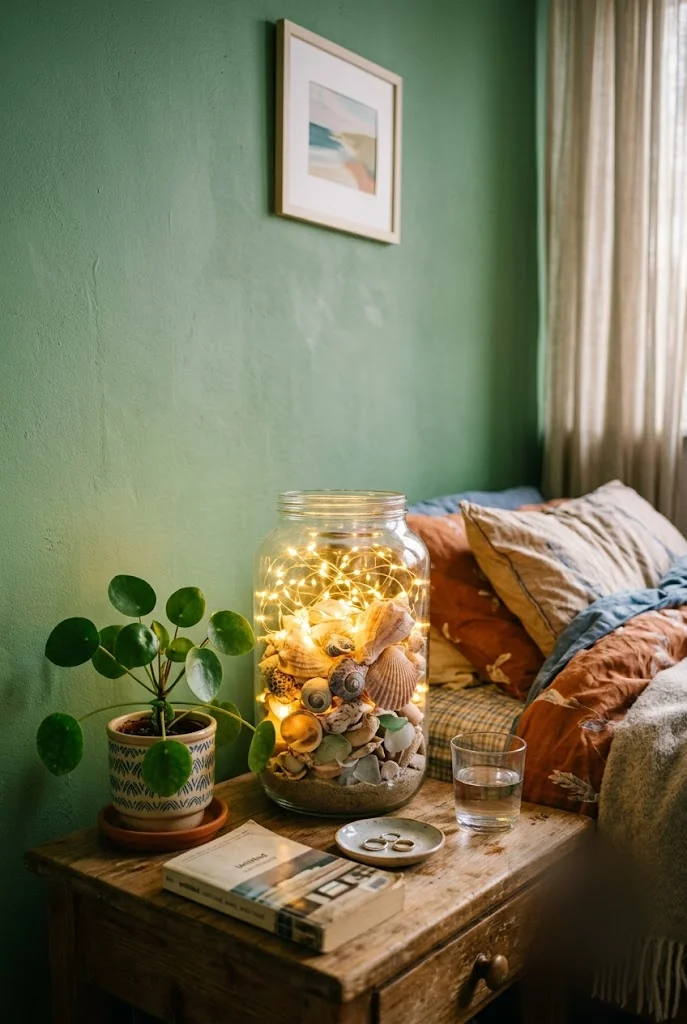
A lamp with a shade is not the only way to get soft light on a nightstand. Layer a battery-powered strand of fairy lights into the bottom of a large mason jar, then fill in around it with shells, sea glass, or smooth stones you already have from a trip.
The glass diffuses the light so it glows instead of glaring, which makes it a better reading companion than an overhead bulb. Screw the lid on loose enough to swap the batteries later. It works just as well with dried flowers or pinecones if the beach look is not your style.
5. Hang a Folded Rug or Blanket on the Wall Behind Your Bed
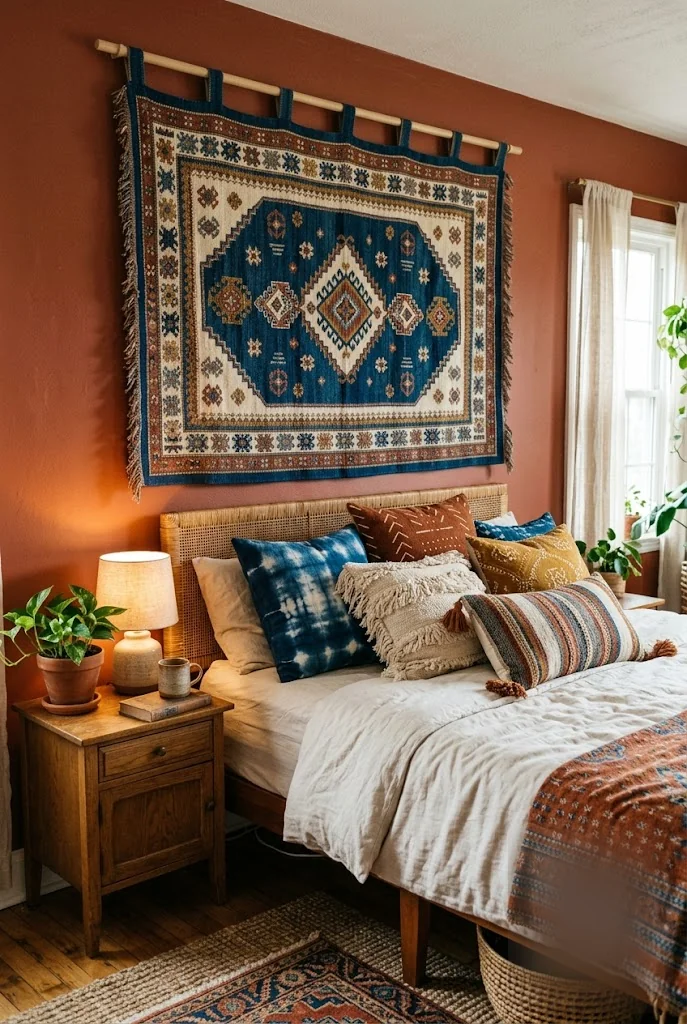
A rug does not have to live on the floor to earn its keep. A woven textile with a busy pattern fills more wall space per dollar than a framed print, and it adds texture that flat art cannot. A folded quilt works the same way if you would rather use fabric than wool.
The difference comes down to weight and mounting. A lightweight kilim or wall hanging drapes over a dowel with no tools needed, while a heavier rug needs a rod pocket sewn in or a few sturdy clips so it does not sag in the middle over time.
| Woven Rug or Kilim | Folded Quilt |
|---|---|
| Lightweight, drapes over a plain dowel with no sewing. | Softer texture, works well folded in thirds for a layered look. |
| Best for a bold graphic pattern as the room’s focal point. | Best for reusing a quilt that no longer fits the bed. |
6. Bend a Strand of String Lights Into a Heart on the Wall
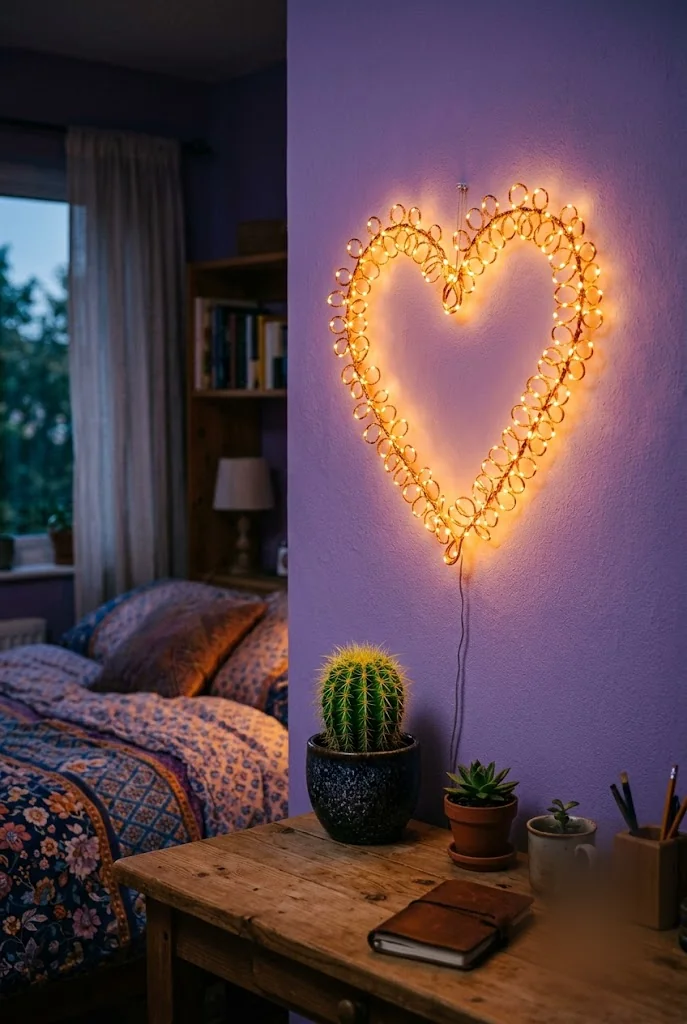
By the time it gets dark, a blank stretch of wall next to a desk stops doing anything for the room. A single strand of battery or plug-in string lights, bent gently into a heart shape and taped invisibly at a few points on the back with clear tape, fixes that in under ten minutes.
Use small binder clips or removable hooks to hold the curve instead of forcing the wire into shape, since string lights kink if you bend them too sharply. Keep the plug or battery pack tucked behind a plant or a stack of books so the only thing visible is the shape itself once the sun goes down.
A single strand of lights bent into shape does more for a bare wall after dark than a framed print ever will.
7. Cover Empty Shoeboxes in Scrap Fabric for Instant Shelf Organizers
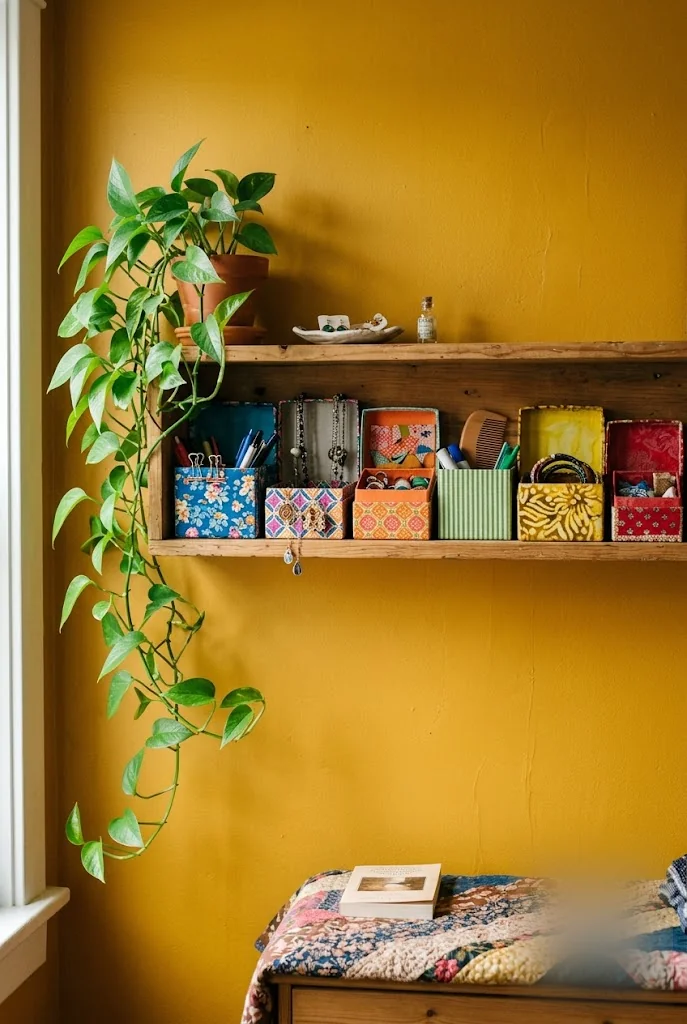
A shelf full of loose pens, tangled jewelry, and stray hair ties never looks decorated no matter what sits above it. Wrap a shoebox, a cereal box, or a shipping box in leftover fabric or wrapping paper, using a glue stick to tack down the edges on the inside so no seams show from the front.
Line up three or four different sizes on the same shelf, mixed prints and all, and the clutter reads as a styled system instead of a mess waiting to be sorted. Cut the box down first if the shelf is shallow so nothing hangs off the edge.
What to grab first
8. Fill Old Bottles With Cut Flowers and Line Them Up on the Windowsill
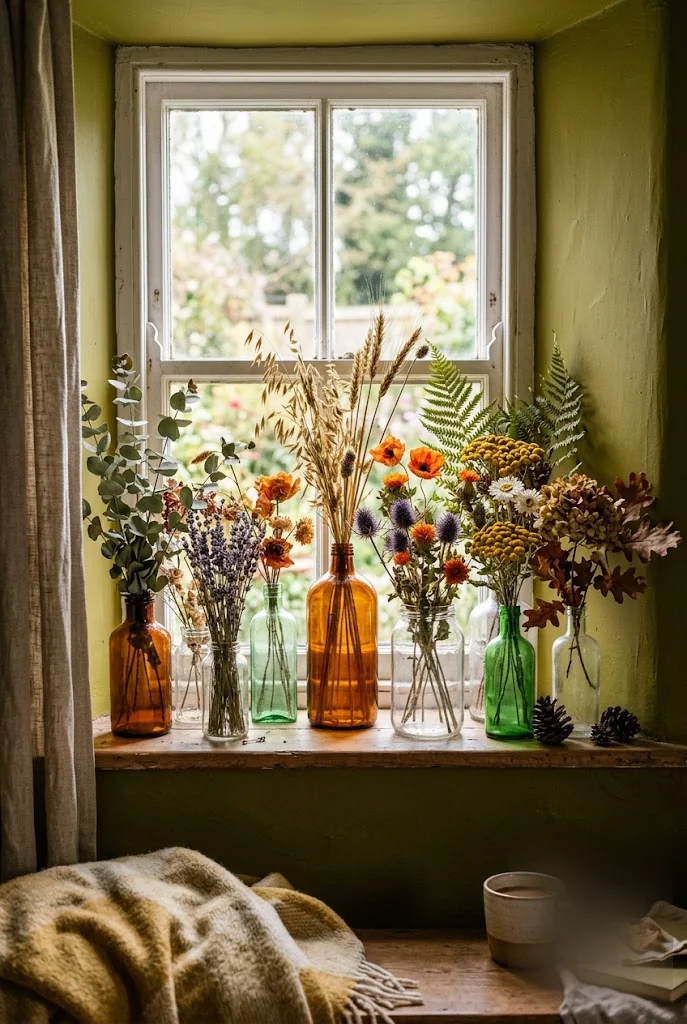
The mistake most people make with a windowsill is leaving it empty because they think it needs a matching vase set to look put together. Save the wine and cooking oil bottles that have real color in the glass, amber, green, or clear, peel off the labels with warm water, and use them as vases instead.
Cut a few stems from the yard, a grocery store bouquet, or even dried grasses, and give each bottle its own single flower or stem instead of crowding them all together. Uneven heights and mismatched bottles read as gathered over time, not as a matching set someone bought at once.
9. Clip Your Favorite Photos Around the Edge of a Mirror
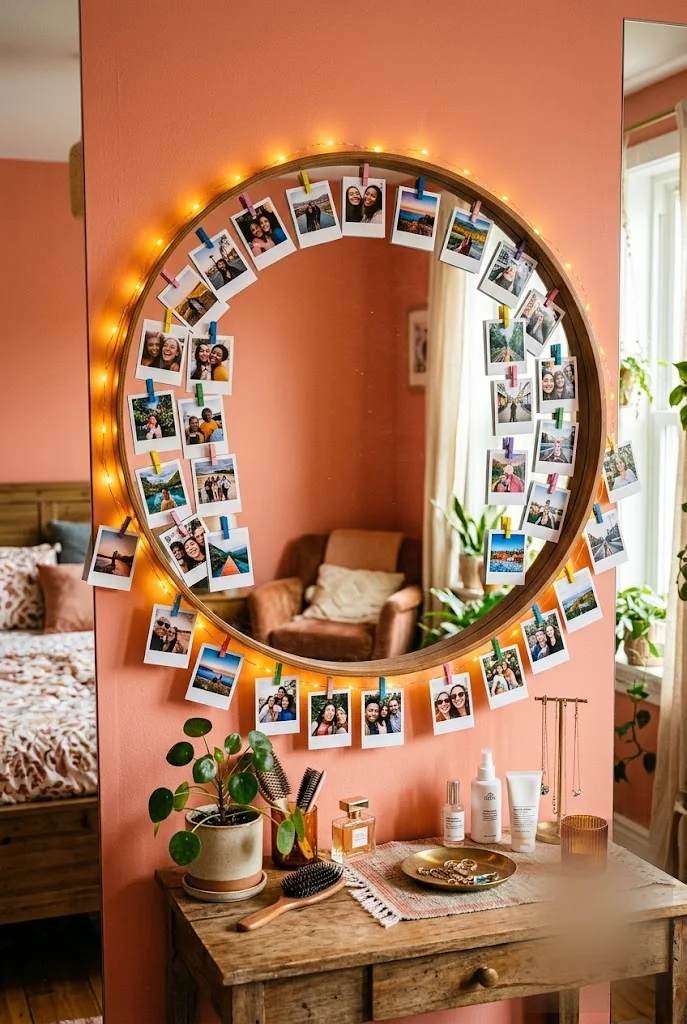
A plain round mirror over a dresser does its job and nothing more, which is a waste of the wall space right around it. Small wood clothespins, the kind sold in bulk at any craft store, grip a printed photo without any tape or tack marks on the frame.
Space them unevenly around the curve instead of in a perfect ring, since a slightly loose rhythm looks more like a collection than a display someone measured out. Mix in a few blank photo cards between the real ones if you are still waiting on more prints to come back.
- ▸Small wood clothespins hold photos without damaging the mirror frame.
- ▸Space them unevenly around the curve for a gathered, not measured, look.
- ▸Swap photos in and out anytime without leaving a mark behind.
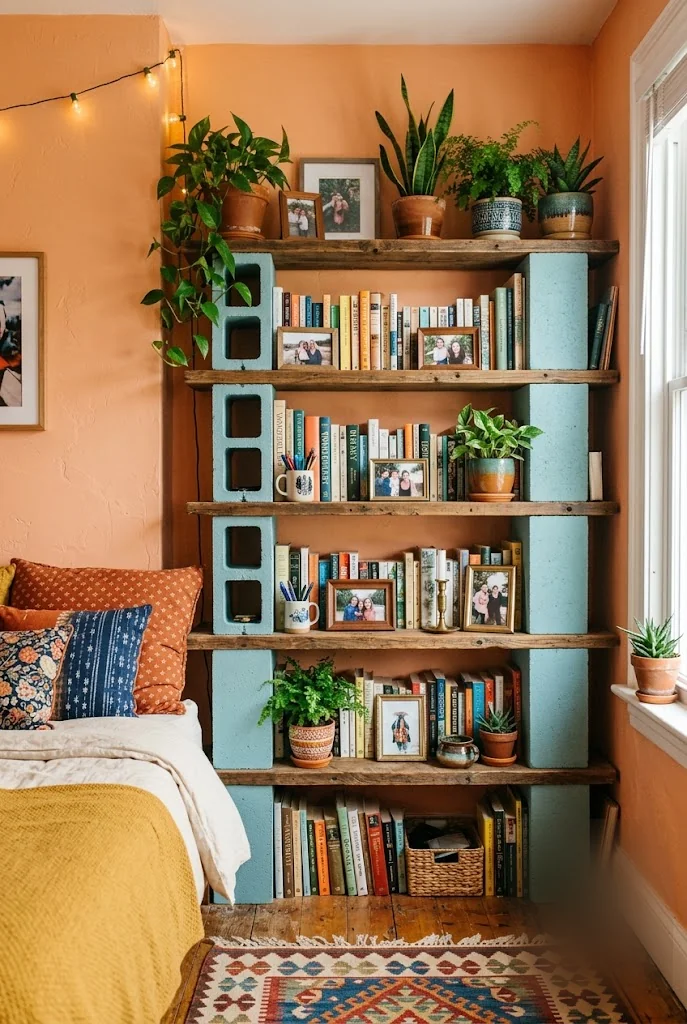
10. Stack Painted Cinder Blocks and Reclaimed Boards Into a Bookshelf
Cinder block shelving gets written off as a dorm room fix, but painted and paired with real wood boards, it holds up in an actual bedroom too. Paint the blocks in a color from the room’s palette instead of leaving them gray, and use boards that are at least an inch thick so they do not bow under a full row of books.
Stack it as tall or as short as the space allows, since the blocks come apart and restack anywhere. Tuck a strand of lights along the back edge and the whole thing reads as a built piece, not a stack of leftover construction materials.
Paint the blocks a color from the room’s palette.
Use boards at least an inch thick so they do not bow.
Leaving the blocks bare gray concrete.
Thin, flimsy boards that sag under a full row of books.
11. Tape a Washi Sunburst Straight Onto the Wall Above Your Desk
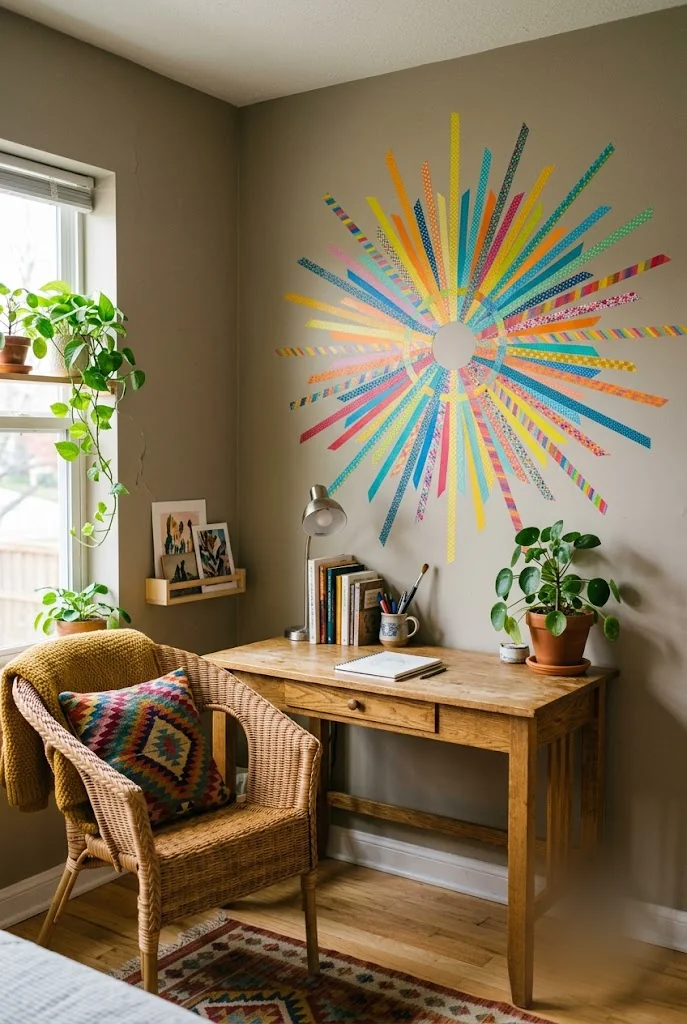
A blank wall above a desk feels like the one spot in the room nobody knows what to do with, since it is too small for a gallery and too used to hang anything heavy above the chair. Washi tape solves it without a single nail. Cut strips into rays of different lengths, radiating out from one center point, and press them straight onto the paint.
Layer patterns and solid colors together so it does not look like a store-bought decal. If a strip goes crooked, lift it while the tape is still fresh, washi peels away clean without pulling paint. Take it down whenever you want a different mood, no patching required.
💡 Quick Tip
Washi tape peels off clean, even from textured paint, so a crooked ray is a two second fix, not a redo of the whole design.
12. Turn a Plain Blanket Into a Photo Collage Above Your Desk
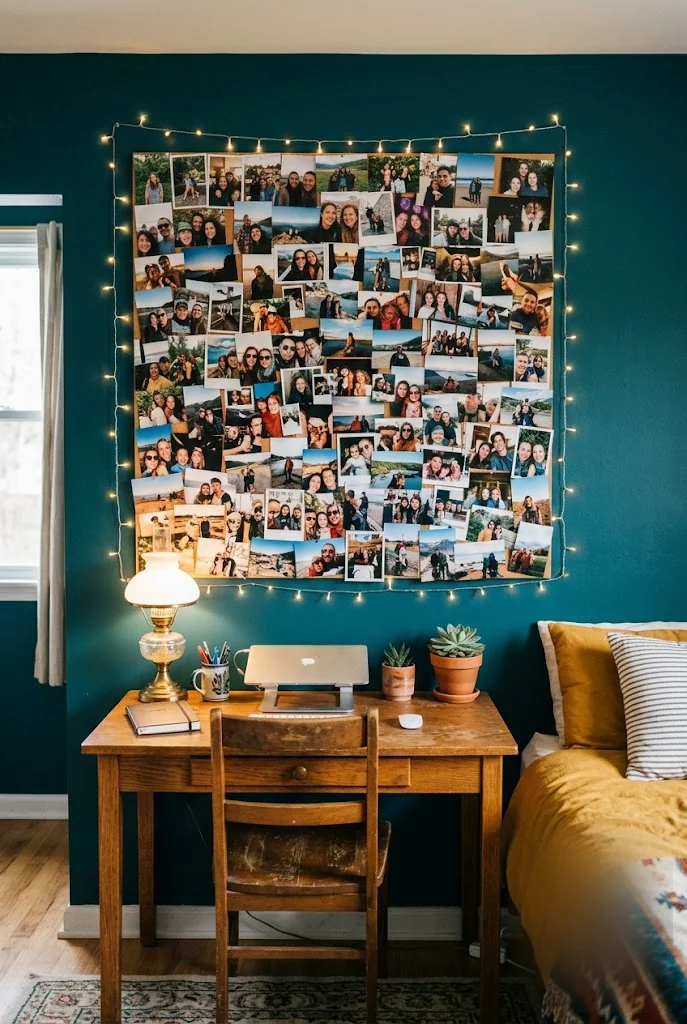
Stretch a plain blanket or piece of fabric over a curtain rod or a couple of finish nails, wide enough to cover the space above your desk from edge to edge. Print photos small, two by three inches works well, and arrange them in loose rows instead of a strict grid so the fabric still shows through in places.
Run a strand of fairy lights along the top edge before you hang the last row of photos, tucking the wire behind the fabric so only the bulbs peek through. Swap photos out as often as you want since nothing is glued down, only pinned.
A stretch of bare wall above the desk, empty except for a light switch.
The same wall covered edge to edge in pinned photos on a hung blanket, framed by a string of lights.
13. Paint Thrifted Terra-Cotta Pots and Line Them Up on the Sill
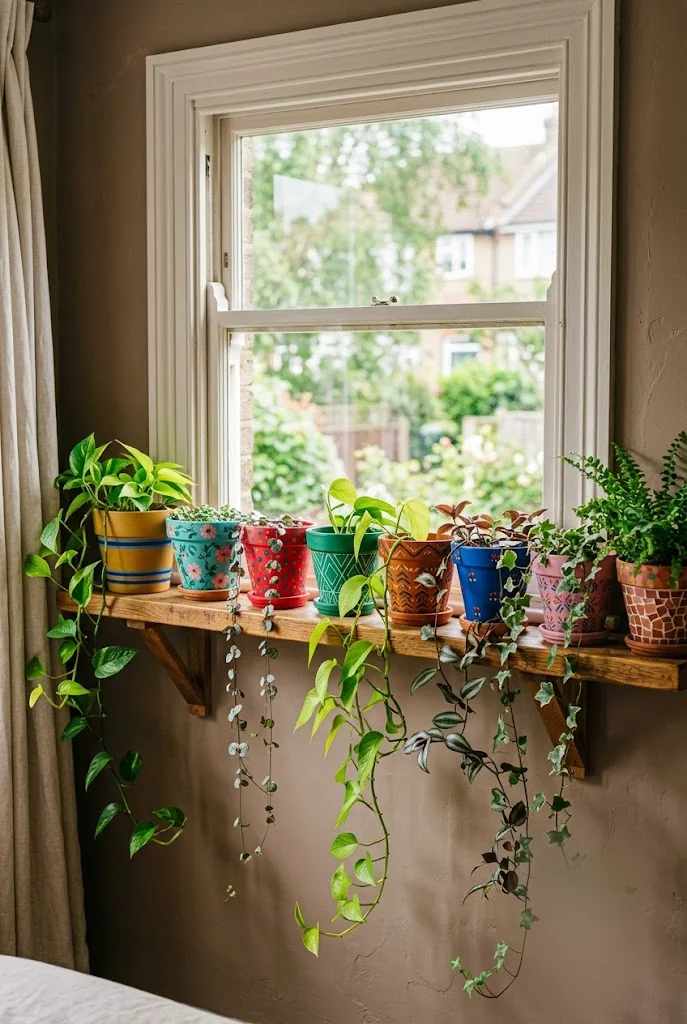
A terra-cotta pot only needs one coat of paint to stop looking like a garden center leftover, as long as you prime it first, since raw clay soaks up color unevenly without a base coat. Pick up mismatched pots from a thrift store or your own garage, wipe off any dirt, and let a plant that already trails, like pothos or ivy, do the rest of the styling for you.
Group the pots by height instead of by color so the sill reads as one arrangement instead of a shelf of leftover planters.
Wipe down thrifted pots and let them dry completely.
Apply a thin primer coat first, then one coat of paint once it is dry.
Add a plant that already trails and group the pots by height on the sill.
It is one of the simplest, most plant-based ways to decorate your room, and it costs about as much as a single can of paint.
14. Cover One Whole Wall in Photos Using Only Washi Tape
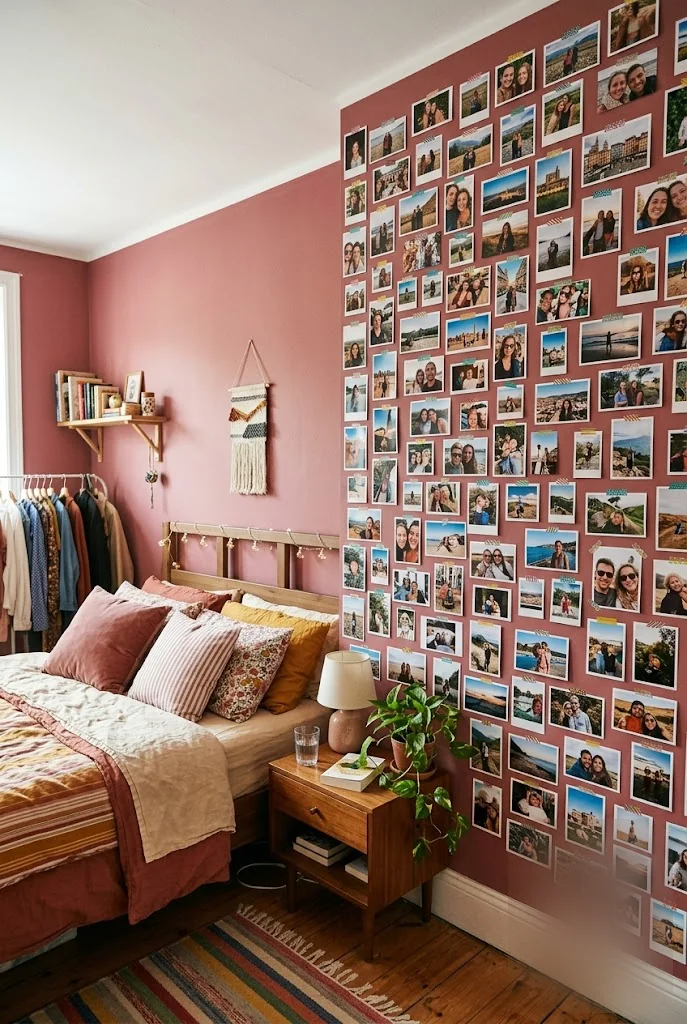
Committing an entire wall to photos sounds like the bigger project on this list, but it takes less planning than a gallery wall of frames, since there is no measuring or leveling involved. Print photos in one consistent size so the grid reads as clean rather than chaotic, and corner each one with a small triangle of washi tape instead of covering the whole print.
Start in a corner and work outward in rows, leaving a finger’s width of space between photos. The tape holds for years on most painted walls and comes off without stripping paint when you eventually want the wall back.
15. Build a Low Headboard From Reclaimed Boards and String It With Fairy Lights
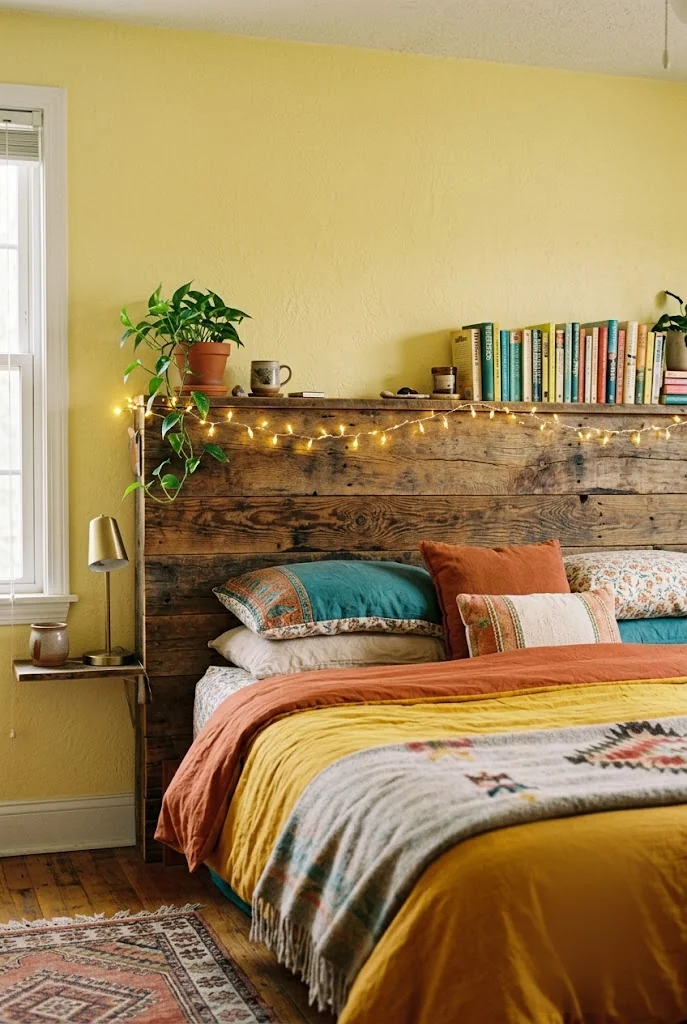
A headboard from a store costs more than most people expect for what is basically a flat board with fabric on it, and reclaimed wood does the same job for the price of a few screws. Salvaged fence boards, pallet wood, or old shelving all work, sanded down just enough to lose the splinters but not the texture.
Screw them to a simple frame or straight into wall studs if the boards are light enough, then run a strand of fairy lights along the top edge and rest a small stack of books there instead of buying a nightstand shelf. The wood grain does more for the room than a padded headboard ever would, and it costs a fraction of one.
| Reclaimed Board Headboard | Store-Bought Headboard |
|---|---|
| Built from salvaged wood you already have or can find for free. | Ships flat-packed and usually needs assembly either way. |
| Shows real grain and texture, doubles as a shelf for books and lights. | Padded and uniform, but rarely built to hold anything on top. |
Conclusion
None of these fifteen ideas asked you to buy anything new, and that is really the point. A jar you already had, a curtain that never fit a window, a stack of frames sitting in a closet, all of it had a second use waiting inside your own house. Start with whichever one matches what you already own, not the one that looks best in a photo, since that is the fastest way to actually finish a project instead of just planning one.
There are plenty of ways to decorate your room without spending a cent, and every idea here starts with something you already have on hand. Save this list for the next slow weekend when you are ready to try one.